background image

29

4. Al guardar la imagen trazada se proyectará en el panel izquierdo.

5. Para realizar la conversión de la nota seleccione la opción Conversión de la barra 

de herramientas, seguido de iniciar.

6.  Aparecerá  una  pantalla  para  realizar  los  ajustes  globales  de  conversión,                             

seleccione las opciones que desee para configurar el documento. 

Summary of Contents for IPEN-100

Page 1: ......

Page 2: ...e cómo utilizar apropiadamente el producto Para apoyo compras y todo lo nuevo que tiene Steren visite nuestro sitio web www steren com PLUMA DIGITAL PARA NOTAS La información que se muestra en este manual sirve únicamente como referencia sobre el producto Debido a actualizaciones pueden existir diferencias Por favor consulte nuestra página web www steren com para obtener la versión más reciente de...

Page 3: ...sitivo Limpie con un paño seco así evitará la corrosión No intente abrir el equipo puede ocasionar un mal funcionamiento y anular la garantía Si no se utiliza el dispositivo durante un periodo prolongado de tiempo cargue la batería al menos una vez al mes para mantener la vida de la batería Cargue la batería si a Aparece el icono batería agotada b El dispositivo se apaga automáticamente cuando se ...

Page 4: ...mportar las notas o dibujos para editarlos o solamente almacenarlos en la computadora Incluye 2 cartuchos de tinta negra y todos los accesorios necesarios para su conexión e instalación Escaneo por infrarrojo Función de mouse incorporada Tamaño máximo soportado A4 Compatible con paquetería Office Memoria integrada para 100 notas Contenido Bolígrafo Módulo de captura y almacenamiento 2 repuestos de...

Page 5: ... Sujete la recarga de tinta con la herramienta para extraer el repuesto Sujete la pluma firmemente y jale el repuesto hacia afuera 3 Retire el repuesto utilizado previamente e introduzca el nuevo 3 INSTALACIÓN DE LAS BATERÍAS 1 Retire la tapa del compartimento de la batería 2 Instale dos baterías SR41 con el polo positivo hacia arriba asegúrese de presionar un poco la tapa hasta que quede bien cer...

Page 6: ...ip Ajuste en la hoja de papel 2 Puerto USB Conecte a la computadora a través del cable USB 3 Pantalla LCD 4 Botón de encendido apagado cambio de hojas Mantenga presionado 5 segundos para encender el módulo Presione ligeramente para crear una nueva nota Presione 3 segundos para apagar el módulo 5 Sensor infrarrojo 6 Reset Cuando la unidad no responda presione este botón y posteriormente mantenga pr...

Page 7: ... el sensor de la unidad podría no funcionar No bloquee el módulo de captura con la mano No coloque su mano entre el lápiz y el receptor Sostenga la pluma firmemente 3 Comience a escribir 4 Una vez que haya completado una página presione el botón encendido apagado para guardar la página actual y comenzar una nueva página En la pantalla podrá verse el número de página asignada 6 INSTALACIÓN 1 Insert...

Page 8: ... for Windows y seleccione EasyNoteTaker seleccione nuevamente la opción 3 Para instalación en MAC ingrese a la carpeta Note Manager for MAC y seleccione la carpeta NoteTaker pkg y siga las instrucciones en pantalla Para MAC el dispositivo funcionará únicamente en modo ratón y las imágenes se guardarán en formato tif ...

Page 9: ...o Al desinstalar actualizar o volver a instalar el software en una ubicación diferente los archivos de notas permanecerán en este directorio y no serán reemplazados 6 Ejecute el Administrador de notas seleccionando Programas Note Manager del menú de inicio de Windows para ejecutar 7 Utilice el cable USB incluido para conectar en el módulo a un puerto USB disponible de su computadora ...

Page 10: ...cargue esas notas que ya están en la computadora no se cargarán Sin embargo si elimina las notas desde la aplicación de la computadora y después las sube desde el módulo se cargarán las notas nuevamente 8 VISUALIZACIÓN DE LAS NOTAS 1 Para visualizar las notas en la pantalla de su computadora ejecute Note Manager 2 Dé clic en la carpeta Notas de Móvil en el panel izquierdo verá todas las notas en m...

Page 11: ... o presione el botón lateral de ésta 3 Para dar doble clic sobre un objeto coloque el cursor del ratón sobre ese objeto Posteriormente toque con la pluma dos veces en el papel o presione el botón lateral de la pluma 4 Para dar clic derecho sobre un objeto coloque el cursor del ratón sobre ese objeto Presione la punta de la pluma sobre el papel por más tiempo Aparecerá un círculo sobre el objeto Le...

Page 12: ...a y la guarda en el portapapeles 7 Pega lo último que se haya copiado o cortado al portapapeles 8 Borra la nota notas seleccionadas 9 Edita una nota seleccionada 10 Imprime la nota notas seleccionadas 11 Muestra la nota como nota adhesiva 12 Muestra la nota como portada de libreta 13 Muestra las notas en tamaño pequeño en la vista del Note Manager 14 Muestra las notas en tamaño mediano en la vista...

Page 13: ...ece inmediatamente en la pantalla que refleja todo lo que se escribe en el documento adjunto al módulo de captura La barra de herramientas que aparece junto con la ventana de notas permite llevar a cabo diversas funciones básicas como guardar editar enviar y copiar sus notas al escribir o una vez que haya terminado de escribir ...

Page 14: ... y el ancho del trazo 6 Copia la nota en el portapapeles para pegarlo en otras aplicaciones 7 Imprime la nota actual 8 ENVIAR POR RED envía la nota actual por la red local 9 ENVIAR POR EMAIL Envía la nota actual por correo electrónico a los destinatarios seleccionados como un archivo JPEG 10 EXPORTAR A JPEG Exporta la nota seleccionada a un archivo JPEG 11 Guardar en la carpeta guarda la nota en u...

Page 15: ... la nota actual sin guardar 12 CREAR UNANUEVACARPETA 1 Cree una nueva carpeta seleccionando en la barra de herramientas Archivo Nueva carpeta y nómbrela 13 RENOMBRAR UNACARPETA Todas las carpetas pueden ser renombradas excepto las predeterminadas Misceláneas Elementos eliminados Notas recibidas y Notas de móvil 1 Para renombrar una carpeta de clic derecho en la carpeta que desea renombrar y selecc...

Page 16: ...iminados notas recibidas y notas de móvil 1 Para eliminar una carpeta haga clic derecho o presione el botón de eliminar cuando la carpeta esté seleccionada 2 En el menú que aparece seleccione Eliminar 3 Seleccione Sí para confirmar que desea eliminar la carpeta o No para cancelar 15 UNIR NOTAS Para unir más de una nota ...

Page 17: ...leccione Unir notas o presione en la barra superior 16 EDITAR NOTAS 1 Dé doble clic sobre la imagen a editar ubicada en el administrador de notas 2 Dé doble clic nuevamente aparecerá una nueva pantalla donde podrá editar la nota 3 Introduzca el nuevo nombre para las notas unidas ...

Page 18: ...petas en las que desea buscar 3 Si desea buscar por descripción o el nombre de la nota en el campo Buscar escriba el nombre o la descripción de la nota que está buscando 4 Para buscar por parámetros de fecha de creación seleccione todas las notas creadas y especifique el intervalo de fechas de acuerdo a la nota que desea buscar 5 Haga clic en Buscar ...

Page 19: ...gráfica Para exportar una nota a formato JPEG 1 En el Administrador de notas seleccione la nota que desee exportar 2 Aparecerá el cuadro de diálogo Exportar 3 Seleccione la ruta del archivo de destino y el tipo de archivo JPEG 4 Seleccione la calidad de resolución y haga clic en Guardar 18 EXPORTACIÓN IMPORTACIÓN DE NOTAS ...

Page 20: ...nota a un archivo de datos archivo pegvf 1 En el Administrador de notas seleccione la nota que desea exportar 2 Haga clic en el nombre de la nota o en el menú Archivo seleccione Exportar como un archivo de datos Aparecerá el cuadro de diálogo Exportar 3 En Guardar en seleccione la ruta del archivo de destino 4 Haga clic en Guardar EXPORTACIÓN DE NOTAS COMO ARCHIVO DE DATOS ...

Page 21: ... en la unidad de CD ROM 2 Ejecute el programa seleccionando la opción setup exe para comenzar la instalación 3 Siga las instrucciones en pantalla 4 Elija la ubicación de destino donde se instalarán los archivos y verifique el proceso de instalación del programa ...

Page 22: ...22 5 Presione finalizar para concluir la instalación ...

Page 23: ...timo cambio realizado 6 Rehace el cambio realizado previamente 7 Acerca la página 8 Aleja la página 9 Adapta el tamaño de página a las ventanas 10 Rota la página a 90º 11 Presione para ir a la primera página 12 Presione para ir a la página anterior 13 Presione para ir a la siguiente página 14 Presione para ir a la última página 20 MENÚ DE HERRAMIENTAS ...

Page 24: ...ntana del editor de tinta 2 Seleccione para añadir área de conversión 3 Supreme área de conversión 4 Abre diccionario 5 Perfiles de reconocimiento Cambie el idioma a utilizar 6 Abra ajustes globales de conversión 7 Inicie o cancele la conversión ...

Page 25: ... o elimine el formato cursiva 4 Aplique o elimine un subrayado 5 Aplique un color a lo seleccionado 6 Alinea el párrafo a la izquierda 7 Centre el párrafo 8 Alinee el párrafo a la derecha 9 Inserte una viñeta 10 Exporte como correo 11 Exporte como documento Documento en Word 12 Exporte como texto Bloc de notas ...

Page 26: ... en la barra superior de herramientas y seleccione la opción Abrir 2 Seleccione la carpeta destino donde guardó el archivo anteriormente 23 CREAR UN ARCHIVO DE NOTAS 1 Dé click en la opción Archivo ubicada en la barra superior de herramientas y seleccione la opción Nuevo ...

Page 27: ...rramientas y seleccione la opción Guardar y o guardar como 2 Seleccione la carpeta destino donde desee guardar el archivo 26 IMPRIMIR NOTAS 1 Dé click en la opción Archivo y seleccione la opción Imprimir puede configurar la nota y hacer los ajustes que desee seleccionando la opción Configurar página ...

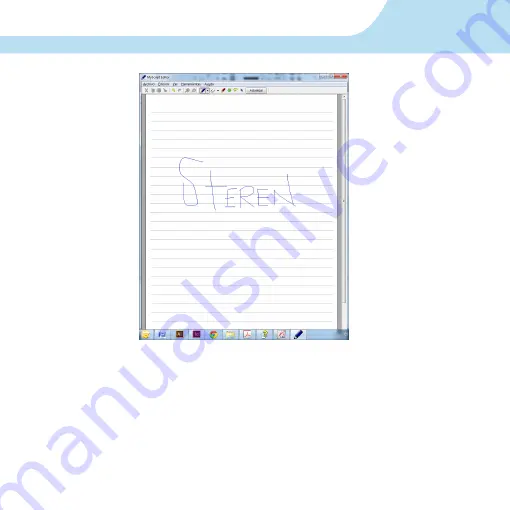
Page 28: ...ee guardar los archivos exportados 28 CONVERSIÓN DE NOTAS 1 Seleccione la opción Conversión en la barra de herramientas y seleccione Editor de tinta 2 Trace una imagen en el editor 3 Edite la nota del editor como desee con las herramientas de resaltador lápiz espaciador lazo que permiten hacer ajustes en la posición de la imagen ...

Page 29: ...quierdo 5 Para realizar la conversión de la nota seleccione la opción Conversión de la barra de herramientas seguido de iniciar 6 Aparecerá una pantalla para realizar los ajustes globales de conversión seleccione las opciones que desee para configurar el documento ...

Page 30: ...a en el panel derecho 8 Seleccione las herramientas para editar la nota de acuerdo a sus necesidades 29 EXPORTAR LAS NOTAS 1 Exporte las notas que desee ya sea como correo electrónico documento en un archivo de Word o como texto en un bloc de notas ...

Page 31: ... la distancia entre la pluma y el sensor infrarrojo sea la correcta Reemplace las baterías de la pluma Los trazos de la pluma son discontinuos Verifique que la distancia entre la pluma y el sensor infrarrojo sea la correcta y no abarque más del tamaño de la hoja Verifique la posición de su mano con respecto al sensor 31 ESPECIFICACIONES Alimentación módulo principal 5 V 500 mA x USB Alimentación B...

Page 32: ... comercial donde adquirió el producto Si la presente garantía se extraviara el consumidor puede recurrir a su proveedor para que le expida otra póliza previa presentación de la nota de compra o factura respectiva DATOS DEL DISTRIBUIDOR Nombre del Distribuidor __________________________ Domicilio ______________________________________ Producto ______________________________________ Marca __________...

Page 33: ......

Page 34: ...Please review this manual thoroughly to ensure proper installation and operation of this product For support shopping and everything new at Steren visit our website www steren com NOTE TAKING DIGITAL PEN The instructions of this manual are for reference about the product There may be differences due to updates Please check our website www steren com to obtain the latest version of the instruction ...

Page 35: ...in order to avoid corrosion Clean it with a dry cloth Do not try to open the device may cause damages and warranty will be void If the device will not be used for an extended period of time please charge the battery at least once per month to maintain battery life Charge the battery if a The battery level icon displays an empty battery b The device powers off automatically when restarted c There i...

Page 36: ...mported using the included software for edition or just for storing The package includes two black ink cartridges and all required accessories for connection and installation IR scanning Mouse function Maximum supported size A4 Compatible with office Up to 100 notes can be stored Package content Pen Module for capture and storage Two additional cartridges Pouch Tool for cartridge change ...

Page 37: ...ach the cap from the digital pen 2 Clamp the ink refill with the refill extractor Hold the pen firmly and apply pres sure with the extractor against it 3 Pull the used refill out 3 BATTERIES INSTALLATIONAND REPLACEMENT 1 Remove the battery compartment cover 2 Install two SR41 batteries with the positive poles facing up be sure to press the lid a bit until it is closed 3 Place the battery compartme...

Page 38: ...e memory unit receivers 4 CONTROLS 1 Paper clip Clip the unit to paper 2 USB port Connect to computer through the USB cable 3 LCD display 4 Top button Press and hold for about 5 seconds to turn on the unit Press shortly to create a new note 5 Infrared sensor 6 Reset hole When the unit does not respond stab into this hole to reset it and then press and hold the Top button to restart the unit ...

Page 39: ...rwise the unit sensor may not work Do not block the base unit with your hand Do not place your hand between the pen and receiver Take the pen firmly 3 Begin writing 4 Once you ve completed one page shortly press the ON OFF button to save current page and start a new page On the base unit screen you can see the page number added by one 6 INSTALLATION 1 Insert the large installation CD into your CD ...

Page 40: ... Manager folder for Windows and select EasyNoteTaker select the option again 3 For MAC installation enter to the Note Manager folder for MAC and select the NoteTaker pkg folder and follow the instructions on the screen For MAC the device will only function in mouse mode and images were saved in tif ...

Page 41: ...directory If you uninstall upgrade or reinstall the software in a different location the note files will remain in this directory and will not be overwritten 6 Select Programs Note Manager from the Windows Start menu to run the Note Manager 7 Use the Mobile Digital Pen s mini USB connector to plug in the USB cable included in the package which connects the unit with the PC when uploading notes ...

Page 42: ...d those notes that are already uploaded to the PC will not be uploaded However if you delete notes from the PC application and then upload again from the memory unit the notes will be uploaded again 8 VIEWING NOTES 1 You can view your note on the computer screen by running the Note Manager 2 Click the Mobile Notes folder in the left pane you should see all note thumbnails 3 Double click a note thu...

Page 43: ...he paper or click the side button 3 To Double Click an object point your mouse cursor on that object Now tip the pen twice on the paper or click the side button twice 4 To Right Click an object point your mouse cursor on that object Now press the tip of the pen a bit longer on the paper A circle cursor will appear Lift the pen from the paper and the context menu appears ...

Page 44: ...pboard 6 Copies the selected note and saves it to the clipboard 7 Pastes whatever was last copied or cut to the clipboard 8 Deletes the selected note notes 9 Allows you to edit a selected note 10 Prints the selected note notes 11 Make your Note as Sticky Note 12 Make your Note as a paper holder 13 Displays small thumbnails in the Note Manager view 14 Displays medium sized of thumbnails in the Note...

Page 45: ...r Digital Pen a Note Window appears on your screen that reflects everything that you write on the paper attached to the base unit The Note Window toolbar allows you to perform various basic functions such as saving editing sending and copying your notes while writing or once you have finished writing ...

Page 46: ...anges the ink color and width 6 Copies the note to the clipboard for pasting into other applications 7 Prints the current note 8 Sends the current note by local network to selected recipients 9 Sends the current note by email to selected recipients as a JPEG attachment 10 Exports the selected note to a JPEG file 11 Saves the note to a specified folder and closes the note window Only available if t...

Page 47: ... 14 Closes the current note without saving 12 CREATINGANEW FOLDER 1 Choose the folder you want to create a sub folder for or choose the My Notes root folder and fill the new folder name 13 RENAMINGAFOLDER All folders can be renamed except for the predefined Miscellaneous Deleted Items Received Notes and Mobile Notes 1 To rename an existing folder right click the folder you want to rename select Re...

Page 48: ...ed Notes and Mobile Notes 1 To delete a folder right click the folder you want to delete Or press the delete button when the folder is selected 2 In the shortcut menu that appears select Delete 3 Select Yes to confirm that you would like to delete the folder or No to cancel the operation 15 MIX NOTES To mix notes ...

Page 49: ...ck the selected notes and then select Join Note from the menu or click the button on the top bar 16 EDIT NOTES 1 Double click on an image to edit located on the panel 2 Double click again a new screen appears where you can edit the note 3 Enter the new name for the mixed notes ...

Page 50: ...ld like to search 3 If you would like to search by description or note name select by description and then in the search for field type in the name or description of the note you are looking for 4 To search by creation date parameters select all notes created and then specify the date range according to which you would like to search 5 Click Find ...

Page 51: ...c image To export a note to JPEG format 1 In the Note Manager select the note you want to export 2 The Export dialog box appears 3 In Save in select the destination file path In the Save as type list select JPEG 4 Under Resolution select the resolution quality and click Save 18 EXPORTING IMPORTING NOTES ...

Page 52: ...Note Manager database To export a note to a data file pegvf file 1 In the Note Manager select the note you want to export 2 Right click the note name or in the File menu select Export as a data file The Export dialog box appears 3 In Save in select the destination file path 4 Click Save EXPORTING TO A DATA FORMAT FILE ...

Page 53: ... small installation CD in the CD ROM 2 Run the program selecting the option setup exe the installation will start 3 Follow the instructions 4 Choose the location where the files will be installed and verify the installation of the program ...

Page 54: ...22 22 5 Click Finish to complete the installation ...

Page 55: ...py a selected item 5 Undo the last change 6 Redo the change made previously 7 Zoom in the page 8 Zoom out the page 9 Fits the page into the windows 10 Rotates the page 90 11 Press to go to the first page 12 Press for previous page 13 Press for next page 14 Press to go to the last page 20 TOOLS MENU ...

Page 56: ...rsion 1 Open the ink editor window 2 Select to add conversion area 3 Suppress conversion area 4 Open dictionary 5 Recognition profiles Change the language 6 Open global adjustments of conversion 7 Start or cancel the conversion ...

Page 57: ...bolds 3 Apply or remove italics 4 Apply or remove underline 5 Apply color to the selected item 6 Aligns the paragraph to the left 7 Centre paragraph 8 Aligns the paragraph to the right 9 Insert a bullet 10 Export as mail 11 Export as document Word 12 Export as text Notebook ...

Page 58: ...26 26 24 OPEN NOTES FILES 1 Click File on the top toolbar and select Open 2 Select the file where you save the archive 23 CREATE A FILE OF NOTES 1 Click File on the top toolbar and select New ...

Page 59: ... located on the top toolbar and select the Save and or Save As 2 Select the destination folder where you want to save the file 26 PRINT NOTES 1 Click on the File and select Print you can set the note and make the desired settings by selecting Page Setup ...

Page 60: ... where you want to save the exported files 28 NOTES CONVERSION 1 Select the conversion option in the toolbar and select Editor ink 2 Trace an image in the editor 3 Edit the editor s note as you want with the tools highlighter pencil spacer snare which allow adjustments in the position of the image ...

Page 61: ...aced image will be shown in the left panel 5 To convert the note conversion select the toolbar followed by start 6 Ascreen will appear to make the conversion global adjustments select the options you want to configure the document ...

Page 62: ...nversion of the note will be reflected in the right panel 8 Select the tools to edit the note according to your needs 29 EXPORT NOTES 1 Export any notes either as email document into a Word file or text in a notebook ...

Page 63: ... Verify that the distance between the pen and the infrared sensor is correct Replace the pen batteries The pen strokes are discontinuous Verify that the distance between the pen and the infrared sensor is correct and is not beyond the paper size Verify the position of your hand according to the sensor 31 SPECIFICATIONS Main module input 5 V 500 mA x USB Pen input 3 V 2 x VR392 SR41 Product design ...

Page 64: ...arranty service at any of the addresses mentioned later THIS WARRANTY IS VOID IN THE NEXT CASES If the product has been damaged by an accident acts of God mishandling leaky batteries failure to follow enclosed instructions improper repair by unauthorized personnel improper safe keeping among others a The consumer can also claim the warranty service in the purchase establishment b If you lose the w...

Page 65: ......

Reviews: