Teclado
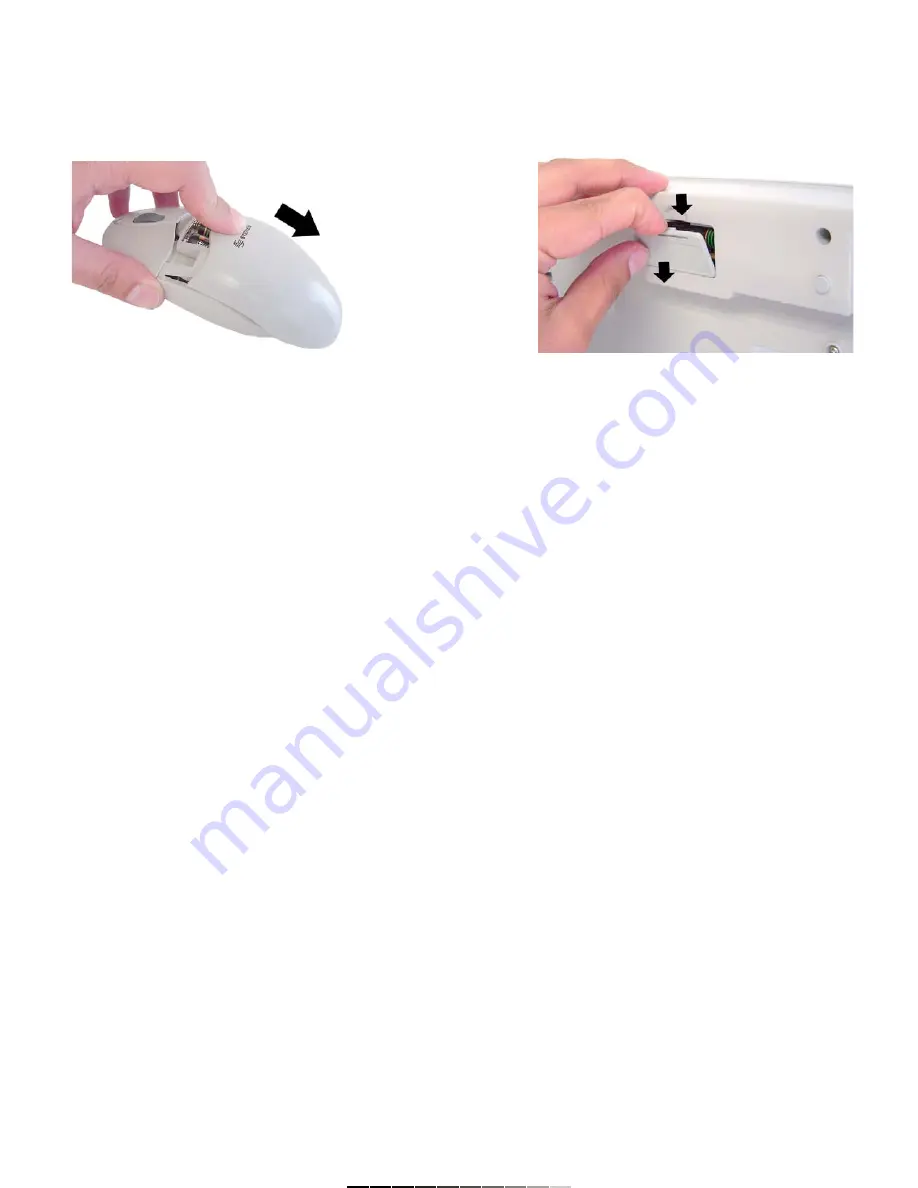
1.- Presione y jale la pestaña del compartimiento de baterías localizado en
la parte inferior del teclado y retírelo (Fig. 2).
2.- Inserte dos baterías nuevas o con suficiente carga en el
compartimiento, poniendo atención a la polaridad.
3.- Vuelva a colocar la tapa del compartimiento.
INSTALACIÓN EN WINDOWS ME, 2000 Y XP
Si usa Windows ME o superior en su computadora, no es necesario
instalar drivers.
1.- Apague su computadora.
2.- Verifique que cuenta con un puerto PS/2 disponible, así como una
tarjeta de sonido para las funciones multimedia.
3.- Inserte el conector PS/2 verde en el puerto PS/2 del ratón en la
computadora, el conector morado insértelo en el puerto PS/2 del teclado.
4.- Encienda la computadora. El receptor se encenderá.
5.- Para que el receptor reconozca el teclado necesita colocar el teclado
frente al receptor y presionar conjuntamente el botón localizador del
teclado y el botón de Connect en el receptor por 10 segundos. Cuando el
LED indicador derecho del receptor se encienda, quiere decir que el
teclado ha sido correctamente reconocido.
6.- De igual forma, coloque el ratón enfrente del receptor y presione al
mismo tiempo el botón localizador del ratón y el botón de Connect del
receptor por 10 segundos. El LED indicador derecho se encenderá si el
ratón ha sido configurado adecuadamente.
7.- Ahora estará listo para comenzar a utilizar su nuevo sistema
inalámbrico.
INSTALACIÓN EN VERSIONES DE WINDOWS ANTERIORES A
WINDOWS ME
Si su computadora cuenta con una versión de Windows anterior a
ME, requerirá de instalar los drivers antes de comenzar a utilizar su
sistema inalámbrico.
1.- Inserte el disco de instalación en la computadora.
2.- Ubique el archivo Setup.exe y siga las instrucciones
3.- Una vez que termine la instalación se le pedirá reiniciar la
computadora.
4.- Verifique que cuenta con un puerto PS/2 disponible, así como una
tarjeta de sonido para las funciones multimedia.
5.- Inserte el conector PS/2 verde en el puerto PS/2 del ratón en la
computadora, el conector morado insértelo en el puerto PS/2 del teclado.
6.- Encienda la computadora. El receptor se encenderá.
7.- Para que el receptor reconozca el teclado necesita colocar el teclado
frente al receptor y presionar conjuntamente el botón localizador del
teclado y el botón de Connect en el receptor por 10 segundos. Cuando el
LED indicador derecho del receptor se encienda, quiere decir que el
teclado ha sido correctamente reconocido.
8.- De igual forma, coloque el ratón enfrente del receptor y presione al
mismo tiempo el botón localizador del ratón y el botón de Connect del
receptor por 10 segundos. El LED indicador derecho se encenderá si el
ratón ha sido configurado adecuadamente.
9.- Ahora estará listo para comenzar a utilizar su nuevo sistema
inalámbrico.
Keyboard
1.- Press the eyelash from the battery compartment and pull out. The
battery compartment is located in the bottom of the keyboard (Fig. 2).
2.- Place two new batteries or with enough charge into the battery
compartment, paying attention to polarity.
3.- Replace the battery compartment cover.
INSTALLING FOR WINDOWS ME, 2000 AND XP
If you use Windows ME or higher, it is not necessary to install
drivers.
1.- Turn the computer off.
2.- Check that you have a PS/2 available port and a sound card for the
multimedia functions.
3.- Plug the green PS/2 connector into the PS/2 mouse port on the
computer, the purple connector plug into the PS/2 keyboard connector.
4.- Turn the computer on. The receiver lights on.
5.- By the first time, you need to synchronize the keyboard with the
receiver. To do that, you must place the keyboard in front of the receiver
and press, at the same time, the Finder button on the keyboard and the
Connect button on the receiver for 10 seconds. The right LED will light on
when both devices are synchronized.
6.- In he same way, you must synchronize the mouse and the receiver,
place the mouse in front of the receiver, and then, press the Finder button
on both devices for 10 seconds. The right LED will light on when both
devices are synchronized.
7.- Now you’ll be ready to start to use the new wireless system.
I
NSTALLING ON OLDER WINDOWS
You must install the drivers before to use the wireless system if you
use older versions than ME.
1.- Place the disc installation in the computer.
2.- Locates the file Setup.exe and follow the instructions.
3.- Once you have finished the installation, you need to reboot the
computer.
4.- Verify that you have a PS/2 available port, and a sound card for the
multimedia functions.
5.- Plug the green PS/2 connector into the PS/2 mouse port on the
computer, the purple connector plug into the PS/2 keyboard connector.
6.- Turn the computer on. The receiver lights on.
7.- By the first time, you need to synchronize the keyboard with the
receiver. To do that, you must place the keyboard in front of the receiver
and press, at the same time, the Finder button on the keyboard and the
Connect button on the receiver for 10 seconds. The right LED will light on
when both devices are synchronized.
8.- In he same way, you must synchronize the mouse and the receiver,
place the mouse in front of the receiver, and then, press the Finder button
on both devices for 10 seconds. The right LED will light on when both
devices are synchronized.
9.- Now you’ll be ready to start to use the new wireless system.
Fig.
1
Fig.
2


