background image

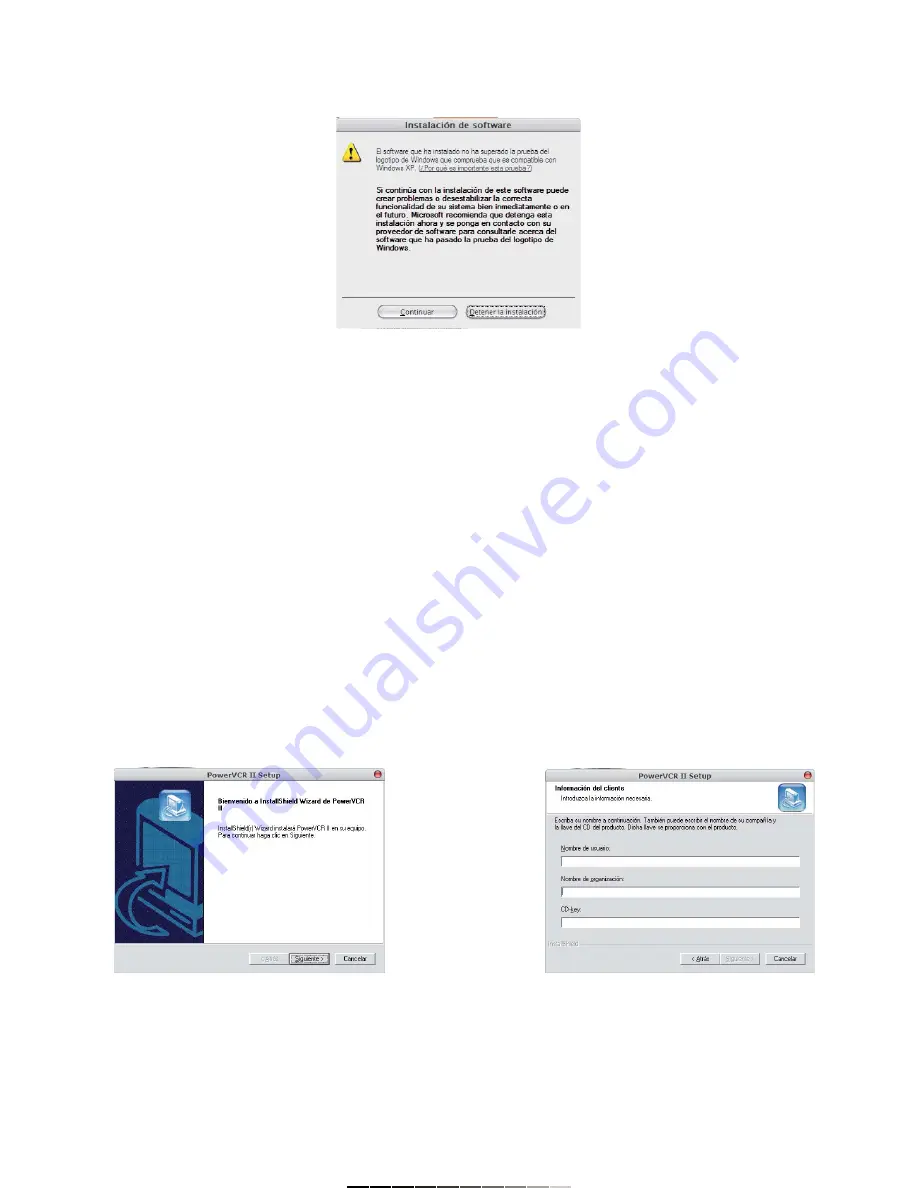
8.- Durante el proceso, puede aparecer un mensaje de advertencia. 
Presione Continuar para reanudar la instalación. De otra forma, cancelará 
la actualización, y tendrá que volver a comenzar  (Fig. 7).
9.- Presione Finalizar para concluir con el proceso de instalación.

Notas:
Para comprobar que la instalación se realizó de forma correcta, abra el 
Administrador de Dispositivos, ubicado en el panel de control / sistema / 
hardware. Un nuevo equipo aparece en la sección de Dispositivos de 
Imagen.
En algunos sistemas operativos podría aparecer un mensaje de 
advertencia acerca del Service Pack de Windows. Presione Aceptar para 
continuar con el proceso de instalación de forma normal.

INSTALACIÓN DEL SOFTWARE DE GRABACIÓN (POWER VCR II)
Es necesario instalar los programas de edición y grabación a fin de 
poder ver sus programas de TV favoritos o videos desde una 
videocassettera en su computadora.

1.- Inserte el disco de instalación y seleccione la opción Install Cyberlink 
PowerVCR II.
2.- Seleccione el idioma de instalación. El asistente de instalación 
comienza.
3.- En la pantalla de bienvenida, presione Siguiente para continuar 
(Fig. 8).
4.- Acepte el Contrato de Licencia e introduzca los datos de usuario. De 
igual forma ingrese el número de serie (CD-KEY) que viene impreso en la 
cubierta del disco de instalación. Presione Siguiente para continuar
(Fig. 9).


8.- During the installation process, a warning message may appears on 
screen, Press Continue to resume the installation process. Otherwise, you 
cancel the process and you must start from the beginning (Fig. 7).
9.- Press Finish to conclude with the installation process.

Notes:

To verify the installation, you can open Control Panel / System / Hardware 
/ Device Manager, there is a new device under Imaging Devices.

In some Operating Systems a warning message may appears about 
Windows Service Pack. Press Accept to resume the process
installation.

POWER VCR II SOFTWARE INSTALLATION
You must install the Recording and Editing software to watch TV 
programs or videos from another video source into the computer.

1.- Place the CD installation into CD-ROM drive and choose Install 
Cyberlink PowerVCR II option.
2.- Choose the language. The InstallShield Wizard starts.
3.- On screen appears a Welcome message, press Next to continue 
(Fig. 8).
4.- Accept the License Agreement and enter the Customer Information. 
Please, enter the CD-KEY. The product CD-KEY is provided with your 
shipment. Press Next to continue (Fig. 9).

Fig. 7

Fig. 

       Fig. 

9

Summary of Contents for COM-440

Page 1: ... DISTRIBUIDOR DISTRIBUTION NOMBRE DISTRIBUIDOR ADDRESS DOMICILIO PRODUCT PRODUCTO BRAND MARCA MODEL MODELO SERIAL NUMBER No DE SERIE DATE OF DELIVERY FECHA DE ENTREGA Call Center Centro de Atención a Clientes del Interior 01 800 500 9000 Mexico City Cd de México 53 54 22 90 Warranty CONDITIONS 1 This warranty card with all the required information the invoice or purchase ticket the product box or ...

Page 2: ...sto S vídeo entrada para conector de S vídeo o adaptador para vídeo compuesto 3 Salida de audio permite conectar bocinas externas para escuchar el audio de la señal de vídeo recibida 4 Entrada de audio 5 Conector de antena de TV conector de antena de TV para sintonizar programas de televisión 1 2 3 4 5 INSTRUCTION MANUAL FOR USB 2 0 VIDEO CAPTURE CARD Model COM 440 Brand Steren Before using your n...

Page 3: ...ione Instalar automáticamente el software recomendado y presione Siguiente para continuar La instalación comienza Fig 6 DRIVERS INSTALLATION It is required to install drivers before connecting the Video Capture Card to Computer 1 Insert CD installation on CD ROM drive Automatically loads an installation window Fig 1 2 Choose Install USB 2 0 Video Capture Card Driver The InstallShield Wizard starts...

Page 4: ...8 4 Acepte el Contrato de Licencia e introduzca los datos de usuario De igual forma ingrese el número de serie CD KEY que viene impreso en la cubierta del disco de instalación Presione Siguiente para continuar Fig 9 8 During the installation process a warning message may appears on screen Press Continue to resume the installation process Otherwise you cancel the process and you must start from the...

Page 5: ...icamente la primera vez que ejecuta el programa PowerVCR II Posteriormente si desea realizar otra búsqueda o editar la información de canales presione el botón de Configuración de Sistema Fig 13 5 Choose destination location If you want to use the pre established location press Next 6 Select Power VCR II s working drive Press Next thrice if you want to use the pre established options 7 Press Finis...

Page 6: ...en the application loads Update graphics card driver The driver must support the screen keep flashing DirectX 8 or higher La pantalla está en blanco cuando Revise las conexiones ve y graba video de la TV o alguna Verifique los parámetros de la fuente de audio y vídeo otra fuente de vídeo en el programa de vídeo Video playback window is blank when Check the connections watching and recording video ...

Reviews: