Installing The Heater
(cont'd)
11
Step 7
Adjust the leveling legs (48) on the bottom of the base assembly (50) once it is set in final position.
The leveling legs must not be extended more than one inch. The base MUST
set securely on all four legs to prevent rocking of the furnace and/or twisting of
the heat exchanger.
Step 8
Set the brick storage cabinet on the base assembly (50) taking care not to damage the wiring har
nesses (65 & 70).
The rope gasket around the
heat exchanger inlet
and outlet of the base
assembly must be
properly adhered and
free from damage.
Damage to any
gasketing on the
furnace will result in
improper unit opera
tion and/or furnace
damage.
Step 9
Position wiring harnesses (65 & 70),
and temperature sensing bulb and
plate assembly (77) to facilitate
routing through bottom right side
panel cutout. (See Figure 5 for
reference to wiring harness locations
on the furnace.)
Step 10
Install the sides and back painted
outer panels (9, 71 & 73) on the
brick storage cavity. Use the screws found in the hardware package to secure the panels to the
cabinet by placing them along bottom edge of the panels.
To avoid internal wire damage, use only blunt tip screws in all areas where
screw tips could come in contact with wiring.
Step 11
Install the temperature sensing bulb and plate assembly (77) by tightening the screws in a cross
pattern until gasket is compressed. Do not overtighten. Make certain that the capillary tube of the
temperature sensing assembly (77) does not come into contact with any live electrical terminals.
Failure to seal the sensing bulb plate will cause abnormal furnace operation and
potential component damage.
Step 12
Connect the main and element wiring harnesses (65 & 70) to the limit switches (67). The switches
are marked with a red dot on one side. Connect the red wires to the red dot marked side of the
switches. Connect the black wires to the unmarked side of the switches.
NOTE
NOTE
NOTE
NOTE
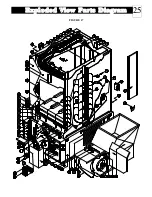
FIGURE 5


