ēno play
Connect cables and verify amplifier operation
To finish cable connections and verify operation of the amplifier:
1. Connect the audio input cable to the audio source.
2. Connect the power plug to the AC outlet.
3. Verify the LED on the amplifier is green. Refer to “Amplifier LED status”.
4. Check that all cables are in tracks or otherwise coiled and out of the way so there is no trip or
safety hazard, and cable service loops are not visible to users.
5. If using an adjustable height mobile stand or wall mount, assure that the lift system can extend
to its full range and that no cables are pinched.
6. Assure that vibrations from loose components do not interfere with the audio.
Add foam strips to prevent unwanted vibrations
Test the sound from your system. If you detect unwanted vibrations, Steelcase provides four foam
strips for sound damping.
To damp unwanted vibrations using the foam strips provided:
1. Wrap the foam strips around loose components or wedge foam strips between components
that vibrate.
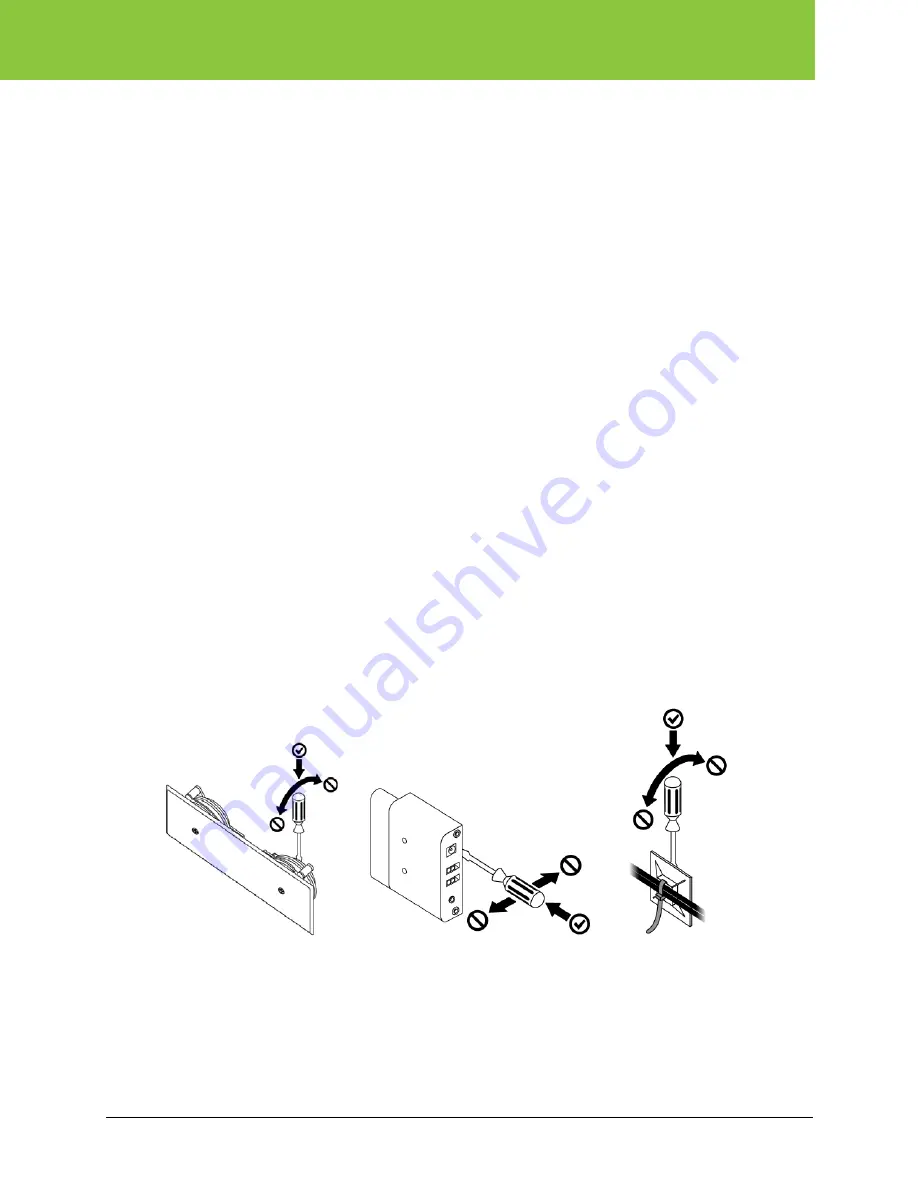
Removing and replacing the cable tie holders, driver packs or amplifier
The adhesive backing on the driver packs and amplifier create a tight bond to the whiteboard.
Additional self-adhesive strips are provided in case you need to remove and replace a component.
To remove and replace a driver pack, amplifier or cable tie holder:
1. Insert a flat blade screw driver between the whiteboard and the adhesive.
2. Use firm, prolonged pressure to pry up the component.
3. Clean any residual adhesive from the back of the whiteboard using an appropriate cleaner and
a cloth.
4. Clean the new installation location using the alcohol wipes provided.
5. Install the component as instructed.
19 of 23
2002480-001 Rev D
Installation and Operation Guide


