


StarVedia Outdoor, Day&night IP Camera
16
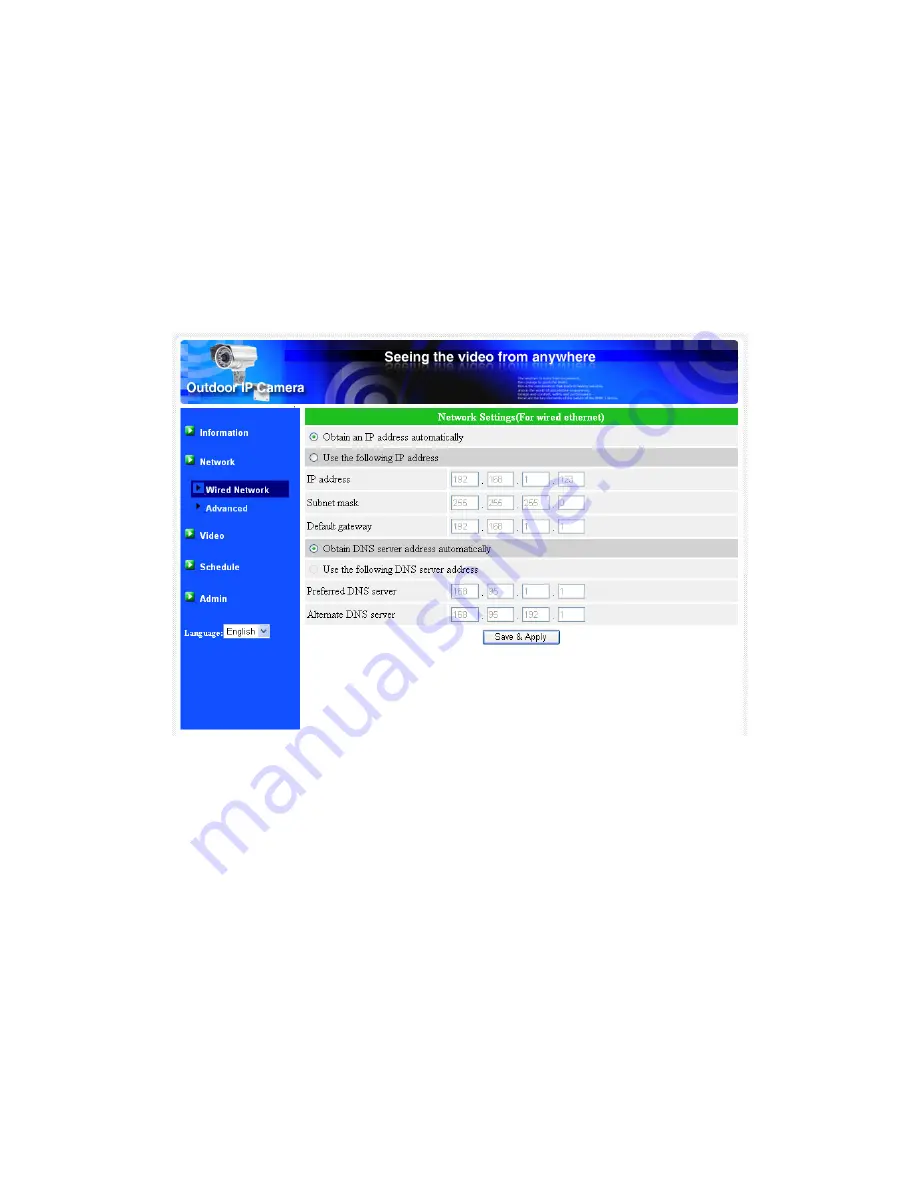
3.3. Network
The Network page allows you to modify the network settings of the wired
Ethernet. The default settings use DHCP to obtain an IP address automatically. In
most of the home and office network environment, there is a DHCP server running. In
this situation, by using this default settings, the IP CAM can work immediately in most
of the time.
If the Ethernet cable is unplugged, the IP CAM will lose connection. But as soon
as the Ethernet cable is plugged in again, the IP CAM will obtain a new IP address
immediately.
Figure 3-5: Network settings page for DHCP function
If the network environment does not support DHCP function, you will need to set
the network settings of the IP CAM manually. Please fill all the fields including “IP
address”, “Subnet mask”, “Default gateway” and “DNS server” to let the network work.
All these settings must be correct for your network environment, otherwise the IP
CAM can not work.
The default setting is “Obtain an IP address automatically”.
Summary of Contents for IC602
Page 5: ...StarVedia Outdoor Day night IP Camera 5 Table A 2 List of tested Wired NAT router devices...
Page 17: ...StarVedia Outdoor Day night IP Camera 17 Figure 3 6 Network settings page for fixed IP address...
Page 29: ...StarVedia Outdoor Day night IP Camera 29 Figure 3 14 Schedule management page...
Page 33: ...StarVedia Outdoor Day night IP Camera 33 Figure 3 18 Firmware upgrade status page...