background image

Manual Revision: 10/03/2019

User Manual

For the latest information and specifications visit 

www.startech.com/SV565HDIP

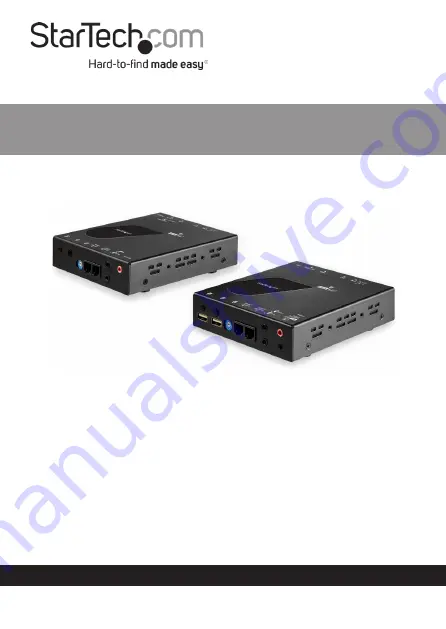
HDMI® KVM Over IP Extender | 4K 30Hz | 328 

ft. (100 m)

Actual product may vary from photos

SKU#: 

SV565HDIP

Summary of Contents for SV565HDIP

Page 1: ...Revision 10 03 2019 User Manual For the latest information and specifications visit www startech com SV565HDIP HDMI KVM Over IP Extender 4K 30Hz 328 ft 100 m Actual product may vary from photos SKU SV...

Page 2: ...of the following measures Reorient or relocate the receiving antenna Increase the separation between the equipment and receiver Connect the equipment into an outlet on a circuit different from that to...

Page 3: ...tension L installation et ou le montage du produit doit tre r alis par un professionnel certifi et dans le respect des normes locales et du code de construction local Les c bles y compris les c bles d...

Page 4: ...endast g ras av beh riga yrkespersoner och enligt g llande lokala f rordningar f r s kerhet och byggnormer Kablar inklusive elkablar och laddningskablar ska dras och placeras p s s tt att risk f r sn...

Page 5: ...ransmitter Front 6 Transmitter Back 7 Receiver Front 8 Receiver Back 9 Product Information 10 Package Contents 10 Requirements 10 Rotary Dip Switch 11 Changing the Rotary Dip Switch Channel 11 Setting...

Page 6: ...sion Information 20 Updating the Firmware 21 Resetting the Transmitter and or Receiver to Factory Default Settings 23 Rebooting the Transmitter and or Receiver 25 EDID Settings Receiver Only 26 Enteri...

Page 7: ...nical drawings and more visit www startech com support Product Diagram Transmitter Front 1 F2 Button 2 F1 Button 3 IR In Connector 4 Mic Out Port 5 Rotary Dip Switch Serial Port 2 6 Serial Port 1 7 Se...

Page 8: ...s technical drawings and more visit www startech com support Transmitter Back 1 Network Status LED 2 RJ45 Port 3 HDMI Lock Screw 4 Audio Embed Switch 5 Power Port 6 Reset Button 7 HDMI Port 8 3 5 mm A...

Page 9: ...and more visit www startech com support Receiver Front 1 F2 Button 7 Rotary DIP Switch 2 F1 Button 8 Serial Port 1 3 IR IN Connector 9 Serial Port 2 4 Microphone In Port 10 IR OUT Connector 5 USB A P...

Page 10: ...ds technical drawings and more visit www startech com support Receiver Back 1 Network Status LED 6 Recessed Reset Button 2 RJ45 Port 7 HDMI Port 3 HDMI Lock Screw 8 3 5 mm Audio Port 4 USB A Port 9 US...

Page 11: ...HDMI Cable 1 m x 1 Mini USB B to USB A Cable 1 5 m x 1 Rubber Feet x 8 Plastic Screwdriver x 1 Quick Start Guide x 1 Requirements For the latest requirements visit www startech com SV565HDIP Video Sou...

Page 12: ...r and Receiver Rotary Dip Switch If you are adding additional Transmitters Receivers they all need to be set to the same Rotary DIP Switch channel Note By default the Rotary Dip Switch on the Transmit...

Page 13: ...r 1 Connect an HDMI Cable to the HDMI Port on the Transmitter and connect the other end to an HDMI port on the Video Source Device 2 Connect a USB B Connect on the USB B to USB A Cable to the USB B Po...

Page 14: ...Receiver the same you would when connection point to point However instead of connecting the Transmitter to the Receiver you would connect both the Transmitter and Receiver to a LAN Device switch rou...

Page 15: ...corners 3 Remove the adhesive backing and apply the Rubber Feet in the desired positions Connecting a Microphone Note A Microphone can only be connected when the Transmitter and Receiver are set to un...

Page 16: ...support Connectivity Diagrams Point to Point Application SV565HDIP Tx Rx Computer OR CAT 5e 6 USB USB HDMI SV565HDIP Computer Computer Computer Computer KVM Computer LAN Application SV565HDIP LAN Tx R...

Page 17: ...back on 4 Hold the F1 Button for 17 seconds the power link LED will flash green and blue 5 Power cycle the unit to complete the reset Change from Graphic Mode to Video Mode Push the F2 Button once on...

Page 18: ...the Receiver using the push buttons 1 Power off the Receiver 2 Press and hold the F2 Button 3 While still holding the F2 Button power the Receiver back on 4 Hold the F2 Button for 12 seconds the netw...

Page 19: ...Link LED Indicator is located on the top of the units LED Function Transmitter Receiver Network Flashing Indicates the system is connecting to a network Off Indicates abnormal connection Power Link S...

Page 20: ...the F1 button on the Receiver 2 The IP Address information will appear on the On Screen Display OSD on the connected Display Device Local IP The Receiver s IP Address Remote IP The Transmitter s IP A...

Page 21: ...ceiver depending on the IP Address entered Checking Version Information If the Version Information tab does not appear when you first log into the System Configuration follow the steps below 1 From th...

Page 22: ...visit www startech com support Updating the Firmware Note Before updating the firmware ensure that the Trans mitter and Receiver are not currently in use 1 From the System screen click on the Update...

Page 23: ...priate firmware file When the file is selected the name of the file will be listed next to the Choose File button 5 Click the Upload button to upload the firmware file A Status screen will appear disp...

Page 24: ...iled 6 If you see the failed warning use the Back button located on the browser to go back to the Update Firmware tab Note You can perform the firmware update from either the Transmitter or Receiver R...

Page 25: ...24 To view manuals videos drivers downloads technical drawings and more visit www startech com support Utilities Tab 2 The Utilities tab will appear Utilities Tab 3 Click on the Factory Reset button...

Page 26: ...nd more visit www startech com support 4 The unit Transmitter or Receiver will reboot resetting the unit to factory settings Rebooting the Transmitter and or Receiver 1 From the System screen click on...

Page 27: ...ownloads technical drawings and more visit www startech com support Utilities Tab 3 Click the Reboot button 4 The unit Transmitter or Receiver will reboot EDID Settings Receiver Only 1 From the System...

Page 28: ...27 To view manuals videos drivers downloads technical drawings and more visit www startech com support Utilities Tab 2 The Utilities tab will appear Utilities Tab...

Page 29: ...s EDID setting for the default settings Default DVI EDID The Receiver will use the connected DVI Display Device s EDID setting for the default settings Default VGA EDID The Receiver will use the conn...

Page 30: ...ww startech com support Utilities Tab 3 Enter an API command in the Console API Command field 4 Click the Apply button to execute the API command The Output field will return command values Note A not...

Page 31: ...From the System screen click on the Statistics tab 2 The Statistics tab will appear listing statistics for the selected unit State Machine List the current state of the unit Transmitter or Receiver N...

Page 32: ...9 wall configuration or a total of 81 receivers where net work resources allow 1 From the System screen click on the Video Wall tab along the top of the screen Video Wall Tab 2 The Video Wall screen w...

Page 33: ...dth of the first monitor in millimeters OH Enter the outside height of the first monitor in millimeters VW Enter the view width width of the screen of the first monitor in millimeters VH Enter the vie...

Page 34: ...in the video wall setup along the horizontal plane Row Position Allows you to assign a number to the monitor in the first row position For example the monitor in the first row should have the number 0...

Page 35: ...s you want to apply the video wall settings to 5 Click the Apply button to apply the settings to the selected device s Advanced Video Wall Configuration 1 From the System screen click on the Video Wal...

Page 36: ...x to place a number of each of the connected displays 5 Use the Choose Control Target controls to select all connected monitors or to select a specific row or column Icon Description Select all connec...

Page 37: ...visit www startech com support Control Options Section Reset to basic Setup Allows you to revert back to the basic setup settings Stretch Type Allows you to select a image stretch type e g Fit In fit...

Page 38: ...ansmitter Column Position Allows you to indicate the column position of the Transmitter Horizontal Shift Allows you to shift the selected display horizontally Vertical Shift Allows you to shift the se...

Page 39: ...s drivers downloads technical drawings and more visit www startech com support Setting an IP Address 1 From the System screen click on the Network tab along the top of the screen Network Tab 2 The Net...

Page 40: ...P Mode field Auto IP The system will automatically assign an IP Address to the unit DHCP The DHCP server will automatically assign an IP Address to the unit Static Allows you to manually assign an IP...

Page 41: ...s drivers downloads technical drawings and more visit www startech com support Changing Casting Mode 1 From the System screen click on the Network tab along the top of the screen Network Tab 2 The Net...

Page 42: ...nder the Casting Mode section on the screen select either Multicast Send data to multiple sources Unicast Send data to a single source 4 It is also recommended that you select the AutoSelect USB Opera...

Page 43: ...vers downloads technical drawings and more visit www startech com support Configuring Video Over IP 1 From the System screen click on the Functions tab along the top of the screen Functions Tab 2 The...

Page 44: ...s you to enable or disable the video over IP function Enable Video Wall Allows you to enable or disable the video wall function Maximum Bit Rate Receiver only Allows you to select the number of bits p...

Page 45: ...more visit www startech com support Configuring USB Over IP 1 From the System screen click on the Function tab along the top of the screen Functions Tab 2 The Functions screen will appear 3 On the USB...

Page 46: ...atically select the appropriate operation mode multicast or unicast Active On Link Use if using unicast mode Active Per Request Use if using multicast mode Compatibility Mode Mouse Not Responding Well...

Page 47: ...e visit www startech com support Configuring Serial Over IP 1 From the System screen click on the Function tab along the top of the screen Functions Tab 2 The Functions screen will appear 3 On the Ser...

Page 48: ...pe 1 Type 2 Type 1 Guest or Type 2 Guest Baud rate Settings Baud rate Allows you to select a baud rate speed at which data is transmitted from the drop down list Data Bits Select the number of bits th...

Page 49: ...other Check to see if Unicast or Multicast modes are selected 2 If the units are having issues communicating with one another Check to make sure the network supports both Jumbo Frames and IGMP and tha...

Page 50: ...ny damages whether direct or indirect special punitive incidental consequential or otherwise loss of profits loss of business or any pecuniary loss arising out of or related to the use of the product...

Page 51: ...tools StarTech com is an ISO 9001 Registered manufacturer of connectivity and technology parts StarTech com was founded in 1985 and has operations in the United States Canada the United Kingdom and Ta...

Reviews: