background image

Instruction Manual

1

Introduction

Package Contents

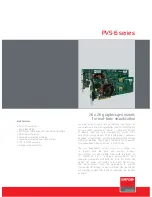
•  1 x PCI SATA/ eSATA Controller Card
•  1 x SATA Data Cable
•  1 x Low Profile Bracket
•  1 x Driver CD
•  1 x Instruction Manual

System Requirements

•  One available PCI expansion slot
•  Microsoft® Windows® 98SE/ ME/ 2000/ XP/ Server 2003/ Vista/ 7

Installation

Hardware Installation

1.  Make sure that your system is unplugged and you are grounded.
2.  Remove the cover of your system (see your computer’s user manual for details, if necessary) 

and gently turn your computer onto its side.

3.  Locate an empty PCI slot (usually white in color) and remove the metal plate that covers the 

rear bracket. You may need a Phillips screwdriver to perform this step. Retain the screw! 

You will need it to secure the card later.

4.  Gently insert the card into the empty slot, making sure it is firmly seated.
5.  Secure the card in place using the screw you removed in Step 3.
6.  Install the devices you wish to use with the card into the case following the instructions 

provided in their documentation.

7.  Use the provided SATA cable to attach the internal devices you are using to the controller. Be 

sure to also attach necessary power cords to all attached devices. For devices connected 

to the external SATA port, a separate eSATA cable must be used.

8.  Put the computer case back on.

Summary of Contents for PCIESATA2I

Page 1: ...ungsanleitung de startech com FR Guide de l utilisateur fr startech com ES Gu a del usuario es startech com IT Guida per l uso it startech com NL Gebruiksaanwijzing nl startech com PT Guia do usu rio...

Page 2: ...ntenna Increase the separation between the equipment and receiver Connect the equipment into an outlet on a circuit different from that to which the receiver is connected Consult the dealer or an expe...

Page 3: ...ion Manual i Table of Contents Introduction 1 Package Contents 1 System Requirements 1 Installation 1 Hardware Installation 1 Driver Installation 2 Specifications 3 Technical Support 4 Warranty Inform...

Page 4: ...ally white in color and remove the metal plate that covers the rear bracket You may need a Phillips screwdriver to perform this step Retain the screw You will need it to secure the card later 4 Gently...

Page 5: ...n Windows detects the PCIESATA2I an Add New Hardware Wizard window will appear on the screen Select the Specify the location of the driver Advanced option then click Next to continue the setup 3 Inser...

Page 6: ...erface 32 bit PCI v2 2 33 MHz 66 MHz SATA revision 1 0 Chipset VIA VT6421 Connectors 1 x 7 pin SATA Internal 1 x 7 pin eSATA External Maximum Data Transfer Rate 1 5 Gbps Operating System Support Windo...

Page 7: ...ith equivalent products at our discretion The warranty covers parts and labor costs only StarTech com does not warrant its products from defects or damages arising from misuse abuse alteration or norm...

Page 8: ...ts and we quickly deliver them wherever they need to go Just talk to one of our tech advisors or visit our website You ll be connected to the products you need in no time Visit www startech com for co...

Reviews: