background image

5

IL1269

PORTION CONTROL

This dispenser is supplied with a portion control timer. This portion control is based on a time 
setting.  Variations in product temperature and consistency will affect the dispensed amount.  
To insure a consistent portion, use product that is at the correct temperature (145°F to 160°).

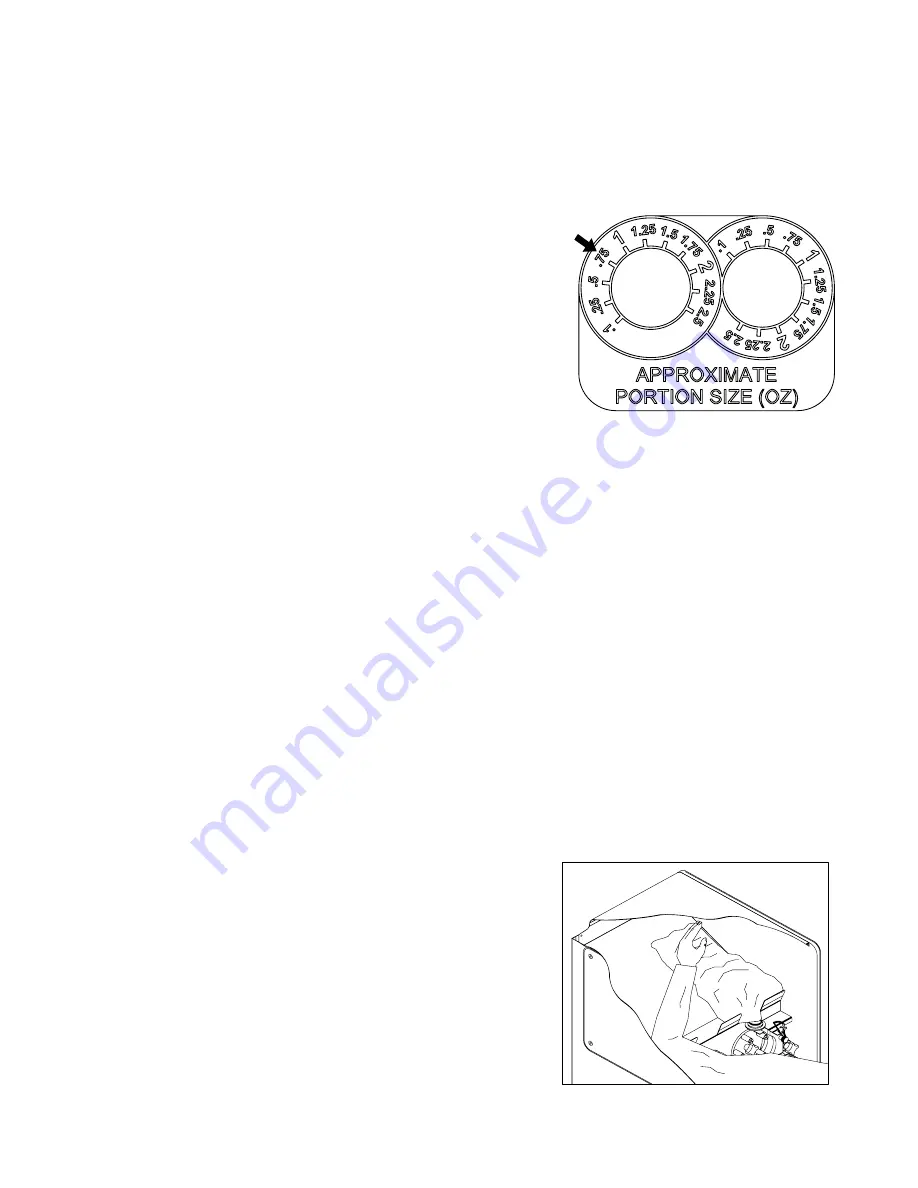
SPDE2 models have a Portion Control Label showing approximate settings for portion size 
in oz, 

see Fig 1

.  The units are pre-set at the factory for 0.75oz, this is a general guideline, and 

following procedures still need to be followed to complete calibration.

IL1268

To set portion:

1.  Load preheated product bag into dispenser.
2.  Dispense product until there is a steady fl ow.
3.  Dispense the product into a clean container and 

measure the product to verify the dispensed 
amount.

4.  Using a small screwdriver, remove the round plug 

covering the adjustment knob located on the front 
of the unit below the tube cover.

5.  Turn the control dial clockwise for more product 

and counterclockwise for less product.

6.  Repeat steps 3 and 5 until the desired amount 

is reached.

OPERATION NOTES

The product should be preheated according to the manufacturer's instructions.  
The product should be a minimum of 140°F before dispensing.

The digital temperature readout displays the cabinet air temperature and will fl uctuate during 
normal operation.  The product temperature should be close to the temperature set point, but 
the actual product temperature should be checked periodically to ensure proper operation.

The dispenser will not function correctly if the product is not at the correct temperature.

CHECKING PRODUCT TEMPERATURE

The dispenser should be plugged in and turned on with product in the dispenser for a least 5 
hours.
1.  Dispense at least 3 inches of product into an insulated cup.
2.  Without hesitation, insert the thermometer to the bottom of the cup and stir the product 

gently with the stem of the thermometer.

3.  Position the tip of the thermometer in the center of the product mass.
4.  The temperature should read between 140°F and 160°F.

The dispenser is designed to operate 24 hours a day.  Once the product is placed in the 
dispenser it should not be removed until the bag is empty or the holding period of the product 
has expired.

NOTE: 

 To increase the evacuation, 

open the dispenser and pull the 
product toward the outlet 3 or 4 times 
during operation,

 see Fig 2

.

Figure 1, Portion Control Label, 

SPDE2 models only.

Figure 2, Pull product down once or 
twice during operation.

Summary of Contents for SPDE1ARB

Page 1: ...1 HEATED PERISTALTIC DISPENSER MODEL SPDE1ARB SPDE2ARB SPDE1HP Installation and Operation Instructions 2M Z7537 Rev G 2 16 07 SPDE2ARB...

Page 2: ...n information provided or conclusions reached as a result of using the speci cations By using the information provided the user assumes all risks in connection with such use MAINTENANCE AND REPAIRS Co...

Page 3: ...MA CEE7 7 Euro Dimensions 9 7 16 W x 19 9 16 D x 30 5 16 H 23 97 W x 49 69 D x 77 0 H cm Net Weight 42 lbs 19 1 kg SPDE1HP Capacity One 160 ounce pouch Electrical 120V 60 hertz single phase 820 Watts...

Page 4: ...the dispenser OFF 2 Unhook the tension spring from the catch 3 Slide the pump block away from the pump head 4 The product should be preheated according to the manufacturer s instructions and should b...

Page 5: ...facturer s instructions The product should be a minimum of 140 F before dispensing The digital temperature readout displays the cabinet air temperature and will fluctuate during normal operation The p...

Page 6: ...with mild soap and water and wiped dry Do not use detergents strong abrasives or metal scouring pads on the stainless steel panels The pump mechanism should not need cleaning during normal use If pro...

Page 7: ...rs This warranty does not apply to the non stick properties of such materials This warranty does not apply to Special Products but to regular catalog items only Star s warranty on Special Products is...

Page 8: ...ON DO NOT LIFT THE BAG HOUSING UNLESS THE TUBE IS DISENGAGED FROM THE PUMP HEAD BAG HOUSING LOADING POSITION BAG HOOK CUT TUBE HERE TUBE COVER PUMP HEAD POWER SWITCH SPRING ENGAGED FITMENT SWITCH PUSH...

Page 9: ...9...

Page 10: ...10...

Page 11: ...Y SWITCH K IEC INLET 230V ONLY A B C E G H L HEATING ELEMENT L 1 10 NC COM NO SUPPLY t 7 Probe input POWER F 8 OUTPUT I1 J1 16 17 I2 J2 20 21 23 22 13 18 25 8 9 10 11 2 1 D I2 RIGHT PUMP SWITCH J2 RIG...

Page 12: ......

Page 13: ...7 10 37 39 55 40 13 54 42 47 34 26 25 3 48 35 36 49 56 7 9 14 15 22 23 28 30 31 43 44 45 46 50 51 52 53 38 12 NAMEPLATE 24 MODELS SPDE1ARB 120V 230V SPDE1HP 120V SPDE2ARB 120V STAR MANUFACTURING INTER...

Page 14: ...D2037 1 ASY TRACK RIGHT SPDE2ARB 10 M2 PD1012 1 ASSEMBLY BOTTOM SPDE1ARB SPDE1HP M2 PD2045 1 ASSEMBLY BOTTOM SPDE2ARB 11 M2 Z2889 1 DRIP TRAY CSD 1N SPDE1ARB SPDE1HP M2 Z9692 1 TRAY DRIP SPDE2ARB 12 M...

Page 15: ...H SOUTHCO 300 38 2M Z1688 1 GRAPHIC ARROW 2M Z1688 2 GRAPHIC ARROW SPDE2ARB 39 2T Z0613 1 THERMOMETER SPIRIT 40 2I Z1894 1 HINGE INSERT 41 2A Z4595 1 DRIVE SHAFT 2A Z4595 2 DRIVE SHAFT SPDE2ARB 42 2A...

Page 16: ...STAR MANUFACTURING 10 Sunnen Drive St Louis MO 63143 U S A 800 807 9054 314 781 2777 Parts Service 800 807 9054 www star mfg com...

Reviews: