- 12 -
3. Printer Features
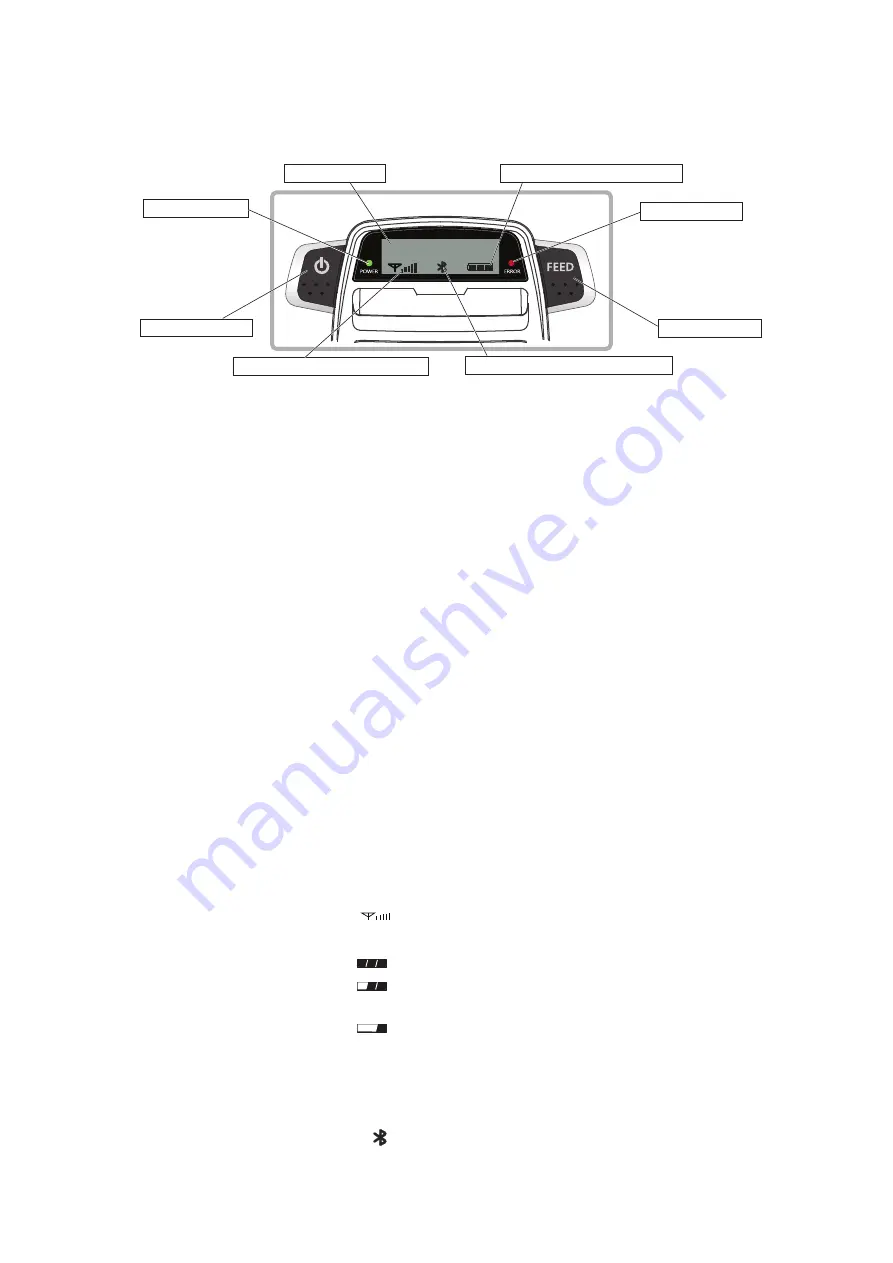
3.1 Control Panel
3.1.1 Button
1
POWER Button :
Pressing and holding the POWER button for 5 seconds or more will turn the power on or off.
2
FEED Button :
When the printer is on, pressing and holding the FEED button for 1 second or more feeds a paper.
Pressing the
1
POWER button and
2
FEED button simultaneously enables you to change the
printer mode setting. The buttons are also used to change the mode and change over the setting
contents.(For more details on the mode setting, refer to "3.3. Memory Switch Setting".)
3.1.2 Panel Lamp
3
POWER (Green) : Printer is ON and ready to receive data.
When the memory switch is set, it indicates the printer mode to be set by flashing
by a predetermined number of cycles.
4
ERROR (Red) :
Indicates an error has occurred.
When the memory switch is set, it indicates the current setting contents
by flashing by a predetermined number of cycles.
3.1.3 LCD
1) The 128 × 32 dot display shows alphanumeric characters.
2) Content
5
Mode/Status : Indicates the currently specified printer mode or error status.
6
Data communication status :
... The image shown on the left indicates that the data
communication status is good.
7
Remaining battery power :
... There is sufficient remaining battery power.
... The remaining battery power is low. Please charge the
battery pack. (*)
... The remaining battery power is extremely low. Stop using
the printer immediately, and charge the battery pack. (*)
Note*)If you continue printing at the low remaining battery
power status, the printer cannot feed paper properly and
may print with condensed (narrow) line spacing.
8
Bluetooth connection status :
... The mark on the left indicates that there is a Bluetooth
connection.When there is no Bluetooth connection, the
mark is not displayed.
Bluetooth Mode
1
Mode Status
7
Remaining battery power
6
Data Communication Status
8
Bluetooth Connection Status
2
FEED Button
1
POWER Button
4
ERROR Lamp
3
POWER Lamp


