


– 11 –
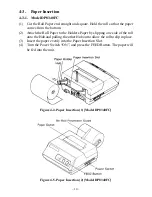
4-3-2. Model DP8340SC
1.
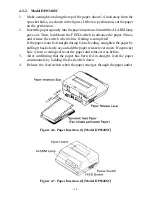
Make a straight cut along the top of the paper, about 1/4 inch away from the
sprocket holes, (as shown in the figure). If there is perforation, cut the paper
on the perforation.
2.
Insert the paper squarely into the paper insertion slot until the ALARM lamp
goes out. Then, hold down the FEED switch to advance the paper 8 lines,
and release the switch when 8-line feeding is completed.
If the paper is not fed straight during 8-line feeding, straighten the paper by
pulling it back slowly as you hold the paper release lever down. If a sprocket
hole is torn or enlarged, recut the paper and reinsert it as before.
3.
After confirming that the paper has been fed in straight, feed the paper
continuously by holding the feed switch down.
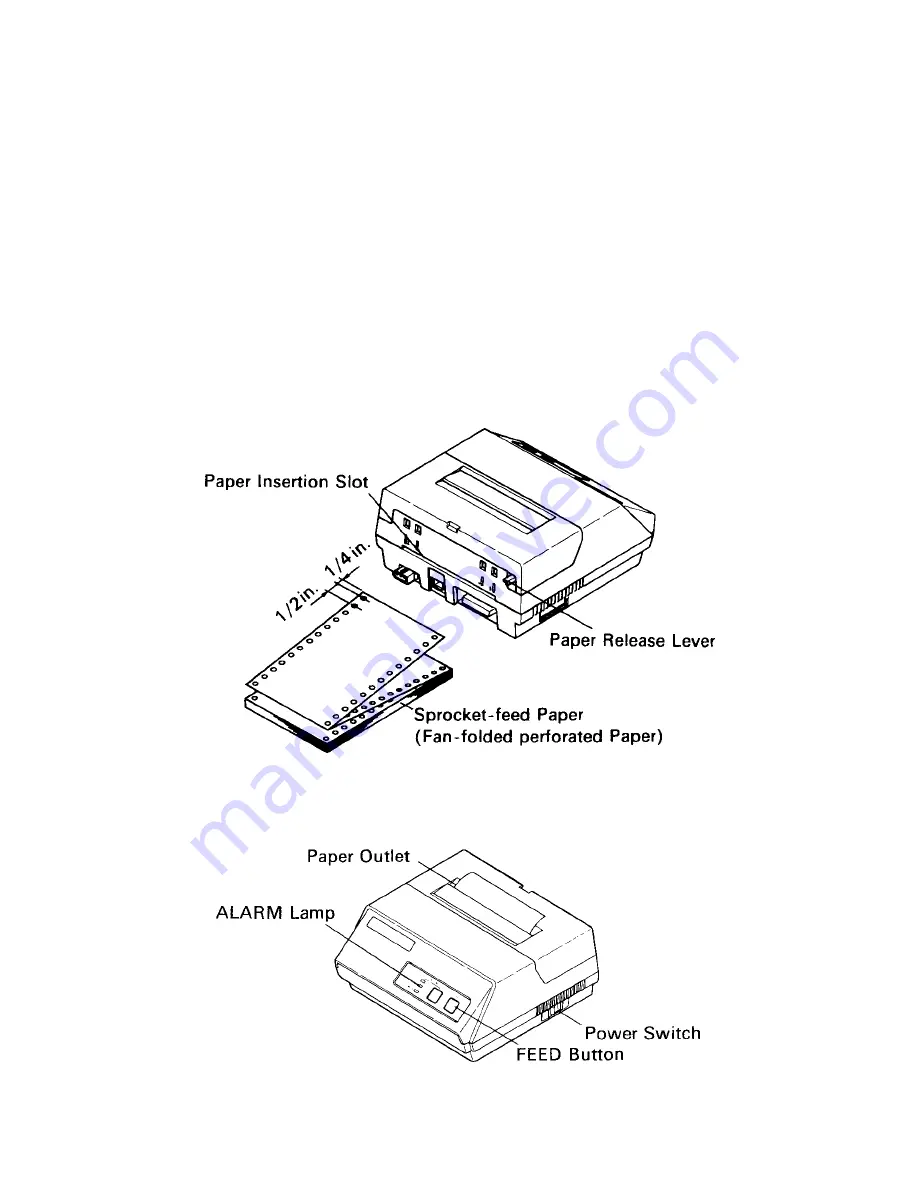
4.
Release the feed switch when the paper emerges through the paper outlet.
Figure 4-6. Paper Insertion (1) [Model DP8340SC]
Figure 4-7. Paper Insertion (2) [Model DP8340SC]
Summary of Contents for DP8340 Series
Page 1: ...DOT MATRIX PRINTER DP8340 SERIES PARALLEL INTERFACE USERS MANUAL ...
Page 4: ......
Page 10: ... 6 3 2 Printer Figure 3 2 Printer Front View Figure 3 3 Printer Rear View ...
Page 34: ... 30 8 CHARACTER CODE LIST 1 U S A Europe DIP SW1 ON SW2 ON ...
Page 35: ... 31 ...
Page 36: ... 32 2 IBM Character Set 1 DIP SW1 OFF SW2 ON ...
Page 37: ... 33 ...
Page 38: ... 34 3 IBM Character Set 2 DIP SW1 ON SW2 OFF ...
Page 39: ... 35 ...
Page 40: ... 36 4 JAPAN DIP SW1 OFF SW2 OFF ...
Page 41: ... 37 ...
Page 42: ... 38 International Character Sets ...
Page 43: ... 39 9 FONTLIST 1 U S A Europe DIP SW1 ON SW2 ON ...
Page 44: ... 40 ...
Page 45: ... 41 ...
Page 46: ... 42 2 IBM Character Set 1 DIP SW1 OFF SW2 ON ...
Page 47: ... 43 ...
Page 48: ... 44 ...
Page 49: ... 45 3 IBM Character Set 2 DIP SW1 ON SW2 OFF ...
Page 50: ... 46 ...
Page 51: ... 47 ...
Page 52: ... 48 4 JAPAN DIP SW1 OFF SW2 OFF ...
Page 53: ... 49 ...
Page 54: ... 50 ...
Page 55: ... 51 International Character Sets ...
Page 58: ... MEMO ...