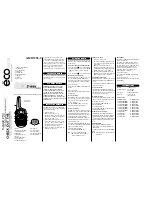
background image

18

8.5.4  GPS Input - optional SCU-31 External GPS Antenna

12 V Battery

Radio Wires

Yellow: NMEA IN(

+

)

Green: NMEA IN(

)

Brown

Black

External GPS Antenna

SCU-31

Black

(

)

(

+

)

Red

2A Fuse

The 

SCU-31

 External GPS antenna (Built-in GPS receiver) is supplied with  

49 feet (15 m) of cable and a connector. To connect the 

SCU-31

 to the trans-

ceiver, cut off the 6 pins antenna connector, strip the white insulation to expose 

the Red, Black and Brown wires and connect as shown in the diagram. All 

other wires are not used and may be cut off. The 2 amp fuse is not included.

8.5.5  Connection to External Speaker

External Speaker

Shield

White

Wire Color/Description

Connection Examples

White:  External Speaker (+)

Positive wire of external 4 Ohm External speaker

Shield: External Speaker (−)

Negative wire of external 4 Ohm External speaker

8.5.6  Connecting the SCU-38 External GPS Antenna to the Radio 

(GX1400GPS and GX1400GPS/E only)

Installed the SCU-38 in a location where the structure does not interfere with 

the signal, it will have better performance than the internal GPS antenna.
Connect the 

SCU-38 

cable to the 

GPS ANT


connector (Coaxial connector) on the rear 

panel, then tighten the cable nut (see illustra-

tion at the right).

NOTE

: The 

SCU-38

 External GPS Antenna is 

always used preferentially than the internal GPS 

antenna.

Summary of Contents for Eclipse GX1400

Page 1: ...selection DSC test call DSC distress individual group all ships position request and position report Large Viewable Display Easy to Mount Submersible IPX8 5 feet or 1 5 m for 30 minutes z z Noise canceling microphone with channel change 16 S and H L key buttons GPS position and time shown on a full dot matrix display Preset Key used to recall up to 10 favorite channels Programmable scan priority s...

Page 2: ...ASIC OPERATION 24 9 1 TURNING ON AND OFF THE TRANSCEIVER 24 9 2 RECEPTION 24 9 3 TRANSMISSION 24 9 3 1 Transmit Power 24 9 4 TRANSMIT TIME OUT TIMER TOT 25 9 5 BASIC OPERATION OF THE SETUP MENU 25 9 6 SIMPLEX DUPLEX CHANNEL USE 26 9 7 CHANNEL GROUP 26 9 8 NOAA WEATHER CHANNELS in USA and Canada only 27 9 8 1 NOAA Weather Alert USA version only 27 9 8 2 NOAA Weather Alert Testing 27 9 9 MULTI WATCH...

Page 3: ... Individual Directory 66 11 1 2 Individual Reply 66 11 1 3 Individual Acknowledgement 66 11 1 4 Individual Ringer 66 11 1 5 Group Directory 66 11 1 6 Auto Position Polling Call Type 67 11 1 7 Auto Position Polling Interval Time 67 11 1 8 Auto Channel Switching Time 67 11 1 9 DSC Beep 67 11 2 CHANNEL SETUP 67 11 2 1 Channel Group Band Selection 67 11 2 2 Weather Alert USA version only 68 11 2 3 Mul...

Page 4: ...nter clockwise to un squelch the radio Press the 16 S key on the radio to select Channel 16 Press and hold the 16 S key on the radio to select the sub channel Press again to revert to the last selected channel Press the H L key to toggle the transmit power between High 25W and Low 1W To transmit place your mouth about 1 2 5cm away from the MIC hole of the microphone and speak in a normal voice lev...

Page 5: ...channel by pressing the red 16 S key NOAA weather channel can also be accessed immediately by pressing the WX soft key Depending on the transceiver version Other features of the GX1400 series include a 66 channel internal GPS receiver GX1400GPS and GX1400GPS E only scanning functions priority scanning dual watch DSC position polling up to 6 vessels high and low voltage warning and GPS repeatabilit...

Page 6: ...mage Types and meanings of symbols These symbols signify prohibited actions which must not be done to use this product safely For example indicates that the product should not be disassembled These symbols signify required actions which must be done to use this product safely For example indicates that the power plug should be disconnected Do not operate the device when flammable gas is generated ...

Page 7: ...ug and un plug the power plug with wet hands This may result in injury liquid leak electric shock and equipment failure Disconnect the power cord and connection ca bles before incorporating items sold separately or replacing the fuse This may result in fire electric shock and equip ment failure When smoke or strange odors are emitted from the radio turn off the power and disconnect the power cord ...

Page 8: ...he degree to which this is accomplished is called the antenna s gain It is measured in decibels dB and is one of the major factors in choosing an antenna In terms of effective radiated power ERP antennas are rated on the basis of how much gain they have over a theoretical antenna with zero gain A 1 m 3 dB gain antenna represents twice as much gain over the imaginary antenna Typically a 1 m 3 dB ga...

Page 9: ...ring state which to a well known landmark such as a navigation aid or geographic feature such as an island or harbour entry 4 Explain the nature of your distress sinking collision aground fire heart attack life threatening injury etc 5 State the kind of assistance you desire pumps medical aid etc 6 Report the number of persons aboard and condition of any injured 7 Estimate the present seaworthines...

Page 10: ...ired channel in advance to make sure you will not be interrupting other traffic and then go back to either channel 16 or 9 for your initial contact When the hailing channel 16 or 9 is clear state the name of the other vessel you wish to call and then this is followed by the name of your vessel and your Station License Call Sign When the other vessel returns your call immediately request another ch...

Page 11: ...es decreases one step Holding the key the channel increases decreases continuously Secondary use While the MENU screen is displayed press the key to slide the on screen MENU upward downward VOL knob Volume control Adjusts the audio volume level Clockwise rotation of this knob increases the internal and speaker micro phone volume SQL knob Squelch control Adjusting this control clockwise sets the po...

Page 12: ... of soft keys Secondary use While the MENU screen is displayed press the key to slide the on screen MENU to the right left side 16 S key Pressing this key immediately recalls channel 16 from any channel location Holding down this key selects the SUB channel The default setting is channel 9 Pressing this key again reverts to the previous selected working channel DISTRESS key Used to send a DSC Dist...

Page 13: ...m away from your mouth Speak slowly and clearly into the microphone H L key Press this key to toggle between 25 W High and 1 W Low power When the TX output power is set to Low while the transceiver is on channel 13 or 67 the output power will temporarily switch from Low to High power until the PTT switch of the microphone is released This key is not available on transmit inhibited and low power on...

Page 14: ... to a DC power supply capable of delivering 11 to 16 VDC Accessory Connection Cable Green Brown Yellow White Connects the transceiver to a GPS chart plotter Refer to section 8 5 2 Accessory Cables EXTERNAL Speaker Connection Cable White Shield Connects the transceiver to an optional external speaker Refer to section 3 OPTIONALACCESSORIES for a list of optional STANDARD HORIZON Speakers White Exter...

Page 15: ... 0 5 m provides accessibility to the front panel controls allows connection to a power source and antennas has nearby space for installation of a microphone hanger is at least 3 feet 1 m away from the radio s antenna the signal from the GPS satellite can receive sufficiently NOTE To insure the radio does not affect the compass or radios performance is not affected by the antenna location temporari...

Page 16: ...ernal GPSAntenna may be needed to receive GPS satellite signals 1 Use the template page 93 to mark the location where the rectangular hole is to be cut Confirm the space behind the dash or panel is deep enough to accommodate the transceiver at least 4 72 120 mm deep There should be at least 1 2 inch 1 3 cm between the transceiver s heat sink and any wiring cables or structures 2 Cut out the rectan...

Page 17: ...5 feet 7 6 m 2 Connect the red power wire to a 13 8 VDC 20 power source Connect the black power wire to a negative ground 3 If an optional remote extension speaker is to be used refer to next section for connections 4 It is advisable to have a Certified Marine Technician check the power output and the standing wave ratio of the antenna after installation A c c e s s o r y C a b l e Antenna Water p...

Page 18: ... 2 0 or higher and NMEA 0183 HS version 1 01 or higher The NMEA 0183 input sentences are GLL GGA RMC GNS GSA and GSV RMC sentence is recommended If 4800 baud default is selected The Yellow and Green wires of input are at 4800 baud If 38400 baud is selected The Yellow and Green wires of input are at 38400 baud NMEA Output DSC and GPS information The NMEA 0183 output sentences are DSC and DSE If 480...

Page 19: ...have a single wire for NMEA signal ground In such a case connect the NMEA input to the GPS chart plotter s single NMEA signal ground wire and leave the NMEA output open In case the assignment of power supply and ground of a GPS chart plotter to be used is different from that of the radio connect the signal ground wire of the GPS chart plotter to the ground terminal GND on the rear panel of the rad...

Page 20: ...8 5 5 Connection to External Speaker External Speaker Shield White Wire Color Description Connection Examples White External Speaker Positive wire of external 4 Ohm External speaker Shield External Speaker Negative wire of external 4 Ohm External speaker 8 5 6 Connecting the SCU 38 External GPS Antenna to the Radio GX1400GPS and GX1400GPS E only Installed the SCU 38 in a location where the structu...

Page 21: ...f the MMSI number need to be reset Please contact Standard Horizon to obtain the required reset code Refer to the section 11 5 6 Reset the USER MMSI and ATIS CODE Programming the MMSI 1 Press the MENU key to display MENU BACK SELECT 2 Press the key to select MMSI POS INFO then press the SELECT soft key To cancel press the BACK soft key 3 The MMSI INPUT screen is displayed which has not yet set the...

Page 22: ...ignal from GX1400GPS GX1400GPS E GX1400 Internal GPS Receiver NMEA 0183 I O If there is a problem with the NMEA 0183 connection between the radio and the GPS the GPS icon will blink continuously until the connection is corrected After connections have been made between the trans ceiver and the GPS a small satellite icon will appear on the top right corner of the display and displays your current l...

Page 23: ...flush mounting of the GX1400GPS and GX1400GPS E it is recommended to connect option al External GPS Antenna SCU 38 to GPS ANT connector on the rear panel 1 Press hold the MENU key to display the MENU BACK SELECT 2 Press the key to select GPS then press the SELECT soft key The GPS STATUS screen will appear 3 Press the CLR key to return to radio operation NOTE For the transceiver to properly show th...

Page 24: ...s the or key to select TIME OFFSET then press the SELECT soft key BACK SELECT GPS SETUP LOCATION FORMT TIME OFFSET TIME AREA TIME FORMAT 5 Press the or key to select time offset of your location If 00 00 is assigned the time is the same as UTC BACK ENTER TIME OFFSET 01 30 01 00 00 30 00 00 6 Press the ENTER soft key to store the time offset 7 Press the CLR soft key to return to radio operation 8 8...

Page 25: ...MENU 2 Press the key to select SETUP then press the SELECT soft key BACK SELECT 3 Press the or key to select GPS SETUP then press the SELECT soft key BACK SELECT SETUP DSC SETUP CHANNEL SETUP GPS SETUP CONFIGURATION 4 Press the or key to select TIME FORMAT then press the SELECT soft key BACK SELECT GPS SETUP LOCATION FORMAT TIME OFFSET TIME AREA TIME FORMAT 5 Press the or key to select 12 HOURS or...

Page 26: ... a signal is received adjust the volume to the desired listening level The BUSY Indicator Lamp glows green and the BUSY icon on the display indicates that communications are being received 9 3 TRANSMISSION 1 Perform steps 1 through 6 of RECEPTION 2 Before transmitting monitor the channel to ensure it is clear THIS IS AN FCC REQUIREMENT 3 Press and hold the PTT push to talk switch of the microphone...

Page 27: ...efore automatic transmitter shutdown a warning beep will be heard from the speaker s The transceiver will automatically go to receive mode even if the PTT switch is continually held down Before transmitting again the PTT switch must first be released and then pressed again NOTE 9 5 BASIC OPERATION OF THE SETUP MENU Using the setup menu the various functions of the GX1400 series can be customized t...

Page 28: ...instructions on use of simplex and duplex channels NOTE 9 7 CHANNEL GROUP Set the Channel Group according to the region 1 SETUP CHANNEL SETUP CHANNEL GROUP 2 Press the or key to select desired channel group USA INTL or CAN 1 1 In the European version when setting the region the selected European Channel Group will be displayed instead of CAN For details refer to the note on the setting the region ...

Page 29: ...r alerts when monitoring a weather channel and on the last selected weather channel during scanning modes or while on another working channel To enable the weather alert function refer to section 11 2 2 Weather Alert USA version only When an alert is received on a NOAA weather channel scanning will stop and the transceiver will emit a loud beep to alert the user of a NOAA broad cast Press any key ...

Page 30: ...ENTER MULTI WATCH DUAL TRIPLE 3 Press the ENTER soft key to store the selected setting 4 Press the CLR key to return to radio operation 9 9 2 Starting the Dual Watch 1 Adjust the SQL knob until the background noise disappears 2 Press the or key to select a channel you wish to dual watch to the priority channel 3 Press one of the soft keys 4 Press or key repeatedly until the DUAL WATCH soft key is ...

Page 31: ...ps 9 10 1 Selecting the Scan Type 1 SETUP CHANNEL SETUP SCAN TYPE 2 Press the or key to select PRIORITY SCAN or MEMORY SCAN BACK ENTER SCAN TYPE PRIORITY SCAN MEMORY SCAN 3 Press the ENTER soft key to store the selected setting 4 Press the CLR key to return to radio operation Memory Scan M SCAN CH12 CH09 CH1001 CH15 CH1018 CH1022 CH1061 CH1078 CH68 CH88 Priority Scan P SCAN Priority Channel CH12 C...

Page 32: ...splay 5 Press the CLR key to return to radio operation 9 10 3 Memory Scanning M SCAN 1 Set the scan type to MEMORY SCAN in the SETUP menu refer to 9 10 1 Selecting the Scan Type 2 Adjust the SQL knob until background noise disappears 3 Press one of the soft keys 4 Press the or key repeatedly until the P SET soft key display then press the SCAN soft key The M SCN icon appears on the LCD Scanning wi...

Page 33: ... soft key NOTE In the default setting Channel 16 is set as the priority channel You may change the priority channel to the desired channel from Channel 16 on the SETUP menu Refer to section 11 2 7 Priority Channel 9 11 PRESET CHANNELS INSTANT ACCESS 10 preset channels can be programmed for instant access Pressing the P SET soft key activates the preset channel bank If the P SET soft key is pressed...

Page 34: ... key to select the desired preset channel 4 Press one of the soft keys then press the P SET soft key again to return to the last selected channel 9 11 3 Deletion 1 Press one of the soft keys 2 Press the or key repeatedly until the P SET soft key display then press the P SET soft key to recall the preset channel BUSY M P SET USA 25W 72 QUIT DELETE BUSY M P SET USA 25W 72 BUSY USA 25W 72 3 Press one...

Page 35: ... announce routine and urgent maritime safety information broadcasts This system allows mariners to instantly send a distress call with its own position to the Coast Guard and other vessels within range of the transmission DSC will also allow mariners to initiate or receive Distress Urgency Safety Routine Position Request Position Report and Group calls to or from another vessel equipped with a DSC...

Page 36: ...ISTRESS UNDESIGNATED Waiting for ACK TX IN 02 25 PAUSE INFO CANCEL 4 When a distress acknowledgment is received a distress alarm sounds and Channel 16 is automatically selected The display shows the MMSI of the ship responding to your distress DISTRESS RX ACKNOWLEDGED USCG CA SINCE 00 15 OK 5 Press the microphone PTT switch and state your name vessel name number of persons on board and the distres...

Page 37: ...your latitude and longitude and time before transmitting the distress alert 1 DSC DIST ALERT MSG 2 Press the POS TM soft key BACK POS TM DIST ALERT MSG UNDESIGNATED POS TIME UTC NATURE 3 Press the or key to select the first number of latitude then press the SELECT soft key to step to the next number 4 Repeat step 3 to set the position and UTC time in the 24 hour format If you make a mistake press ...

Page 38: ...w pausing TX IN 02 25 RESUME INFO CANCEL 2 To suspend re transmitting the distress call press the PAUSE soft key 3 To resume counting down to transmit the distress call press the RESUME soft key Canceling a DSC Distress Alert If a distress alert was sent by error the transceiver allows you to send a message to other vessels to cancel the distress alert that was made 1 Press the CANCEL soft key the...

Page 39: ...nel 16 QUIT Press this key to quit the automatic Channel 16 switching and revert to the last selected working channel 4 After accepting the distress call press the INFO soft key to show information of the vessel in distress RX DISTRESS YAESU UNDESIGNATED NOT ACKNOWLEDGED SINCE 00 05 INFO QUIT INFO DIST INFO DIST 366901234 YAESU UNDESIGNATED RX DISTRESS BACK QUIT 5 Press the or key to scroll the sc...

Page 40: ...tting an All Ships Call 1 DSC ALL SHIPS 2 Press the or key to select the category of the call SAFETY or URGENCY then press the SELECT soft key BACK SELECT CATEGORY SAFETY URGENCY 3 Press the or key to select the operating channel you want to communicate on then press the SELECT soft key BACK SELECT INTERSHIP CH CH 16 CH 06 CH 1008 CH 1009 4 Press the YES soft key to transmit the selected type of a...

Page 41: ...e PAUSE soft key to suspend the acknowledgement Press the RESUME soft key to resume the acknowledgement 5 If you want the radio to stay on the channel you were on before receiving the all ships call press the QUIT soft key 6 Press the or key to scroll the screen and see the MMSI or name of the calling vessel category of the call and requested operating channel RX ALL SHIPS YAESU CATEG SAFETY CH 08...

Page 42: ...p the Individual Position Call Directory The transceiver has a DSC individual directory that allows storing vessels or persons names and the associated MMSI numbers you may wish to contact via individual calls auto polling position request position report and polling transmissions To transmit an individual call you must program this directory with information of the persons you wish to call simila...

Page 43: ... If a mistake was made entering in the MMSI number press the or key repeatedly until the wrong number is highlighted then press the or key to correct the entry 12 After the ninth number has been entered press the FINISH soft key to return to the previous screen ADD NAME YAESU MMSI 366901555 BACK SELECT FINISH 13 Press the FINISH soft key to save the entered address 14 To enter another individual a...

Page 44: ...ENTER INDIVIDUAL ACK ABLE UNABLE 3 Press the 16 S key or press the CLR soft key to return to radio opera tion mode 10 4 4 Transmitting an Individual Call This feature allows you to contact another vessel switch their radio to a requested working channel and ring like a telephone This feature is similar to calling a vessel on CH16 and requesting to go to another channel Individual Call from Individ...

Page 45: ...the vessel you called the radio will automatically switch to the operating channel selected in step 6 and produce a ringing sound 8 Key the microphone and call the other vessel you desire to communicate with Individual Call by Manually Entering an MMSI You may enter an MMSI number manually to contact a vessel without storing the MMSI in the individual directory 1 DSC INDIVIDUAL 2 Press the or key ...

Page 46: ...ging sound 11 Key the microphone and call the other vessel you desire to communicate with 10 4 5 Receiving an Individual Call When receiving an individual call an acknowledgment must be sent back to the calling station The transceiver in the default setting will automatically respond to the calling station and switch to the requested channel for voice communi cations Refer to the section 10 4 2 Se...

Page 47: ...h on the microphone and talk to the calling vessel Automatic reply 1 When an individual call is received a ringing alarm sounds The transceiver automatically switches to the requested channel The display shows the MMSI or the name of the vessel transmitting the individual call 2 Press any key to stop the alarm 3 Press the QUIT soft key to return to radio operation 4 Monitor the channel to make sur...

Page 48: ... to automatically contact a specific group of vessels using DSC radios with the group call function The called radios can automati cally switch to the desired channel for voice communications This function is very useful for yacht clubs and vessels traveling together that want to make communal announcements on a predetermined channel Up to 30 group MMSIs may be programmed 10 5 1 Setting up a Group...

Page 49: ... simply change one or more of the last 5 digits of the group MMSI 1 SETUP DSC SETUP GROUP DIR 2 Press the or key to select ADD then press the SELECT soft key BACK SELECT GROUP DIR ADD EDIT DELETE 3 Press the or key to select NAME then press the SELECT soft key BACK SELECT ADD NAME GROUP MMSI 0 4 Press the or key to scroll through the first letter of the group name you want to reference in the dire...

Page 50: ... entry 12 After the ninth number has been entered press the FINISH soft key to return to the previous screen ADD NAME YAESU GP GROUP MMSI 036690155 BACK SELECT FINISH 13 Press the FINISH soft key to save the entered data 14 To enter another group entry repeat steps 2 through 13 15 Press the 16 S key or press the CLR soft key to return to radio opera tion mode 10 5 2 Transmitting a Group Call Group...

Page 51: ...one and call the other vessels you desire to communicate with Group Call by Manually Entering an MMSI You may enter an MMSI number manually to contact a vessel without storing the MMSI in the Group Call Directory 1 DSC GROUP 2 Press the or key to select NEW ID then press the SELECT soft key BACK SELECT GROUP HISTORY MEMORY NEW ID 3 Press the or key to scroll through numbers 0 to 9 BACK SELECT FINI...

Page 52: ...1 When a group call is received the transceiver will produce a ringing alarm sound DSC BEEP needs to be enabled to hear alarm The display will show the MMSI or name of the vessel transmitting the group call 2 Press any key to stop the alarm 3 To immediately switch to requested channel press the ACCEPT soft key If a key is not pressed for thirty seconds after a group call is received the transceive...

Page 53: ...y to turn off the group call ringer 1 SETUP DSC SETUP DSC BEEP 2 Select GROUP with the or key then press the SELECT soft key BACK SELECT DSC BEEP INDIVIDUAL GROUP ALL SHIPS POS REQUEST ON ON ON OFF 3 Press the or key to select OFF then press the ENTER soft key BACK ENTER GROUP OFF ON 4 Press the 16 S key or press the CLR soft key to return to radio opera tion mode If you wish to return to enabling...

Page 54: ...al Position Call Directory 1 DSC POS REQUEST 2 Press the or key to select HISTORY or MEMORY then press the SELECT soft key BACK SELECT POS REQUEST HISTORY MEMORY NEW ID 3 Press the or key to select an individual you want to contact then press the SELECT soft key BACK SELECT MEMORY YAESU USCG MEMORY SHIPS HORIZON 4 Press the YES soft key to transmit the position request call POS REQUEST YAESU CATEG...

Page 55: ... the received data POS INFO POS 23 56 890N 123 56 890W TIME 12 56 UTC RX POS REPLY BACK QUIT BACK RX POS REPLY QUIT 123 56 890W TIME 12 56 UTC DST 29 8NM BRG 270 T 9 To exit from position request display press the QUIT soft key NOTE Position Request by Manually Entering an MMSI You may enter an MMSI number manually to contact a vessel without storing the MMSI in the individual position call direct...

Page 56: ...lustration on the right To send again press the RESEND soft key POS REQUEST 366901555 CATEG SAFETY SINCE 00 05 Waiting for ACK RESEND QUIT 9 When the transceiver receives the position from the polled vessel the transceiver will produce a ringing alarm sound and the position from the polled vessel is sent to a GPS chart plotter via NMEA 0183 DSC BEEP needs to be enabled to hear alarm Press any key ...

Page 57: ...ith the or key then press the SELECT soft key BACK SELECT DSC BEEP INDIVIDUAL GROUP ALL SHIPS POS REQUEST ON ON ON OFF 3 Press the or key to select OFF then press the ENTER soft key BACK ENTER POS REQUEST OFF ON 4 Press the 16 S key or press the CLR soft key to return to radio opera tion mode If you wish to return to enabling the ringer tone just repeat the above procedure pressing the or key to s...

Page 58: ...e position information POS REPORT YAESU POS 23 56 890N 123 56 890W Transmit a Call YES NO POS 5 To exit from position request display press the QUIT soft key POS REPORT YAESU CATEG SAFETY SINCE 00 05 Transmitted QUIT DSC Position Report Call by Manually Entering an MMSI You may enter an MMSI number manually to contact a vessel without storing the MMSI in the individual position call directory 1 DS...

Page 59: ...smits their location to the transceiver the following will happen 1 When the position report call is received a ringing sound will be produced and the display shows the vessels MMSI or name how long since the call was received and the GPS position of the vessel The transceiver will also output NMEA sentences DSC and DSE to a connected GPS chart plotter 2 Press any key on the radio to stop the alar...

Page 60: ... to select ON in step 3 above 10 8 MANUAL INPUT OF THE GPS LOCATION LAT LON You may send the latitude and longitude of your vessel manually when a GPS receiver is not connected or is not functioning After the position is entered transmitting a DSC distress or position report will contain the manually entered position 1 DSC MMSI POS INFO 2 Press the POS TM soft key to display the position input scr...

Page 61: ... 16 S key or press the CLR soft key to return to radio opera tion mode 10 9 AUTO POS POLLING The GX1400 series has the capability to automatically track 6 stations programmed into the individual directory 10 9 1 Setting up the Polling Call Type 1 SETUP DSC SETUP AUTO POS POLLING 2 Press the or key to select POS REQUEST or POS REPORT then press the ENTER soft key BACK ENTER AUTO POS POLLING POS REQ...

Page 62: ...T MEMORY YAESU USCG MEMORY SHIPS HORIZON 5 Repeat steps 3 and 4 for all the desired individual to be polled BACK SELECT SELECT ID 1 HORIZON 2 MEMORY SHIPS 3 USCG 2 4 YAESU 1 6 Press the BACK soft key to return to AUTO POS POLLING 10 9 4 Enabling Disabling Auto POS Polling 1 DSC AUTO POS POLLING AUTO POS POLL 2 Press the or key to select ACTIVATION START then press the SELECT soft key BACK SELECT A...

Page 63: ...ss the or key to select an individual you want to contact then press the SELECT soft key BACK SELECT MEMORY YAESU USCG MEMORY SHIPS HORIZON 3 Press the YES soft key to transmit the test signal TEST CALL YAESU CATEG SAFETY Transmit a Call YES NO 4 After the DSC test call is transmitted the trans ceiver waits for a reply from the radio which was called and the display will show WAITING FOR ACK To tr...

Page 64: ...ES NO 7 After the DSC test call is transmitted the trans ceiver waits for a reply from the radio which was called and the display will show WAITING FOR ACK To transmit again press the RESEND soft key TEST CALL 366901555 CATEG SAFETY SINCE 00 05 Waiting for ACK RESEND QUIT 8 When an acknowledgement signal is received the display will show Received ACK TEST CALL 366901555 CATEG SAFETY SINCE 00 05 Re...

Page 65: ...D LOG then press the SELECT soft key BACK SELECT DSC LOG TRANSMITTED LOG DISTRESS LOG OTHER CALL LOG LOG DELETE 3 Press the or key to select the station name or MMSI number you want to review the call then press the SELECT soft key BACK SELECT TRANSMITTED LOG HORIZON MEMORY SHIPS USCG YAESU 4 Press the or key to scroll the display BACK DELETE TRANSMITTED LOG INDIVIDUAL 123456789 YAESU TX TM 12 56 ...

Page 66: ...56 UTC DATE 12 JAN BACK DELETE DISTRESS LOG DATE 12 JAN CATER ROUTINE CH 06 Delayed ACK 5 Press the BACK soft key to go back to the DSC distress call list 10 11 3 Reviewing a Logged Other Calls The transceiver allows received calls individual group all ships etc to be reviewed 1 DSC DSC LOG 2 Press the or key to select OTHER CALL LOG then press the SELECT soft key BACK SELECT DSC LOG TRANSMITTED L...

Page 67: ...elect the category TRANSMITTED LOG DISTRESS LOG OTHER CALL LOG or ALL LOG to be deleted then press the SELECT soft key BACK SELECT LOG DELETE TRANSMITTED LOG DISTRESS LOG OTHER CALL LOG ALL LOG 4 Press the YES soft key to delete logs of the selected category To cancel press the NO soft key YES NO LOG DELETE TRANSMITTED LOG Do you want to delete the LOG 5 Complete will appear on the display and aut...

Page 68: ... shown allowing you to see who is calling This function is similar to caller id on a cellular phone Refer to section 10 4 2 Setting up Individual Call Reply for setting 11 1 3 Individual Acknowledgement The radio can be setup to transmit a reply automatically default or set so the radio will not reply to an individual call Refer to section 10 4 3 Setting up the Individual Call Acknowledgment for s...

Page 69: ...ty is received the transceiver will automatically switch to the channel 16 This MENU selection allows the automatic switching time to be changed 1 SETUP DSC SETUP AUTO CH CHANGE 2 Press the or key to select the desired time then press the ENTER soft key The switch ing time can be set to OFF 10 sec 30 sec 1 min 2 min 5 min or 10 min BACK ENTER AUTO CH CHANGE OFF 10 sec 30 sec 1 min 3 Press the CLR ...

Page 70: ...hannels the radio must be programmed This section allows channels to be stored in scan memory Refer to section 9 10 2 Programming Scan Memory for details 11 2 5 Scan Type This selection is used to select the scan mode between MEMORY SCAN and PRIORITY SCAN Refer to section 9 10 1 Selecting the Scan Type for details 11 2 6 Scan Resume This selection is used to select the time the transceiver waits a...

Page 71: ... ENTER SUB CH CH 06 CH 07 CH 08 CH 09 S CH 3 Press the ENTER soft key to store the new setting 4 Press the CLR key to return to radio operation 11 3 ATIS SETUP GX1400GPS E only The GX1400GPS E supports the ATIS Automatic Transmitter Identification System used in Inland waterways in Europe When enabled ATIS mode transmits a unique ATIS code each time the PTT switch is released at the end of a trans...

Page 72: ...erform steps 2 through 4 above ATIS CODE INPUT 1st 2nd BACK SELECT FINISH 6 After the second number has been input press the FINISH soft key to store the ATIS number in memory 7 Press the OK soft key to return to radio operation ATIS CODE INPUT STORED CODE 9366901230 OK 11 3 2 ATIS CH Group The GX1400GPS E has the capability to turn on and off the ATIS feature for each channel group 1 SETUP ATIS S...

Page 73: ...display The default setting is ddd mm mmm 1 SETUP GPS SETUP LOCATION FORMAT 2 Press the or key to select the desired coordinate system BACK ENTER LOCATION FORMAT dd mm mmm dd mm mm dd mm SS 3 Press the ENTER soft key to store the new setting 4 Press the CLR key to return to radio operation 11 4 2 Time Offset This selection sets the time offset from UTC time GPS sends to radio Refer to section 8 8 ...

Page 74: ...NMEA 0183 baud rate of the GPS input Yellow and Green wires and DSC output White and Brown wires The default setting is 4800 bps When 38400 bps is selected the DSC sentences DSC DSE are output on the White and Brown wires after a DSC distress position request is received 1 SETUP GPS SETUP BAUD RATE 2 Press the or key to select the desired speed from 4800bps and 38400bps BACK ENTER BAUD RATE 4800bp...

Page 75: ...POS data will be output at intervals of two seconds or less When all sentences are set to be output depending on the baud rate not all sentences can be output at intervals of one second or less GSA and GSV sentences will be output at intervals of around five seconds 11 5 CONFIGURATION SETUP 11 5 1 Dimmer Adjustment Allows adjustment of the backlight intensity or to turn it off 1 SETUP CONFIGURATIO...

Page 76: ...3 Press the ENTER soft key to store the selected level 4 Press the CLR key to return to radio operation NOTE 11 5 4 Soft Keys This MENU item assigns the number of soft keys soft key selection and how long the display will show the soft key icon after a soft key is pressed Assigning Soft Keys 1 SETUP CONFIGURATION SOFT KEY 2 Press the or key to select KEY ASSIGN MENT then press the SELECT soft key ...

Page 77: ... Add or remove channels from memory channel scan 04 DW TW Starts and stops dual watch or triple watch scan 06 PRESET Programs or deletes the pre set memory channel 10 GX1400GPS GX1400 01 GX1400GPS E TX HI LO Selects transmit power 02 Selecting How Long the Soft Keys are Shown 1 SETUP CONFIGURATION SOFT KEY 2 Press the or key to select KEY TIMER then press the SELECT soft key BACK SELECT SOFT KEY K...

Page 78: ...T soft key 4 Press the YES soft key To cancel press the NO soft key YES NO RESET DSC SETUP DO you want to reset it 5 Press the OK soft key OK RESET DSC SETUP COMPLETE 6 Press the CLR key to return to radio operation 11 5 6 Reset the USER MMSI and ATIS CODE If the MMSI number and ATIS code GX1400GPS E only need to be reset Please contact Standard Horizon to obtain the required reset codes To reques...

Page 79: ... The request code will be displayed BACK SELECT USER MMSI RESET REQUEST CODE PASS CODE NOTE When resetting both USER MMSI and ATIS CODE both request codes are required Resetting the USER MMSI and ATIS codes Here is the procedure for resetting the USER MMSI and ATIS codes after obtaining the reset codes 1 The RESET screen is displayed on step 2 in Checking the Request code 2 Press the or key to sel...

Page 80: ...istake was made entering in the station name press the key to select or press the SELECT soft key until the wrong character is selected then perform step 3 5 Press the FINISH soft key If the reset is successful COMPLETE will appear on the screen If the error message is displayed input the reset code again OK USER MMSI RESET COMPLETE 6 Press the OK soft key to return to setup screen NOTE The acquir...

Page 81: ...ct your Dealer or our repair facility 12 1 REPLACEMENT PARTS Commonly requested parts and their part numbers are listed below Power Cord T9025406 VOL SQL Knob Black RA618990A VOL SQL Knob White RA618980A Mounting Bracket Black RA6208600 Mounting Bracket White RA6208500 Mounting Bracket Knob Black RA6204100 Mounting Bracket Knob White RA6204000 Microphone Hanger Black RA0458800 Microphone Hanger Wh...

Page 82: ...ernal or external speaker Accessory cable Check the connections of the accessory cable Possible short circuit on the External speaker cable WHITE SHIELD Receiving station report low transmit p o w e r e v e n w i t h transceiver set to HI power Antenna Have the antenna checked or test the trans ceiver with another antenna If the problem persists contact your Dealer for servicing HI BATTERY or LO B...

Page 83: ...rcial Inter ship only 09 X X X S 156 450 Boater Calling channel Commercial Non commercial Recreational 10 X X X S 156 500 Commercial 11 X X X S 156 550 Commercial VTS in selected areas 12 X X X S 156 600 Port operation VTS in selected areas 13 X X X S 156 650 Inter ship Navigation Safety Bridge to bridge 14 X X X S 156 700 Port operation VTS in selected areas 15 X S 156 750 Environmental Receive o...

Page 84: ...t Coast Guard East Coast commercial fishing only 62 X D 156 125 160 725 Public Correspondence Marine Operator Port operation ship movement 1062 X S 156 125 Public Coast Coast Guard East Coast commercial fishing only 63 X D 156 175 160 775 Public Correspondence Marine Operator Port operation ship movement 1063 X X S 156 175 Port Operation and Commercial VTS in selected areas 64 X X D 156 225 160 82...

Page 85: ...ip movement 1079 X X S 156 975 Commercial 1079 X S 156 975 Port operation and Ship movement 2079 X S 161 575 80 X D 157 025 161 625 Port operation ship movement 1080 X X S 157 025 Commercial 81 X D 157 075 161 675 Port operation ship movement 1081 X X S 157 075 U S Government Only Environmental protection operations USA Canadian Coast Guard Only Canada 82 X D 157 125 161 725 Public Correspondence ...

Page 86: ...950 SIMPLEX 2019 161 550 SIMPLEX 20 157 000 161 600 DUPLEX LOW 6 PORT OPR NAUTIK 1020 157 000 SIMPLEX 2020 161 600 SIMPLEX 21 157 050 161 650 DUPLEX INTL NAUTIK 22 157 100 161 700 DUPLEX INTL NAUTIK 23 157 150 161 750 DUPLEX INTL 24 157 200 161 800 DUPLEX TELEPHONE 25 157 250 161 850 DUPLEX TELEPHONE 26 157 300 161 900 DUPLEX TELEPHONE 27 157 350 161 950 DUPLEX TELEPHONE 28 157 400 162 000 DUPLEX ...

Page 87: ... 161 875 DUPLEX TELEPHONE 86 157 325 161 925 DUPLEX TELEPHONE 87 157 375 SIMPLEX PORT OPR 88 157 425 SIMPLEX PORT OPR M 3 157 850 SIMPLEX YACHTING UK M2 3 161 425 SIMPLEX YACHTING UK L1 5 155 500 SIMPLEX PLEASURE L2 5 155 525 SIMPLEX PLEASURE L3 5 155 650 SIMPLEX PLEASURE F1 5 155 625 SIMPLEX FISHING F2 5 155 775 SIMPLEX FISHING F3 5 155 825 SIMPLEX FISHING NOTE Country Channel assignment are diff...

Page 88: ...els Dimensions W x H x D 6 14 x 2 40 x 3 94 156 x 61 x 100 mm Flush Mount Dimensions W x H x D 5 16 x 1 97 x 4 72 131 x 50 x 120 mm Weight 1 76 lbs 800 g z zTRANSMITTER Frequency Range 156 025 MHz to 161 600 MHz Inter National RF Output 25 W Hi 1 W Lo Conducted Spurious Emissions Less than 80 dB Hi 66 dB Lo Audio Response within 1 3 of a 6 dB octave pre emphasis characteristic at 300 to 3000 Hz Au...

Page 89: ...3 13 European version Meets ITU R M493 14 z zINTERNAL GPS RECEIVER GX1400GPS and GX1400GPS E only Receiver Channels 66 Channels Sensitivity Less than 147 dBm Time to First Fix 1 minute typical Cold Start 5 seconds typical Hot Start Geodetic Datum WGS84 NMEA 0183 INPUT OUTPUT Sentences 4800 Baud selected NMEA 0183 Input 4800 baud GGA GLL GNS RMC GSA GSV NMEA 0183 Output 4800 baud DSC DSE GGA GLL GN...

Page 90: ...5 1 129 mm 6 14 156 mm 6 63 168 4 mm 5 47 139 mm 2 4 61 mm 3 58 91 mm 2 36 60 mm 1 58 40 mm 2 86 72 5 mm 1 16 29 5 mm 1 9 48mm 2 56 65 mm 2 4 61 mm 6 14 156 mm 5 1 129 mm 2 36 60 mm 1 58 40 mm 2 86 72 5 mm 1 9 48mm 1 16 29 5 mm ...

Page 91: ...ATE for the GX1400 Series Use this template to mark the location where the rectangular hole for the flush mount is to be cut 131 mm 51 mm R 5 cut here Check out the collection of marine fish finders we offer ...

Reviews: