background image

- 11 -

EN


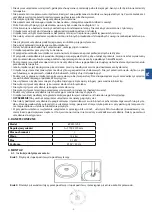
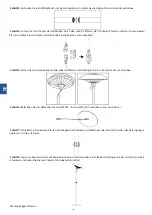
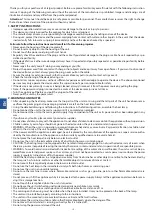
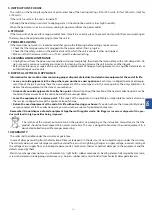
Handle with care, avoiding vibration and impact.


The unit must be grounded during operation.


If the unit is damaged, it must be repaired by professional electricians.


If the power cord is damaged, it must be replaced by authorized repair personnel or other similarly qualified persons to avoid 

a hazard.


After assembling the unit, make sure that there are no wooden parts or flammable objects on or near the unit.


If the unit is operated by a child, this must always be done under adult supervision.


This unit is intended for household use only. It is not intended for use on construction sites, in greenhouses, barns or barns 

where there is combustible dust.


The instrument head becomes very hot during operation. Disconnect the device from the power supply and let it cool down 

before cleaning.


Do not use the unit where there are corrosive fumes or gases, steam or dust, etc.


Do not use the appliance as a clothes or towel dryer.


Do not use the device as a sauna heater.


Do not use this unit in animal breeding or rearing areas.


When cleaning the device, do not immerse it in water or other liquids.


Plug the unit into a power outlet that is visible and easily accessible.


WARNING! To avoid overheating the unit, do not cover it.


Do not connect the unit to programmers and timers or other clock mechanisms or governments that would cause the lamp 

to turn on automatically, as there is a risk of fire if the lamp is set incorrectly or is covered.


If you turn the unit on and off within a few minutes, you will hear a sound caused by heat spreading. This is a normal pheno-

menon and does not indicate damage to the unit. Allow the unit to cool down.

3. TECHNICAL SPECIFICATION

Model

692301V02

Height adjustment

h=1700-2070 mm

Protection class

I

Weight 

13,3 kg

Power

2,1 kW

Power supply 

230 V /50Hz

4. MONTAGES

4.1.  

Installation instructions

Step 1: 

Screw the base post to the lamp base.


Step 2: 

Pass the power cord through the base and base post and pull about 2m of cord through them.

Step 3: 

Connect the center post to the base post by twisting them together.

Summary of Contents for 692301V02

Page 1: ...CHER TERASSENHEIZER ELECTRIC PATIO HEATER Instrukcja obs ugi Instrukcja oryginalna Bedienungsanleitung bersetzung der Originalbedienungsanleitung Instruction manual Translation of the original manual...

Page 2: ...tu Uwaga Je eli wtyczka kabla zasilaj cego jest pod czona do kontaktu urz dzenie ca y czas pozostaje pod napi ciem Wy cz urz dzenie zanim wyci gniesz wtyczk z kontaktu Nigdy nie ci gnij urz dzenia za...

Page 3: ...iwane przez dziecko musi si to odbywa zawsze pod nadzorem osoby doros ej Urz dzenie jest przeznaczone wy cznie do u ytku w gospodarstwach domowych Nie jest przeznaczone do u ytku na pla cach budowy w...

Page 4: ...5 Na o y g owic lampy na s upek g rny i przymocowa j za pomoc dw ch rub 2x8 mm Krok 6 Przymocuj kabel zasilaj cy do gumowej podstawy za pomoc dw ch rub M4X30 i dw ch M4x50 Krok 7 Wsun lub wysun s upek...

Page 5: ...wid owych zasadach post powania ze zu ytym sprz tem elektrycznym i elektronicznym Zostaw stary sprz t w sklepie w kt rym kupujesz nowe urz dzenie Ka dy sklep ma obowi zek nieodp atnego przyj cia stare...

Page 6: ...HINWEISE Vergewissern Sie sich nach dem Auspacken der W rmelampe dass keine Teile des Ger ts fehlen und dass alle Teile aus der Verpackung entfernt wurden und keine Verpackungsmaterialien am Kopf der...

Page 7: ...sgebrauch bestimmt Es ist nicht f r den Einsatz auf Baustellen in Gew chsh usern Scheunen oder St llen vorgesehen in denen brennbarer Staub vorhanden ist Der Ger tekopf wird im Betrieb sehr hei Trenne...

Page 8: ...ampenkopf auf den oberen Pfosten und befestigen Sie ihn mit zwei 2x8 mm Schrauben Schritt 6 Befestigen Sie das Netzkabel mit zwei M4X30 und zwei M4x50 Schrauben an der Gummibasis Schritt 7 Schieben Si...

Page 9: ...n Jedes Ge sch ft ist dazu rechtlich verpflichtet das alte Ger t kostenlos entgegenzunehmen soweit ein neues Ger t derselben Art und in derselben Menge gekauft wird Der K ufer ist lediglich dazu verpf...

Page 10: ...semble the heat lamp Do not connect the unit to the mains supply until it is completely assembled Do not connect the unit to the mains power supply if any component of the unit or its power cord has b...

Page 11: ...dryer Do not use the device as a sauna heater Do not use this unit in animal breeding or rearing areas When cleaning the device do not immerse it in water or other liquids Plug the unit into a power...

Page 12: ...ecure it with two 2x8mm screws Step 6 Attach the power cable to the rubber base using two M4X30 and two M4x50 screws Step 7 Slide the top post in or out to the desired height and attach to the center...

Page 13: ...you buy there the new equipment of the same type and in the same quantity The only condition is to deliver the old equipment to the store at your expense Dispose of your old equipment at a collection...

Page 14: ......

Page 15: ......

Page 16: ...algast de www stalgast de EN Tel 48 22 509 30 77 export stalgast com www stalgast eu FR ES Tel 48 22 509 30 55 export stalgast com www stalgast eu Stalgast Sp z o o Plac Konesera 9 Budynek O 03 736 Wa...

Reviews: