Square
One
User’s
Guide
Page
27
Adding
a
shared
printer
as
a
network
printer
1.
On
the
Start
menu,
click
Run
.
The
Run
dialog
box
opens.
2.
Type
control
printers
and
press
Enter.
The
Printers
and
Faxes
window
opens.
3.
Click
Add
a
printer
or
double
‐
click
the
Add
Printer
icon.
The
Add
Printer
Wizard
dialog
box
opens.
Click
Next
.
4.
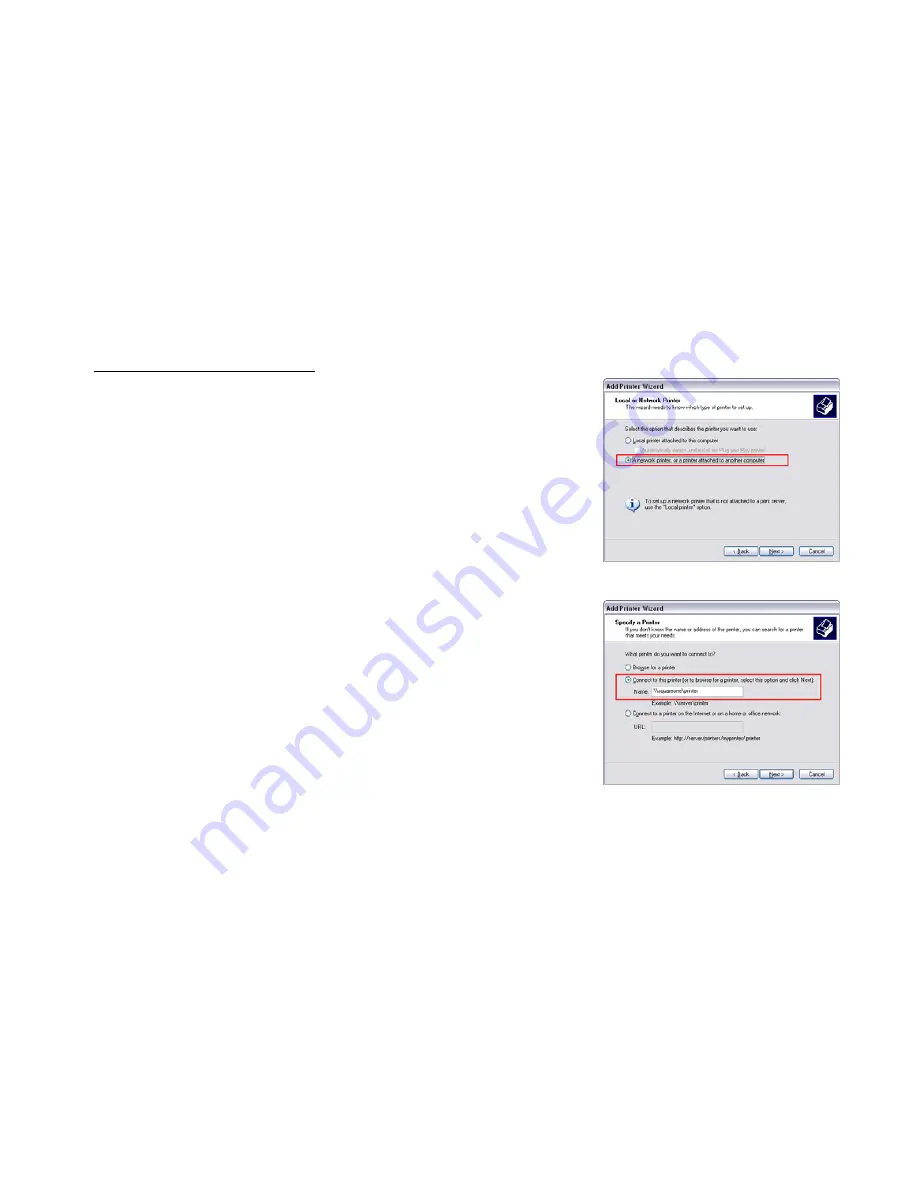
Select
A
network
printer,
or
a
printer
attached
to
another
computer
(see
Figure
15).
Click
Next
.
5.
Select
Connect
to
this
printer
and
then,
in
the
provided
field,
type
\\squareone\printer
(see
Figure
16).
(Note:
If
you
are
connecting
to
your
Personal
Server
through
another
router,
substitute
the
server’s
WAN
IP
address
for
“squareone”.)
Click
Next
.
The
Connect
to
Printer
dialog
box
opens.
6.
Click
Yes
.
The
Connect
to
Printer
dialog
box
opens
again.
Click
OK
.
A
second
Add
Printer
Wizard
dialog
box
opens.
7.
If
the
correct
printer
driver
is
already
installed
on
the
computer,
select
the
printer
manufacturer
and
model,
click
OK
,
and
skip
to
Step
10.
8.
Click
Have
Disk
.
The
Install
From
Disk
dialog
box
opens.
9.
Click
Browse
.
Locate
the
folder
containing
the
appropriate
printer
driver
and
click
Open
.
Click
OK
.
A
third
Add
Printer
Wizard
dialog
box
opens.
10.
Select
the
correct
printer,
and
then
click
OK
.
11.
If
a
Software
License
Agreement
dialog
box
appears,
click
Yes
.
12.
Click
Finish
to
close
the
Add
Printer
Wizard.
When
you
finish
the
Add
Printer
Wizard,
the
shared
printer
will
appear
in
the
Printers
and
Faxes
window
as
printer
on
squareone
.
Figure
15
Figure
16


