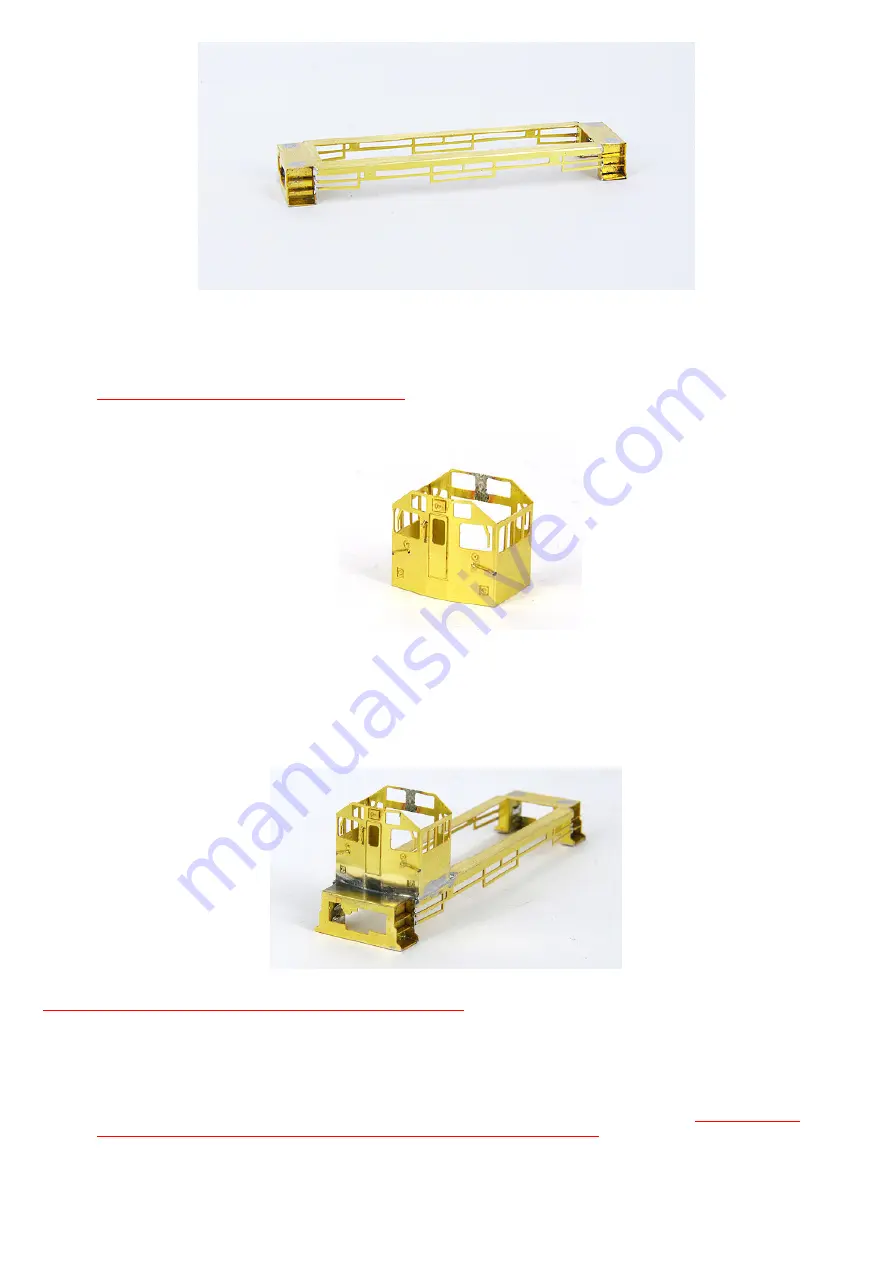
Cab:
1.
Whilst the cab etch (P4) is still flat fit a 3.0mm cab door handrail into the holes provided. Insert a small bit of paper
(photocopy paper thickness is ideal) between the handrail and the cab so that when soldered there will be a space beneath
the handrail after the paper is withdrawn when the soldering is done. If you need to open the holes up use a 0.3mm or
no79-80 drill
2.
Using long-nose pliers bend the cab front (P4) into the familiar shape of the ‘Y’ class. Only a small amount is needed.
Fold lines are marked on the inside of the cab
3.
Fold the remaining sides until the back of the cab meets and aligns and solder. View from above and push/pull the cab into
shape and looks as it should for a Y class
4.
Test fit the cab onto the walkway and then tin the area where the cab will sit on the walkway (P1) and also the bottom
edges of the cab (P4) itself
5.
Test fit the cab (P4) so that its edge is in line with the same shape that is in the walkway (P1) near the steps. When
happy that the cab is central and conforms to the shape of the walkway, solder one edge near the front and then check for
alignment again. If all is well solder the remaining sides of the cab to the floor
6.
Fit 3.5mm handrails for the remaining 2 cab handrails into the holes provided. If you need to open the holes up use a
0.3mm or no79-80 drill to clear away excess solder
7.
Glue a loco headlight (P5) into the square above the front door window
Cab roof:
Note -The large fold lines are on the underside of the cab roof.
1.
Insert 2 lift rings (P23) into the holes provided on top of the roof (P7) and solder/glue from underneath. Enlarge the
holes if necessary carefully with no 78-drill bit or a 0.3mm drill bit. Trim the excess length of lift rings below the roofline
once soldered. It may be easier to spot the holes by looking at the underside of the cab roof
2.
Fold the cab roof (P7) to the cab profile and set it aside. This is glued in place after painting during the final assembly
Long Hood:
1.
Run a small bead of solder along the fold line of the nose where it meets the long hood roof (P8).
This is a safety
precaution so that you don’t accidentally break it off during the next steps
2.
Make 2 x 2mm handrails that will fit into the long hood (P8) roof near the rear grill. They run across the long hood. Again
use paper to space and solder the handrails into place and enlarge the holes if necessary carefully with no 78-drill bit or a
0.3mm drill bit
3.
Fit and solder the long hood handrails (P9) into the holes provided along the side of the long hood. Use a paper spacer to
make the handrails stand proud of the long hood sides


