SpectraPure
SpectraPure®Inc.
480.894.5437 Call us toll-free 1.800.685.2783
215 South Industrial Drive, Suite 2A Tempe, Arizona 85281-2941
®
20
System Troubleshooting Guide
Product Water - Low Production Rate
Cause
Corrective
Action
Plugged pre-filters
Replace pre-filters
Low water temperature
Heat feed water or use higher GPD membrane
Low water pressure
Use booster pump or use higher GPD membrane
Fouled membrane
Replace membrane
Membrane Troubleshooting Guide
The following chart illustrates the procedure for determination of RO membrane
performance. However, the chart represents only rough guidelines for determin-
ing performance of RO membrane. Depending on your tap water chemistry, the
rejection characteristics of the membrane may vary significantly.
Method of Calculate %
Test Results
Conclusion
Testing
Rejection
TDS/
Measure feed water (X)
Is Rejection
No - Replace Membrane
Conductivity RO product water (Y)
greater than
Yes - Membrane OK
Tester
for TDS/Conductivity
95% ?
Alkalinity
Measure feed water (X)
Is Rejection
No - Replace Membrane
Test Kit
RO product water (Y)
greater than
Yes - Membrane OK
for
Alkalinity
90%
?
Hardness
Measure feed water (X)
Is Rejection
No - Replace Membrane
Test Kit**
RO product water (Y)
greater than
Yes - Membrane OK
for
Hardness
90%?
**Caution: This test is not to be used on softened water sources.
Membrane Testing
SpectraPure
®
SpectraPure®Inc
.
Fax 480.894.6109 Fax us toll-free 1.877.527.7873
E-mail: [email protected] Visit us on the web www.spectrapure.com
5
System Information
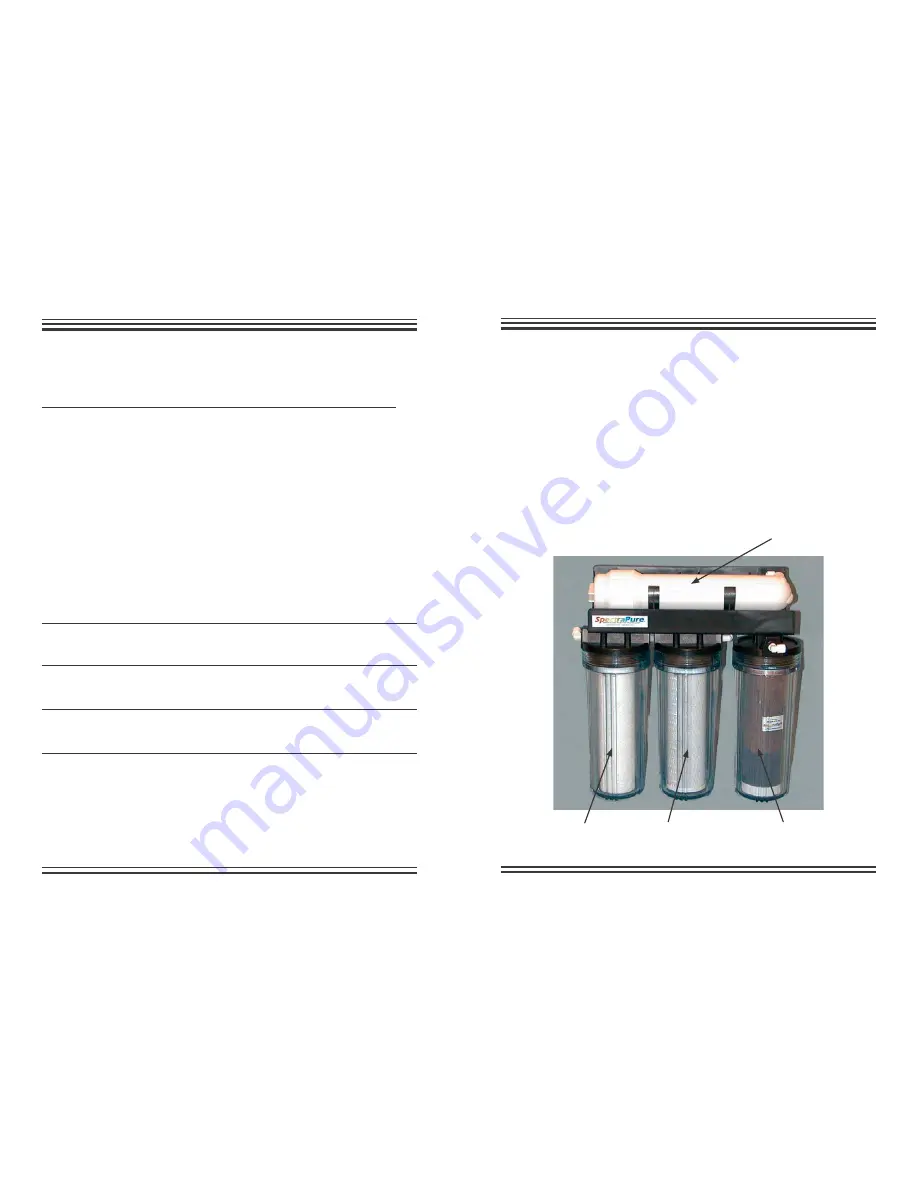
Fig. A: System Diagram
TFC RO Membrane
(TFC-XX)
Color-Indicating
DI Cartridge
(DI-SB-CC-10)
1 micron MicroTec™
Sediment Pre-Filter
(SF-MT-1-10)
10 micron
Carbon Block
Filter (CF-10-10)
To re-insert the tubing into its push-fitting:
a.) Moisten the O-ring seal inside the concentrate outlet fitting by
dripping a few drops of clean water into the fitting.
b.) Grasp the yellow tubing near the flow restrictor end,
and insert the tubing into the push-fitting. Push the tubing into
the fitting until resistance is felt, approximately 1/2 inch (12.7
mm). The tubing is now resting on the O-ring seal inside the
fitting.
c.) Firmly push the tubing approximately an additional 1/4 inch
(6.35 mm) further into the fitting to completely seat the line into
the fitting and O-ring seal.


