Spectral RM5100 User Manual Download Page 16

www.spectralcomputers.com

User Manual

13

Quick Backup

The Quick Backup option is used for quickly creating a new Incremental Backup point to  
backup your hard drive and protect your data. 

Click the Quick Backup button. The Digital Backup System will lock the hard drive. If any program  
is currently writing to the hard disk, the Digital Backup System will stop creating the Backup Point.  
If your computer locks up during this period, restart it manually and try again.
Note: The Digital Backup System does not create new Backup Points if it is unable to lock your hard drive. 
Close ALL applications when you create a new Backup Point.

Select Close when you have successfully created a new Backup Point. In this step you will not need 
to restart your PC.

It is strongly recommended you create a Quick backup point prior to installing any new software 
or hardware. By doing so, you could reverse in seconds any problems arising from the installation. 
It is also highly recommended you reboot the computer prior to creating a backup point.

Complete Backup 

The Complete Backup option allows users to save all data on the hard disk as a Complete  
Backup Point. This feature will overwrite the factory backup with your own backup if there  
is enough space. 

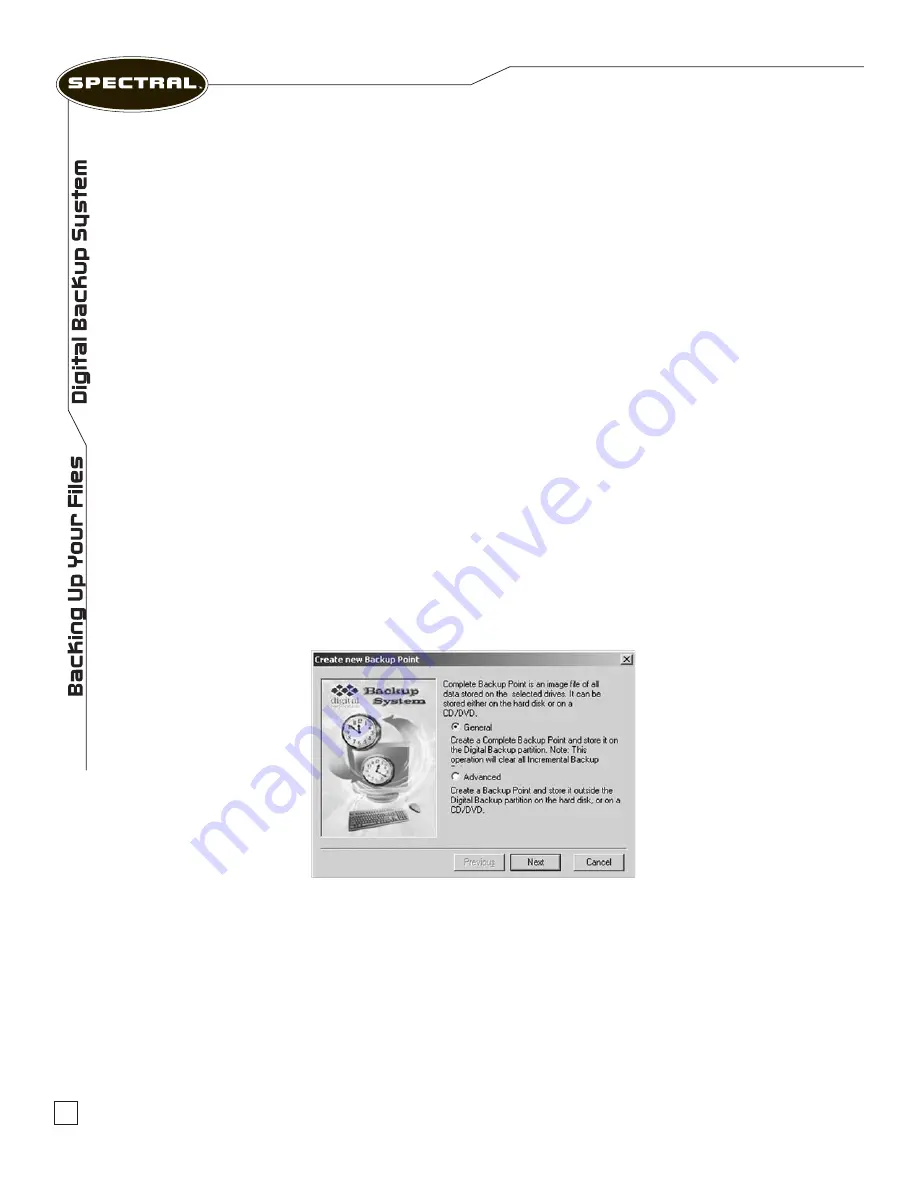
Click the Complete Backup button to open the dialog box shown below.

There are two different kinds of Complete Backup Points: General Complete Backup Point and 

Advanced Complete Backup Point.


The General Backup Point 

can back up the first hard disk that is protected by the Digital Backup 


System only.  It is located in the Digital Backup System partition and only one General Backup 
Point is allowed to be created. 

The Advanced Complete Backup Point is not supported on this version.  Always select General.

Summary of Contents for RM5100

Page 1: ...User Manual Rackmount Systems Models RM5100 RM7100 RM7200 RM7400...

Page 2: ......

Page 3: ...omputer on a stable work surface 5 Only operate the computer using the power source type indicated on the rating label 6 If the computer has a voltage selector switch located on the back of the chassi...

Page 4: ...Upgrading to 64 bit Processing 10 Backing Up Your Files Digital Backup System 11 17 Features 12 System Manager in Windows 12 14 Quick Start 12 Quick Backup 13 Complete Backup 13 RestoringYour Compute...

Page 5: ...al Controller Door Lock USB Ports Front Power Switch Reset Button DVD CD RW Drive Removable Backup Drive Figure 1 0 FrontView Spectral RM5100 and RM7100 Power LED HD LED Thermal Controller Door Lock U...

Page 6: ...FireWire 400 Ports PCI Express 16X PCI PCI Express 1X Figure 1 3 BackView Spectral RM7100 RM7200 RM7400 with Intel Processors LAN Port Ethernet 10 100 1000 Digital Audio Output Optional VGA Output S V...

Page 7: ...use Connecting Your Keyboard 1 Locate the purple PS 2 port on the back of the chassis 2 Properly orient the keyboard s PS 2 connector with this port and gently push until the connector is fully insert...

Page 8: ...nal cable to the monitor s 15 pin D SubVGA connector located at the back of the monitor 4 Secure the connections by tightening the two fasteners at each end of the signal cable 5 Connect one end of th...

Page 9: ...since your video card features multi monitor support RM7100 RM7200 and the RM7400 only 1 Turn off your computer 2 Connect the DVI to VGA adapter or DVI cable to your video card s DVI connector located...

Page 10: ...he Settings tab change the Display pull down menu to the second monitor 15 Now check the box marked Extend my Windows desktop onto this monitor 16 Hit the Apply button when you ve finished making the...

Page 11: ...Time Setup Press button B for 3 seconds to adjust the time minute and hour Use button A and B to select minutes when the number is flashing Wait 3 seconds for hour setup Setup mode will terminate if...

Page 12: ...ct Flash SD Secure Digital Microdrive MMC Multi Media Card SM Smart Media Memory Stick Your Removable Backup Hard Drive RM7200 and RM7400 Only Figure 2 5 Removable Hard Drive Removing the Rack from th...

Page 13: ...IMMs in Channel A equals the combined capacity of the two DIMMs in Channel B Also the DIMMs are matched between DIMM 0 and DIMM 1 of both channels Upgrading to 64 bit Processing Your new Spectral comp...

Page 14: ...ility Once installed the Digital Backup System continually monitors and keeps a complete record of all activities on the system hard drive The Digital Backup System gives you the power to recover lost...

Page 15: ...oint and lock it to prevent accidental removal Complete Backup Points Stores a permanent copy of your hard disk so even after years you can restore your system back to the day you first installed the...

Page 16: ...ed you create a Quick backup point prior to installing any new software or hardware By doing so you could reverse in seconds any problems arising from the installation It is also highly recommended yo...

Page 17: ...fWindows operating system Activating the Digital Backup System Manager To activate Digital Backup System program press the Space Bar after system POST Power on self testing before Windows begins to lo...

Page 18: ...al Backup System Manager DOS screen Use the Tab key to move through the screen selections The selected option will be highlighted Use the Down Arrow key to highlight Backup Points To make a selection...

Page 19: ...ckup Points and press OK once the system has restarted all original existing Incremental Backup Points will be cleared and your system will create a new Incremental Backup Point automatically The orig...

Page 20: ...es a convenient way of Enabling or Disabling Digital Backup System and maintaining your password Uninstall This option allows you to completely remove the Digital Backup System from your system All di...

Page 21: ...ting purposes To register your Spectral PC please go to the Spectral website www spectralcomputers com Click on the Product Registration icon on the product page When the registration form appears fil...

Page 22: ...D DEALERS WARRANT THAT THE SPECTRAL COMPUTERS WILL OPERATE UNINTERRUPTED OR ERROR FREE CUSTOMERS ARE SOLELY RESPONSIBLE FOR THE SELECTION OF THE PRODUCTS AND SOFTWARE TO ACHIEVE INTENDED RESULTS FOR P...

Page 23: ...20 Technical Support Phone No 818 981 3101 Fax No 818 981 3102 E mail support spectralcomputers com Web Site www spectralcomputers com Hours of Operation Weekdays 9 30 am 6 00 pm PST Mailing Address S...

Page 24: ...All trademarks and registered trademarks mentioned herein are recognized as the property of their respective holders Made in the U S A 0511 7533 www spectralcomputers com...

Reviews: