background image

NetClock 


Spectracom 

  NetClock 9483 Option Card Installation Guide, Rev.2 

Verifying HW Detection and SW Update 

Prior to beginning managing any features or functionality provided by the new card, it is advisable to 
verify the successful installation by ensuring the new option module has been detected by the 
NetClock unit. 

(a)  Re-install the top cover of the unit chassis (housing), using the saved screws. 


(b)  Power on the unit. 
(c)  Verify the successful installation by ensuring the option module has been detected: 


NetClock Web UI, ≤


Version 4.x


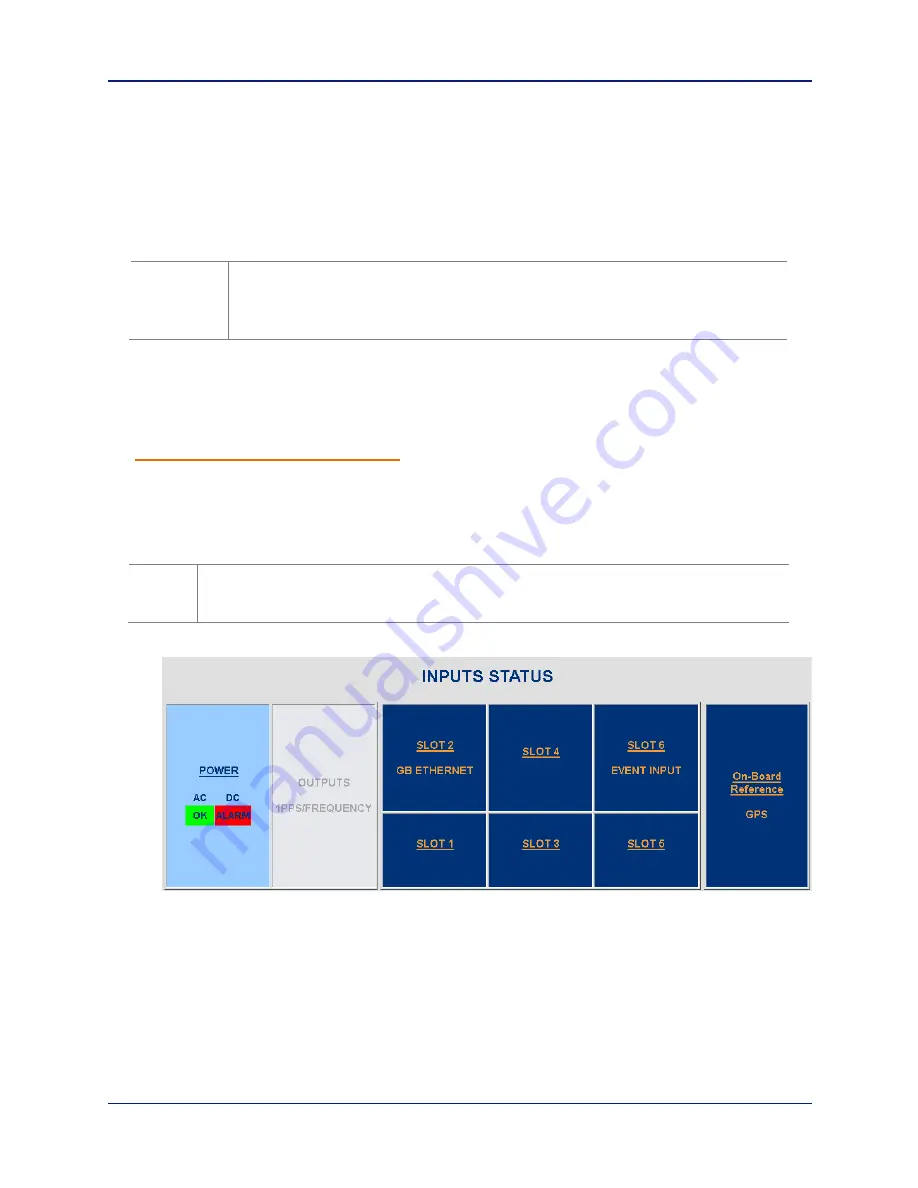
Open a web browser, and log in to the NetClock web interface. Navigate to the 

STATUS

/

INPUTS


and/or 

STATUS

/

OUTPUTS

  pages. Information displayed on these pages will vary depending 

upon your option module card/NetClock configuration (for example, the Multi-Gigabit Ethernet 
option module card has both input and output functionality, and so is displayed in both pages). 

NOTE

:  If after an installation the card does not appear to be properly identified, it may be 

necessary to update the NetClock system software to the latest available version. 


Example STATUS/INPUTS page – NetClock Web UI 


CAUTION

:  Ensure that screw holes on the card are properly lined up and  secured  to the 

chassis before powering the  unit up, otherwise damage to the equipment may 
result. 

Summary of Contents for NetClock 9483

Page 1: ...NetClock 9483 Time and Frequency Synchronization System Option Card Installation Guide 1209 5000 0052 Rev 2 November 2016...

Page 2: ...on Card Installation Instructions 3 Section B Specific Option Card Installation Instructions 5 Multi Gigabit Ethernet Option Card Installation 5 T1 E1 120 Ohm Option Card Installation 5 PTP Option Car...

Page 3: ...mmunications equipment Display clocks Security building access systems fire alarm systems The NetClock 9483 also includes backwards compatibility support with all previous generation NetClock products...

Page 4: ...of option card installation please carefully read the following safety statements and precautions to ensure that the NetClock unit has been safely and properly powered down with all AC and DC power co...

Page 5: ...re designated as Slot 1 Slot 6 as shown Figure 1 NetClock 9483 rear panel option module bay slots General Option Card Installation Instructions IMPORTANT NOTE Each of the available option cards must b...

Page 6: ...nel or if existing option card already installed in top Slot 2 or 4 use screwdriver to unscrew and remove the card from standoffs If standoffs are not already installed screw standoffs into the corner...

Page 7: ...iver screw the option card into the standoffs Connect any required cables and secure option card into place Replace chassis cover power on the unit Log in to NetClock web interface verify the installe...

Page 8: ...ority table will be reset back to the factory default state for the NetClock hardware configuration and the user operator will need to reconfigure the Reference Priority Table For additional informati...

Page 9: ...a web browser and log in to the NetClock web interface Navigate to the STATUS INPUTS and or STATUS OUTPUTS pages Information displayed on these pages will vary depending upon your option module card...

Page 10: ...d properly proceed with the Software update as described below to ensure NetClock and the newly installed card are using the same latest available version Updating the System Software Even if the newl...

Page 11: ...North American or European service centers or visit the Spectracom website at www spectracom com NOTE Premium Support Customers can refer to their service contracts for emergency 24 hour support North...

Reviews: