Technical data
a) HDMI switch
Input voltage/current ..........................5 V / DC, max. 2 A
Power consumption ...........................max. 5 W
Maximum resolution ..........................4096 x 2160, 60 Hz
Supported HDMI resolutions ............. 480 i, 480 p, 576 i, 576 p, 720 p, 1080 i, 1080 p, 2160 p (50 / 60 Hz,
PAL / NTSC)
Input................................................... 3 x HDMI sockets (item no. 1712301)
5 x HDMI sockets (item no. 1712300)
Output ................................................ 1 x HDMI socket
Vertical frequency range ....................50 / 60 Hz
Video bandwidth ................................6 Gbps / 600 MHz
Operating conditions. .........................0 to +40 °C, 10 - 85 % RH (non-condensing)
Storage conditions .............................-10 to +80 °C, 5 - 90 % RH (non-condensing)
Dimensions ........................................approx. 117 x 64.5 x 24.8 mm (L x W x H)
Weight ............................................... approx. 127 g (item no. 1712301)
approx. 132 g (item no. 1712300)
b)
Remote control
Power supply .....................................1 x 3 V button cell, type CR2025
c) Power adapter:
Operating voltage/current ..................100 - 240 V / AC, 50 / 60 Hz, max. 0.4 A
Output voltage / current .....................5 V/DC, 2 A
Setup
a)
Remote control
When changing the battery, also refer to the illustration on the back of the remote control.
• Replace the battery once a year or at the latest if the HDMI switch does not receive the signal or only
picks it up intermittently.
• Before first use, remove the battery insulating strip from the battery compartment by pulling it out.
• Remove the battery holder on the bottom of the remote control by pressing the latch towards the centre of
the battery holder and pulling out the battery holder at the same time.
• Insert a new CR2025, 3 V button cell into the battery holder. Pay attention to the correct polarity.
• Slide the battery holder back into the remote control. Make sure that it engages correctly in the housing.
b) Connecting and operating
• Before installation, make sure that all devices to be connected are turned off.
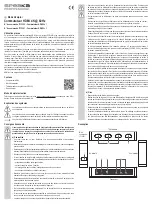
• Connect a suitable HDMI cable (not supplied) to the HDMI output
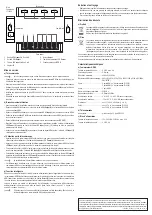
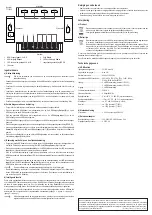
Output (2)
and to the HDMI input of an
HDMI monitor or projector.
• Connect a suitable HDMI cable (not supplied) to an HDMI input
Input (1)
and to the output of an HDMI
source device.
• Connect additional HDMI inputs
(1)
to the outputs of HDMI source devices until all connections are
engaged.
• Insert the low voltage plug of the supplied power adapter into the
DC 5 V
low voltage socket
(7)
.
• Plug the power adapter into a properly installed socket. The LED power light
Power
(6)
will turn green and
the LED indicator light
Input
(Input 1)
(3)
will turn blue. The product is now ready for use.
• Press the
Select
button
(5)
to switch to the active HDMI signal input and the respective LED indicator light
Input (3)
will turn blue.
c) Operation via remote control
• Make sure that the HDMI switch is connected to a properly installed socket (see chapter “Connecting and
operating”). The LED power light
Power
(6)
will turn green.
• Press the on/off button on the remote control to turn on the HDMI switch. The LED indicator light
Input
(Input 1)
(3)
will turn blue. The product is now ready for use.
• Now press a numeric key on the remote control or use the arrow keys to switch to the active HDMI source
device. The respective LED indicator light
Input (3)
of the active HDMI input will turn blue.
• To turn it off, press the on/off button on the remote control again. The LED indicator light
Input
(3)
goes
out. The LED power light
Power
(6)
remains green. Please note that the HDMI switch can only be switched
off by remote control.
The maximum range of the remote control is 10 m in the open field.
• The remote control works with infrared light. The infrared light beam must not be interrupted by obstacles
between the HDMI switch and the remote control. Therefore, aim the remote control at the HDMI switch
in a straight line.
d) Intelligent function
Once you have a source device turned on or connected to the power source (should be in power-on mode),
the HDMI switch will automatically select that source. The HDMI switch selects the last source device used
when two or more inputs are engaged. You can manually select one of the source devices by pressing the
Select
(5) button
. Alternatively, you can also use the remote control.
When the source device is turned off or disconnected from the power supply, the HDMI switch automatically
selects the source device that was previously turned on in the order (Input 5 -> Input 4 -> Input 3 ->
Input 2 -> Input 1).
If the source devices are in standby mode, their power supply should be turned off. Otherwise,
the HDMI switch cannot perform an intelligent function.
Care and cleaning
• Always disconnect the product from the power supply before cleaning it.
• Never use aggressive detergents, rubbing alcohol or other chemical solutions, as these may damage the
casing or cause the product to malfunction.
• Use a dry, lint-free cloth to clean the product.
Disposal
a) Product
Electronic devices are recyclable waste and must not be placed in household waste. At the end
of its service life, dispose of the product according to the relevant statutory regulations.
Remove any inserted batteries and dispose of them separately from the product.
b) Batteries
As the end user, you are required by law (Battery Ordinance) to return all used batteries; they
must not be disposed of in household waste!
Contaminated batteries are labelled with this symbol to indicate that disposal in household waste
is prohibited. The abbreviations for heavy metals in batteries are: Cd = Cadmium, Hg = Mercury,
Pb = Lead (the designation is on the batteries, e.g. below the trash symbol on the left).
Used batteries can be returned free of charge to collection points in your municipality, our stores or wherever
batteries are sold.
You thus fulfil your statutory obligations and contribute to protection of the environment.
This is a publication by Conrad Electronic SE, Klaus-Conrad-Str. 1, D-92240 Hirschau (www.conrad.com).
All rights including translation reserved. Reproduction by any method (e.g. photocopying, microfilming or capturing in
electronic data processing systems) requires prior written approval from the publisher. Reprinting, also in part, is
prohibited. This publication represents the technical status at the time of printing.
Copyright 2018 by Conrad Electronic SE.
*1712300_1712301_v2_1018_02_orf_m_en


