background image

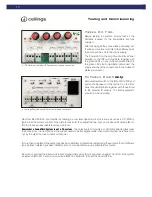
Checking the infrared coverage:

When the transmitters and detectors used on the installation have been set, check the infrared coverage in the 
teaching space or training room. 
Whilst the infrared is, in theory, line of site it readily re

fl

 ects off many surfaces (emitting power has also increased 

signi

fi

 cantly in line with improvements in LED technology). Provided the two sensors are installed and angled 

correctly, and the transmitter batteries are charged completely, coverage of all areas likely to be used by the 
teacher should be readily achieved. If this is not the case the sensors should be checked. 
Firstly ensure that the red LEDs are illuminated on both IS-20A sensors. Secondly test each individual sensor, 
preferably by substitution or, if a replacement is not available, by disconnecting each sensor in turn. The coverage 
with a single sensor should be distinctly poorer; if no change is observed suspect the sensors. 

Please note complete coverage is unlikely to be achieved with only a single sensor.

Chargers and Batteries:

It is vitally important that the correct regime is adopted with regard to battery charging if the performance of the 
system is to be maintained. In normal use, fully charged batteries will power the transmitters for approximately 4 
hours. Batteries will re-charge to 80% within 1 hour and fully within 5 hours using the supplied charger.

16

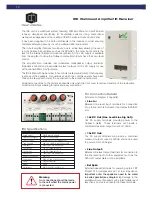
Setting the Transmitters

Important information

Your IWM-402 is supplied with a set of rechargeable batteries. However, if these should become lost or require 
replacement, it is critical that the following procedure is followed to allow your batteries to recharge correctly;
The IWM-402 has an inbuilt safety feature which will protect the Pendant and charger should someone insert 
standard AA batteries and attempt to recharge them.
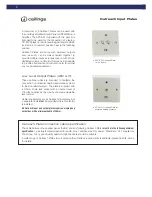
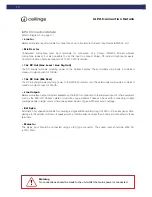
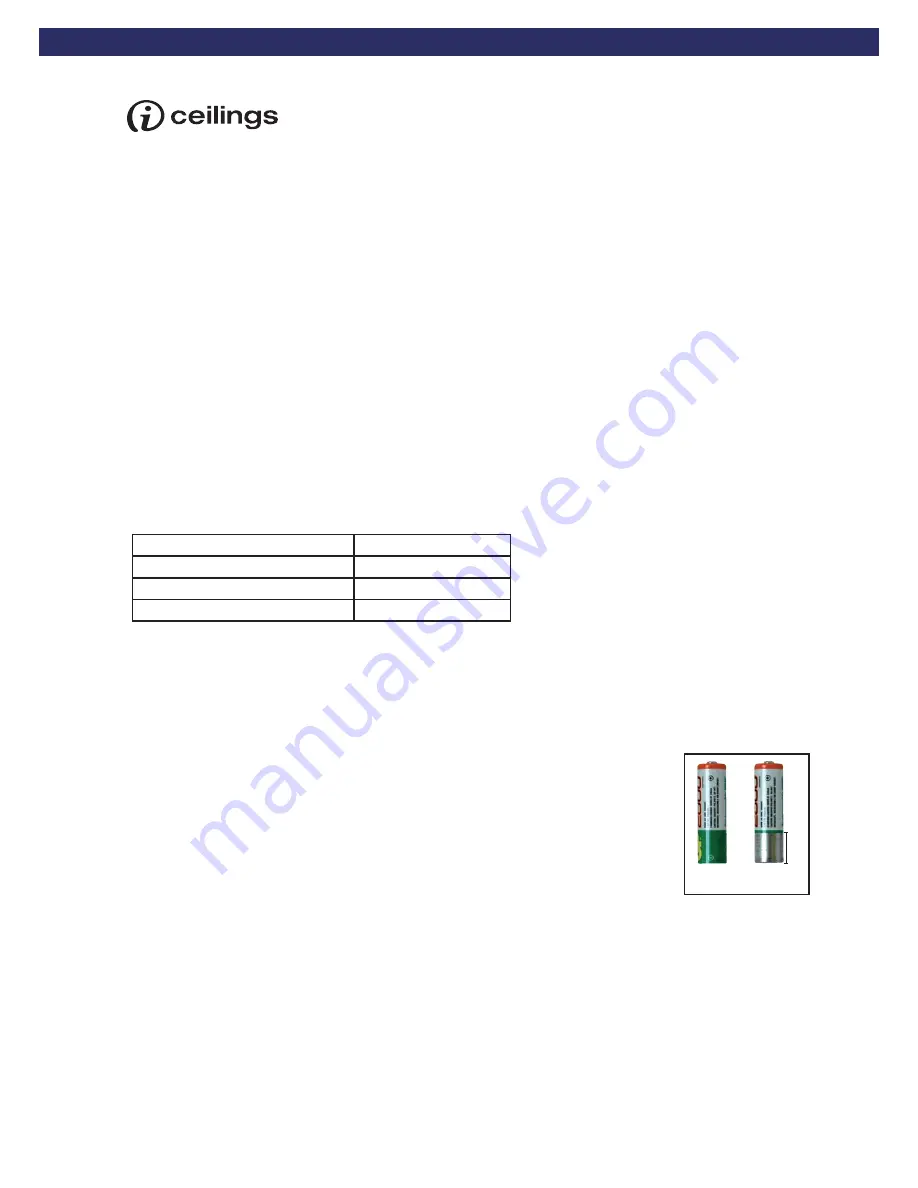
When installing a new set of rechargeable batteries please trim off 15mm of the plastic 
cover/sleeving from the negative end of the battery, insert into the transmitter and place 
into the Drop In charger. If this procedure is not carried out then the charger will not 
recharge the installed batteries.

• WILL 

CHARGE

• WON’T 

CHARGE

15mm

Microphone Type: 

Charger Option:

IWM-402 Pendant Transmitter 

HC-40 Drop-In Charger

IWH-401 Handheld Transmitter 

HC-40 Drop-In Charger

IWH-302 Handheld Transmitter 

HC-33 Drop-In Charger

*

HC-40 Charging indicator LED

Solid Red 

Charging

Solid Green 

Fully Charged

Flashing Red 

Poor battery condition/indication to replace or change the batteries

Note: Before charging either transmitter, please ensure that the batteries are installed the 
correct way around (pos-pos/neg-neg). Inserting the batteries the wrong way around will result 
in failure of/damage to the microphone transmitter. This is not covered under warranty.

Please demonstrate the equipment to the user and explain all the features and facilities. Make 
sure the user understands the charging and care of batteries. Finally leave the user manual 
with them, together with details of who to contact if service is required.

Summary of Contents for i-ceilings Pack B

Page 1: ...www soundfield uk com SYSTEM INSTALLATION GUIDE...

Page 2: ...and so large non reflective surfaces light absorbent surfaces such as black dark painted walls or large fabric coverage etc in the classroom which may reduce coverage must always be considered in the...

Page 3: ...ies for IWM 402 2 x Instructions Installation and Operation Manuals Pack F 4 x FBT Project 315 Wallmount Loudspeakers 1 x IRX Wallmount Amplifier IR Receiver 4 x 03284 Safety Cable 1 x IWM 402 Pendant...

Page 4: ...ble 10 10 Metre IR Sensor Extension Lead IWH 401 Handheld Transmitter Microphone 7W1B2V4 Rechargeable Battery for IWH 301A APA APL CD MP3 Laptop Wall Plate APA LLO Radio Assisted Hearing Aid Output Pl...

Page 5: ...ower Requirements Pack A B and C Systems A single 13 amp power point is all that is required as all ancillary Soundfield system items are powered directly from the panel amplifier If two speakers are...

Page 6: ...dfield system The plate is supplied with a 3 5mm 2pole jack socket with an output level of 775volts nominal set by means of a user adjustable level control Cable requirements are as Outreach input pla...

Page 7: ...the centre of the wall behind the teaching position and the same position on the opposite wall will give the best coverage see Diagram1 above alternatively position on opposite sides of the room The I...

Page 8: ...s used the amplifier is an integral part It supplies power to the IR receiver and any Outreach points as well as providing audio inputs and controls please refer to IAPA section for details on connect...

Page 9: ...eiver Both inputs have their own level controls An additional line level output 18v DC supply and external low impedance speaker output are also features of this unit The unit is fitted with High and...

Page 10: ...20 receiver only These terminals will provide a combined maximum output current of 500mA Line Output Balanced line level output terminals available on the IAPA for connection to the line level input o...

Page 11: ...V GND SPARE A OUT A OUT 18v 0v 18v 0v Optional NO MORE THAN 5 OUTREACH PLATES SHOULD BE CONNECTED MIC OUTPUTS OUTPUT LEVEL SET AT MIC SENSOR INPUTS DC IN IR RECEIVER 1 4 JACK POWER CONNECTOR R O S N E...

Page 12: ...w impedance Important note the speakers need to be wired in series parallel see diagram 4 Damage to the amplifierwilloccurifspeakerswithatotalimpedanceof less than 4 ohms are connected to these termin...

Page 13: ...cult to remove and avoids accidental disconnection of power Note If the mains cable needs to be disconnected from the IRX unit break the clear plastic cover on the red button of the rear of the IEC pl...

Page 14: ...vel signal from a music source such as a CD MP3 or laptop Set the volume control on the plate to maximum then adjust the line input on the Sound Panel amplifier or IRX to produce a reasonable level ov...

Page 15: ...ernatively adjust the level of the amplifier unit installed to compensate The microphone may be muted at at any time by pressing the mute button on the transmitter front if muted this will illuminate...

Page 16: ...t information Your IWM 402 is supplied with a set of rechargeable batteries However if these should become lost or require replacement it is critical that the following procedure is followed to allow...

Page 17: ...ive on Waste Electrical and Electronic Equipment 2002 96 EC the WEEE Directive For disposal details please go on line to www iceilings uk com weee htm 17 www soundfield uk com For further details on t...

Page 18: ...s However a number of acoustic factors lively noisy classes reverberant room conditions ambient noise from equipment outside hearing difficulties etc can have a significant effect on clear effective t...

Reviews: