Inserting and Ejecting CDs or DVDs
Avoid using adhesive labels to identify your CDs or DVDs. Adhesive labels may damage the optical drive if they come
off while the disc is in the drive.
To insert a disc
1.
Turn on the computer or exit a power saving mode (Standby or Hibernate) if one is active. For more information,
see
Using power saving modes.
2.
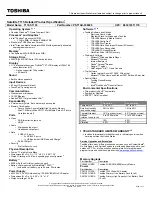
Press the Eject button on the optical drive cover to open the drive tray. The drive tray slides out.
Ejecting the Driv e Tray
3.
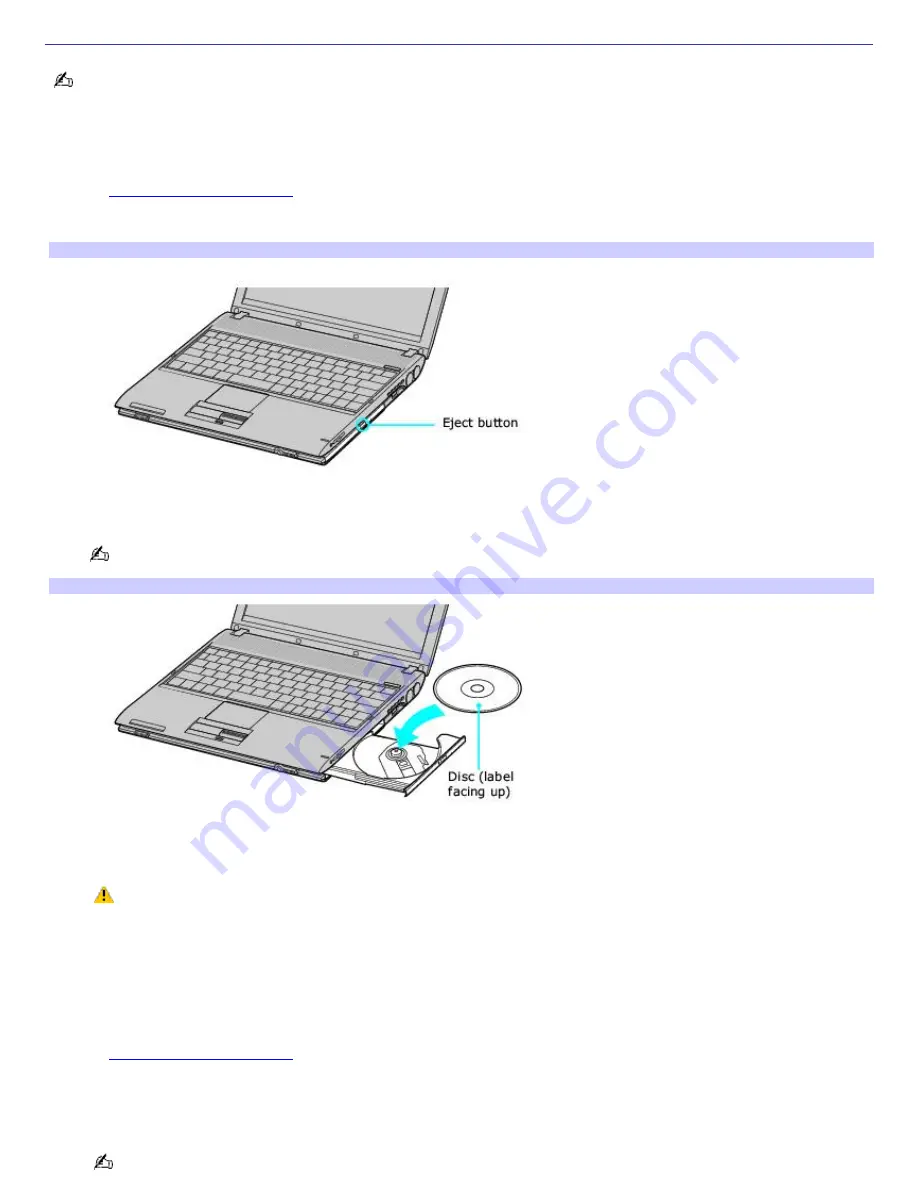
Place a disc on the drive tray with the label facing up.
You can play some DVDs on both sides. Insert this type of DVD with the label you want to play facing up.
Inserting a Disc
4.
Press the disc onto the tray until the disc clicks securely into place.
If you do not seat the disc firmly over the hub, the disc may come loose while it is in the drive. A loose
disc may damage the optical drive and make opening the drive tray difficult.
5.
Push the drive tray gently to close it. The Busy indicator on the drive cover blinks while your computer is reading
data from the drive.
To eject a disc
1.
Turn on the computer or exit a power saving mode (Standby or Hibernate) if one is active. For more information,
see
Using power saving modes.
2.
Close all programs that access the optical drive, and wait for the Busy indicator on the drive cover to turn off.
3.
Press the Eject button on the drive cover to open the drive tray. The drive tray slides out.
If the Eject button does not work, turn off the computer and insert a thin, straight object (such as a paper clip)
Page 47
Summary of Contents for VAIO PCG-V505DXP
Page 46: ...CDs and DVDs Inserting and Ejecting CDs or DVDs Copying and Playing CDs Playing DVDs Page 46 ...
Page 51: ...1 O ptical drive types vary depending on the model you purchased Page 51 ...
Page 59: ...Printer Connections Printing With Your Computer Page 59 ...
Page 82: ...Mice and Keyboards Using the Keyboard Connecting External Mice and Keyboards Page 82 ...
Page 85: ...Page 85 ...
Page 93: ...Floppy Disks and PC Cards Using a Floppy Disk Drive Using PC Cards Page 93 ...
Page 139: ...information Page 139 ...