Sony VAIO PCG-QR10 User Manual Download Page 51

Sony Not

e

book Us

er

 G

u

id

e

Connecting peripheral devices

51

n

N

Connecting two VAIO-notebooks

You can connect your notebook to another VAIO notebook using an i.LINK™ cable (not supplied). Your 
notebook includes Windows

®

 Millennium

®

 Edition and can be connected through i.LINK™ to any other 

VAIO computer that also has Windows

®

 Millennium

®

 Edition installed or that has Smart Connect 3.0. You 

can then use your computer to copy, edit or delete files from another VAIO computer.

You can also print a document on a printer connected to another VAIO computer.

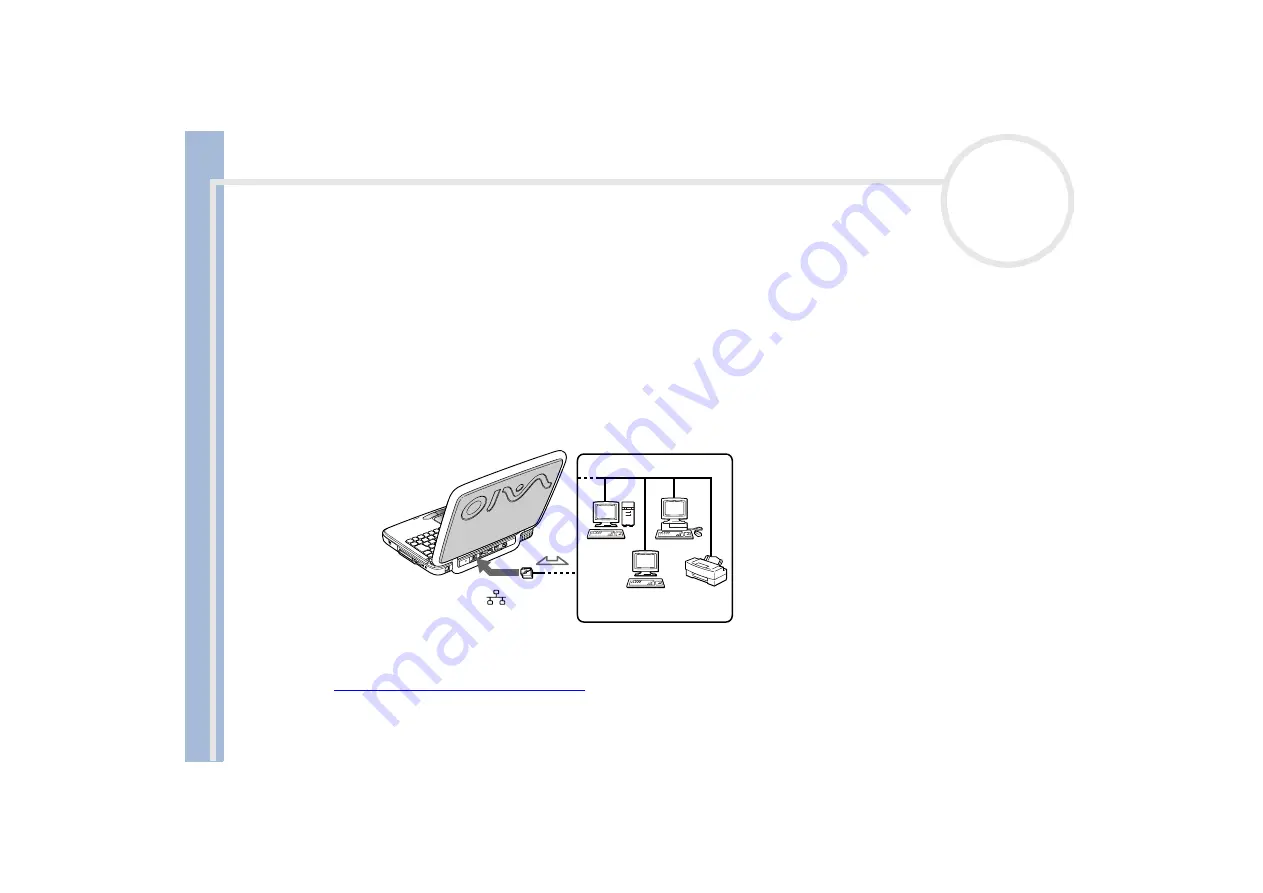
Connecting to a network (LAN)

You can connect your computer to 10BASE-T/100BASE-TX-type networks via an ethernet network cable. For 
the detailed settings and devices needed to connect to the network, consult your Network Administrator.


For more information about connecting your notebook to the network, please consult the Hardware troubleshooting section of the Vaio-Link website: 

How to troubleshoot network problems

!

Do not plug a phone cable into your computer network jack.

Summary of Contents for VAIO PCG-QR10

Page 1: ...N Sony notebook user guide P C G Q R 1 0 ...

Page 2: ...rein at any time without notice The software described herein is governed by the terms of a separate user license agreement Sony DVgate i LINKTM and the i LINK logo JogDialTM PictureGear Memory Stick and the Memory Stick logo VAIO and the VAIO logo are trademarks of Sony Corporation i LINK is the name for the IEEE 1394 1995 standards and their revisions Microsoft Windows and the Windows logo Windo...

Page 3: ... effectively reduce energy consumption It is an open system in which business proprietors can participate voluntarily The targeted products are office equipment such as computers displays printers facsimiles and copiers Their standards and logos are uniform among participating nations ENERGY STAR is a U S registered mark Safety information Owner s record The model number and serial number are loca...

Page 4: ...y to any equipment emitting electromagnetic radiation Connectivity Never install modem or telephone wiring during a storm Never install telephone jacks in wet locations unless the jack is specifically designed for wet locations Use caution when installing or modifying telephone lines Use your notebook only with the supplied AC adapter To disconnect your notebook completely from mains voltage unplu...

Page 5: ...ies with EN 55022 Class B and EN 50082 1 for use in following areas residential commercial and light industrial This product has been tested and found compliant with the limits set out in the EMC Directive for using connection cables shorter than 3 metres 9 8 feet The CD ROM is classified as a CLASS 1 LASER PRODUCT and complies with the Laser Product Safety Standard EN 60825 1 Repair and maintenan...

Page 6: ...er Discard used batteries according to the manufacturer s instructions The battery pack used in this device may present a fire or chemical burn hazard if mistreated Do not disassemble heat above 100 C 212 F or incinerate Keep away from children Your notebook is equipped with an internal backup memory battery For changing this battery please contact VAIO Link http www vaio link com In some areas th...

Page 7: ...applications games and entertainment software Multimedia features Enjoy the speakers to listen to audio and video CDs Interconnectivity Your computer has Ethernet Memory StickTM and i LINKTM functionalities Memory Stick is Sony s new universal storage medium i LINKTM is a bidirectional digital interface for exchanging data Windows Your system includes the latest operating system from Microsoft Com...

Page 8: ...otebook shows you how to use the standard components of your system Connecting Peripheral Devices explains how you can add functionality by connecting various peripherals Getting Help explains the support options available to you and offers basic troubleshooting tips Precautions provides facts and advice about using your notebook Specifications provides details on your computer drivers and accesso...

Page 9: ...eatures and troubleshooting 4 Refer to the Microsoft Quick Start manual for more information on Windows Your notebook and its accessories Following items should be in the box 1 main unit 5 phone plug country specific 2 product recovery CD ROMs 6 phone cable 3 documentation pack 7 power cord 4 AC adapter 8 rechargeable battery pack ...

Page 10: ...f you 1 Keep your forearms horizontal 2 with your wrists in a neutral comfortable position 3 while using the keyboard touchpad or external mouse Let your upper arms hang naturally at your sides Have breaks during sessions with your computer Excessive use of the computer may strain muscles or tendons Furniture and posture Sit in a chair with good back support Adjust the level of the chair so your f...

Page 11: ... Choose a location where windows and lights do not create glare and reflection on the display Use indirect lighting to avoid bright spots on the display You can also purchase accessories for your display that help reduce glare Proper lighting adds to your comfort and work effectiveness Placement of an external display When using an external display set the display at a comfortable viewing distance...

Page 12: ...bes how to start using your computer and how to use your computer s internal and external devices Locating controls and connectors Right 1 PC Card slot page 33 4 USB connector page 46 2 battery bay page 18 5 headphone connector page 44 3 i LINK connector page 49 6 microphone connector page 45 ...

Page 13: ...sing your notebook 13 n N Left There is a ventilation slot located near the CD ROM drive 1 power button page 21 4 LCD lock lever page 21 2 Jog Dial page 30 5 manual eject hole page 32 3 back button page 30 6 CD ROM drive page 32 ...

Page 14: ...power indicator page 27 2 speakers page 28 8 battery indicator page 27 3 ID label 9 hard disk drive indicator page 27 4 keyboard page 24 10 Num Lock indicator page 24 5 touchpad page 29 11 Caps Lock indicator page 24 6 left and right buttons page 29 12 Scroll Lock indicator page 24 ...

Page 15: ...50 All other connectors for this notebook are SELV Safety Extra Low Voltage according to EN 60950 Phone cables and connectors are TNV Telecommunication Network Voltage according to EN 60950 1 phone line jack page 59 2 reset switch 3 ethernet connector page 51 4 monitor connector page 41 5 USB connector page 46 6 DC In connector page 17 ...

Page 16: ...Sony Notebook User Guide Using your notebook 16 n N Bottom 1 battery pack release lever page 18 2 ventilation slot page 70 3 handle page 22 ...

Page 17: ...he handle is folded into the back of your notebook 2 Plug the cable attached to the AC adapter 1 into the DC In connector 2 on the computer 3 Plug one end of the power cord 3 into the AC adapter 4 Plug the other end of the power cord into an AC outlet Use your notebook only with the supplied AC adapter To disconnect your notebook completely from mains voltage unplug the AC adapter Make sure that t...

Page 18: ...ceed as follows 1 Open the cover of the battery bay 1 2 Insert the battery pack 2 with the text facing up into the battery bay Make sure to leave the end of the transparent strip outside the battery bay when inserting the battery The strip enables you to remove the battery later on 3 Close the cover of the battery bay until it clicks When the computer is directly connected to AC power and has a ba...

Page 19: ...tor light flashes in a double blink pattern as the battery charges When the battery is 85 full the battery indicator light turns off This process takes approximately one and a half hour To charge the battery completely continue charging for an additional hour battery indicator light status meaning on The computer is using battery power single blink The battery is running out of power double blink ...

Page 20: ...n while you use the battery pack as a power source When the battery life is nearly depleted the battery indicator starts flashing For some software applications and some peripheral devices your computer may not enter Hibernate mode when battery life is low To avoid loss of data when using battery power you should save your data frequently and manually activate a power management mode such as Stand...

Page 21: ...ook To start your computer proceed as follows 1 Make sure the handle is folded into the back of the notebook 2 Slide the LCD lock lever 1 in the direction of the arrow and lift the cover 3 Press the power button 2 of the computer until the power indicator 3 light turns on ...

Page 22: ...mode assuming that the LCD display is closed Carrying your notebook If you are going to carry your notebook by the handle make sure to remove all cables lock the LCD panel by sliding the LCD lock lever carry it carefully Shutting down your notebook It is important that you shut down your computer properly in order not to lose unsaved data To shut down your computer proceed as follows 1 Click the S...

Page 23: ...ng your notebook You can take advantage of Sony s commitment to quality customer support and receive the following benefits by registering your computer VAIO Link If you are experiencing any problems with your computer you can check the VAIO Link web site for a possible solution http www vaio link com Guarantee Protect your investment See the Guarantee sheet for the terms and conditions and refer ...

Page 24: ... The twelve function keys along the top of the keyboard are used to perform designated tasks For example in many applications F1 is the Help key The task associated with each function key may vary from one application to the other Print Screen key 3 The Print Screen key takes an electronic snapshot of the screen and moves it to the Windows Clipboard You can then paste the screenshot into a documen...

Page 25: ...ypad When you do so the Num Lock light illuminates Operator keys 8 11 12 Several keys are always used with at least one other key Ctrl Alt and Shift When held down with another key the Ctrl Control and Alt Alternate keys offer another way to execute commands For example in many applications instead of choosing the Save command from a menu you can hold down Ctrl and press S referred to as Ctrl S Th...

Page 26: ...lder This is equivalent to selecting Search and then For files or Folders from the Start menu Ctrl F Displays the Search Results Computers window where you can locate other computers M Minimizes all displayed windows Shift M Returns all minimized windows to their previous size R Displays the Run window This is equivalent to selecting Run from the Start menu Fn Insert Displays the System Properties...

Page 27: ...hard drive is not being accessed Num Lock Turns on when the number keys in the numeric keypad are active Turns off when the alphanumeric character keys in the keypad area are active Caps Lock Turns on when the letters appear in uppercase as you type The Shift key lowers the case of typed letters when Caps Lock is on Turns off when the letters appear in lowercase as you type unless you hold down th...

Page 28: ...en or Fn F5 brightness control Adjusts the brightness of the LCD To increase light intensity press Fn F5 and then or To decrease light intensity press Fn F5 and then or Fn F7 switch to the external display Toggles between the LCD external display connected to the monitor connector and both LCD and external display Fn F12 Hibernate Provides for the lowest level of power consumption When you execute...

Page 29: ...e pointer 2 on an item or object click Press the left button 3 once double click Press the left button twice right click Press the right 4 button once In many applications this action displays a shortcut menu drag Slide one finger while pressing the left button scroll Move your finger along the right edge of the touchpad to scroll vertically Move your finger along the bottom to scroll horizontally...

Page 30: ... in Launcher mode until you start an application or the Jog Dial window becomes active When an arrow appears next to an item in the Jog Dial window you can display a submenu for that item by selecting it and pressing the Jog Dial The Jog Dial window switches to Guide mode when you start an application and its window becomes active Depending on the application the Jog Dial window displays different...

Page 31: ...itch to Launcher mode 2 Turn the Jog Dial to select an item then press the Jog Dial The Jog Dial window switches to Guide mode and shows the Jog Dial function 3 Turn or press the Jog Dial to use the Jog Dial function 4 To select another item switch to Launcher mode and repeat this procedure 5 Use the Back button underneath the Jog Dial to go back to the previous state of the Jog Dial window ...

Page 32: ...mode you cannot insert or remove a disk Be sure to seat the disk firmly over the disk drive hub fingers If you do not seat the disk firmly you could damage your disk drive and you may not be able to open the tray When you finish using a disk wait until the LED indicator turns off and then press the Eject button to remove the disk If the disk does not come out when you press the Eject button go to ...

Page 33: ... To insert a PC Card proceed as follows 1 Push the Release button The Release button 1 pops out 2 Push the Release button The PC Card slot protector comes out 3 Insert the PC Card 2 into the PC Card slot front label facing up 4 Gently push the PC Card slot into the connector The PC Card is automatically detected by your system The Unplug or Eject Hardware icon appears in the taskbar ...

Page 34: ... you are inserting the PC Card in the correct direction See the manual supplied with your PC Card for more information on use For some PC Cards if you alternate between Normal power operation and Standby or Hibernate power management modes while the card is inserted you may find that a device connected to your system is not recognized Reboot your system to correct the problem Removing a PC Card Fo...

Page 35: ... You may not be able to use some PC Cards or some functions within the PC Card with this computer Using Memory Stick This compact portable and versatile recording medium has a data capacity exceeding that of a floppy disk The Memory Stick is specially designed for exchanging and sharing digital data with compatible products Because it is removable it can be used for external data storage You need ...

Page 36: ...rd adapter 2 Push the Release button The Release button pops out 3 Push the Release button The PC Card slot comes out 4 Pull the PC Card slot out of the connector 5 Insert the PC Card adapter into the connector on your computer label facing up and push it gently 6 The Memory Stick is automatically detected by your system and appears in your My Computer window as a local drive under the appropriate...

Page 37: ...e message that it is safe to remove the device 6 Click OK 7 Click Close 8 Press the PC Card release button so that it pops out 9 Push the PC Card release button to eject the card 10 Gently grasp the card and pull it out You can skip steps 1 7 when your notebook is off Using the modem Your notebook is equipped with an internal modem You need to connect a phone line to take advantage of online servi...

Page 38: ...elecommunications Network Voltage according to EN60950 Only DTMP Dual Tone Multi Frequency signalling tone dialling is supported Using power saving modes When you use a battery as the source of power for your computer you can take advantage of power management settings to conserve battery life In addition to the normal operating mode which allows you to turn off specific devices your computer has ...

Page 39: ...de proceed as follows Press Fn Esc You can also use the PowerPanel utility to enter Standby mode To return to Normal mode proceed as follows Press any key If you press the power button for more than four seconds the computer will switch off automatically When the computer is in Standby mode you cannot insert a disk Standby requires less time than Hibernate to be activated or to return to normal mo...

Page 40: ...l mode proceed as follows Turn on the computer by pressing the power button The computer returns to its previous state When the computer is in Hibernate mode you cannot insert a disk Hibernate mode requires more time than Standby mode to be activated or to return to normal mode Hibernate mode uses less power than Standby mode ...

Page 41: ...turn off the computer and all peripherals Connect the power cord only after connecting all cables Turn on the computer only after turning on all peripherals Connecting an external display You can connect an external display to your notebook For example you can use your computer with the following devices Computer display monitor Projector Turn off your computer and the peripherals unplug the AC ad...

Page 42: ...To connect a computer display proceed as follows 1 Make sure the handle is folded into the back of the computer 2 Plug the display cable 1 into the monitor connector 2 on the computer 3 If necessary plug one end of the display s power cord 3 into the display and the other end into an AC outlet ...

Page 43: ...ny LCD Projector To connect a projector proceed as follows 1 Make sure the handle is folded into the back of the computer 2 Plug the RGB signal cable 1 into the monitor connector identified by the I O symbol 3 Plug the audio cable 2 into the earphone connector identified by the symbol 4 Connect the power cord of the projector into an AC outlet i ...

Page 44: ...nect external speakers proceed as follows 1 Plug the speaker cable 1 into the earphone connector 2 2 Plug the other end of the speaker cable into the external speaker 3 Turn down the volume of the speakers before you turn them on Make sure your speakers are designed for computer use Do not place diskettes on the speakers their magnetic field may damage the data on the diskettes i ...

Page 45: ...one If you need to use a sound input device for example to chat on the Internet you need to plug in an external microphone To connect an external microphone proceed as follows 1 Locate the microphone connector identified by the symbol 2 Plug the microphone cable 1 into the microphone connector 2 Make sure your microphone is designed for computer use m ...

Page 46: ...use software driver of PCGA UMS1 is preinstalled on your notebook therefore you only need to plug the USB mouse into the USB connector and you can start working You may need to install software device drivers supplied with your USB device before using the USB device You cannot use a PS 2 style mouse Connecting a USB floppy disk drive You can connect a floppy disk drive to the USB connector on your...

Page 47: ...oes not come out by pressing the Eject button disconnect the floppy disk drive from the computer Do not press the Eject button while the LED indicator is on It may damage the diskette Removing the floppy disk drive To remove the floppy disk drive proceed as follows If your computer is on wait until the LED indicator turns off and then unplug the USB cable from the computer If the floppy disk drive...

Page 48: ...ur version of Windows to your computer To connect a printer using the USB connector proceed as follows 1 Make sure the handle is folded into the back of the notebook 2 Plug an optional USB printer cable 1 into the USB connector 2 identified by the symbol on your computer and printer 3 Plug the printer 3 power cord into an AC outlet ...

Page 49: ... the actual transfer rate depends on the transfer rate of the external device i LINK cables compatible with your VAIO notebook include cables with the following part numbers VMC IL4415 a 1 5 meter cable with a 4 pin connector at each end VMC IL4408Series a 0 8 meter cable with a 4 pin connector at each end The software limits the use of more than 1 digital video camera recorder or i LINK device at...

Page 50: ...he DVgate application On Sony digital video cameras connectors labeled DV Out DV In Out or i LINK are i LINK compatible The Sony digital video camera recorder is an example your digital video camera recorder may need to be connected differently If your digital video camera recorder includes a Memory Stick slot you can copy images from it to your computer via a Memory Stick To do so simply copy ima...

Page 51: ...er to copy edit or delete files from another VAIO computer You can also print a document on a printer connected to another VAIO computer Connecting to a network LAN You can connect your computer to 10BASE T 100BASE TX type networks via an ethernet network cable For the detailed settings and devices needed to connect to the network consult your Network Administrator For more information about conne...

Page 52: ...rted gives you a list of the items you find in the box and a summary of the bundled applications Online user guides on your Documentation CD ROM The Hardware guide explains how to use your computer connect peripheral devices It contains a list of specifications of your computer and accessories The Software guide lists the pre installed software titles and explains how to use the utility programs a...

Page 53: ...contacting VAIO Link About the computer and software My computer does not start Check that the computer is plugged into a power source and that it is turned on Check that the power indicator on the front panel of the computer indicates that the power is on Check that the battery packs are inserted properly and that they are charged Make sure there is no diskette in the floppy disk drive Confirm th...

Page 54: ...e arrow keys to select the Exit menu 5 Press the arrow keys to select Get Default Values and then press Enter The message Load default configuration now appears 6 Make sure that Yes is selected and then press Enter 7 Press the arrow keys to select Exit save changes and then press Enter The message Save configuration changes and exit now appears 8 Make sure that Yes is selected and then press Enter...

Page 55: ... Shut Down and then select Shut Down in the list and click OK If the above method does not work press the power button and hold it for at least four seconds This turns off the power If your computer locks up while playing a CD ROM stop the CD ROM and shutdown the computer by pressing Ctrl Alt Delete and then click Shut Down My software program locks up or crashes Contact the software publisher or ...

Page 56: ...display mode may be set to external display mode Press and hold the Fn key while pressing F7 several times The screen image on my external display is not centered or sized properly Use the controls on your external display to adjust the image The window I have just closed continues to appear on my LCD Press the Windows key and D key twice to refresh the screen About CD ROMs and diskettes My CD ROM...

Page 57: ...iskette that is not write protected Check that the diskette is properly inserted into the floppy disk drive When I double click an application icon a message such as You must insert the application CD into your CD ROM drive appears and the software does not start Some titles require specific files that are located on the application CD ROM Insert the disk and try starting the program again Make su...

Page 58: ...ry check that the battery is inserted properly and that it is charged If you are using an application that has its own volume control check that the volume is turned up Check the volume controls in Windows If you use external speakers check that the speakers are properly connected and the volume is turned up If the speakers have a mute button make sure it is off If batteries power the speakers che...

Page 59: ...nnection speed including telephone line noise or compatibility with telephone equipment such as fax machines or other modems If you think your modem is not connecting properly to other PC based modems fax machines or your Internet Service Provider check the following Have your phone company check that your phone line is free from any line noise If your problem is fax related check that there are n...

Page 60: ...ble with your version of Windows If you are using two PC cards use the Sony Notebook Setup utility to disable the devices you are not currently using I cannot print Check that all the cables of the printer are correctly connected Check that your printer is correctly configured and that you have up to date drivers If needed contact your dealer About digital video captures and DVgate While I am reco...

Page 61: ...f you need assistance Adding and removing memory In the future you may want to install memory modules to expand the functionality of your computer You can increase the memory by installing optional memory modules Be careful when adding memory Mistakes on installation or removal of the memory module may cause a malfunction For memory upgrades use only PC100 CL2 SDRAM SO DIMM gold lead contacts Elec...

Page 62: ...rocedure Do not open the memory module package until you are ready to install the module The package protects the module from ESD Use the special bag delivered with the memory module or wrap the module in aluminium foil to protect it from electrostatic discharge Do not place the memory module in places subject to Heat sources such as radiators or air ducts Direct sunlight Excessive dust Mechanical...

Page 63: ... one hour for the computer to cool down before you remove the screws 4 Push the LCD screen away from you until it is completely flat 5 Remove the thin plastic strip containing the Num Lock Caps Lock and Scroll Lock indicators by sliding it toward the keyboard and pulling it up gently 6 Unscrew the two screws underneath the plastic strip turn counterclockwise ...

Page 64: ...ward the LCD screen 8 Lift the keyboard toward the LCD display and turn over the keyboard Be careful not to pull the cables of the display 9 Before you remove the memory module touch a metal part of the computer to discharge any static electricity accumulated on your body ...

Page 65: ...own your computer and disconnect all peripheral devices 2 Unplug the computer and remove the battery pack 3 Wait until the computer cools down The inside of a notebook becomes extremely hot during operation Wait for about one hour for the computer to cool down before you remove the screws 4 Push the LCD screen away from you until it is completely flat 5 Remove the thin plastic strip containing the...

Page 66: ...remove the memory module touch a metal part of the computer to discharge any static electricity accumulated on your body 10 Remove the old memory module for more info see Removing a memory module 11 Slide the memory module into the slot 12 Put the keyboard gently back 13 Put the speaker cover back Adjust the placement at both ends and press the center until it clicks ...

Page 67: ...utions 67 n N 14 Tighten the two screws to fix the keyboard 15 Replace the thin plastic strip by inserting the ends first then slide the center toward the LCD panel 16 Put the LCD back to its normal position 17 Turn on your notebook ...

Page 68: ...ort time On the other hand it may be easily damaged by mechanical vibration shock or dust Although the hard disk has the safety device in itself to prevent losing data due to mechanical vibration shock or dust you should be careful when handling your computer To avoid damaging your hard disk Do not give a shock to your computer Keep away from magnets Do not place your computer in a location subjec...

Page 69: ...You may however see tiny black points and or bright points red blue or green that continuously appear on the LCD This is a normal result of the manufacturing process and does not indicate a malfunction Avoid rubbing the LCD screen as this can damage the screen Use a soft dry cloth to wipe the LCD screen On using power source Your computer operates on 100V 240V AC 50 60 Hz Do not share the AC outle...

Page 70: ...as radiators or air ducts Direct sunlight Excessive dust Moisture or rain Mechanical vibration or shock Strong magnets or speakers that are not magnetically shielded Ambient temperature of more than 35º C or less than 10º C High humidity Do not place electronic equipment near your computer The electromagnetic field of your computer may cause a malfunction Provide adequate air circulation to preven...

Page 71: ...the surface of the diskette Keep diskettes away from magnets Keep diskettes away from direct sunlight and other heat sources On handling CD ROM disks Do not touch the surface of the disk Do not drop or bend the disk Fingerprints and dust on the surface of a disk may cause read errors Proper care of the disk is essential to maintain its reliability Do not use solvents such as benzine thinner commer...

Page 72: ...en or try to disassemble the battery pack Do not expose the battery pack to any mechanical shock If you are not using the computer for an extended period of time remove the battery pack from the computer to prevent damage to the battery If after fully charging the battery pack the battery power is still low the battery pack may be reaching the end of its life and should be replaced You do not need...

Page 73: ...ot touch the connector with your finger or metallic objects Use only the label supplied with the Memory Stick as a label Do not bend drop or apply strong shock to the Memory Stick Do not disassemble or modify Memory Sticks Do not let cards get wet Do not use or store Memory Sticks in a location subject to Extremely high temperatures such as in a car parked in the sun Direct sunlight High humidity ...

Page 74: ...B SDRAM in slot Maximum RAM 512 MB LCD screen 13 3 XGA 1024x768 TFT L2 cache memory 128 KB on die MPEG MPEG 1 Digital Video Supports full screen playback Graphics Intel 815EM Chipset integrated graphic Sound capabilities 16 bit CD quality stereo sound CD ROM drive up to 24x max CD ROM reading speed laser diode properties wave length 795 nm laser output 16 5 µW Internal modem built in modem V 90 K5...

Page 75: ...l speakers headphone external microphone 2 USB modem i LINK IEEE1394 S400 ethernet Supplied accessories rechargeable battery AC adapter AC power cord phone cable country specific phone plug Service 1 year free VAIO Link Service Guarantee 1 year guarantee parts and labour Power requirement 64 4 watts maximum 19 5V DC AC100 240V Power management ACPI Advanced Configuration Power Interface Battery Li...

Page 76: ...mperature gradient less than 10 C hour Storage temperature 20 C to 60 C temperature gradient less than 10 C hour Operating humidity 20 to 80 not condensed provided that humidity is less than 65 at 35 C hygrometer reading of less than 29 C Storage humidity 10 to 90 not condensed provided that humidity is less than 20 at 60 C hygrometer reading of less than 35 C Model Number PCG QR10 ...

Page 77: ...3 32 74 charging status 19 combination controls 26 28 connection capability 75 connector DC In 15 17 earphone 44 ethernet 15 headphone 12 i LINK 12 microphone 12 45 monitor 15 USB 12 15 48 copyright 2 correction key 24 Ctrl key 25 Customer Guide 52 Customer Service Guide 52 D DC In 17 DC In connector 15 digital video camera 50 dimension 75 diskette inserting a 47 removing a 47 display 41 cable 42 ...

Page 78: ...attery 19 27 Caps Lock 14 27 hard disk drive 14 27 Num Lock 14 27 power 14 27 Scroll Lock 14 27 Insert key 24 J Jog Dial 13 30 K key Alt 25 application 25 correction 24 Ctrl 25 Escape 24 Fn 25 28 function 24 Help 24 Insert 24 navigation 25 operator 25 Print Screen 24 Shift 25 Windows 25 26 keyboard 14 24 L L2 cache memory 74 LCD lock lever 13 LCD screen 14 74 lithium ion battery 6 lock lever LCD 2...

Page 79: ... 21 power cord 9 48 power indicator 14 27 power management 75 power requirement 75 power saving modes 38 precautions 61 Print Screen key 24 printer cable 48 processor 74 product recovery CD ROM 9 projector 41 43 R registration 23 regulatory information 5 reset switch 15 S Scroll Lock indicator 14 27 serial number 3 service 75 Shift key 25 slot PC Card 33 Smart Connect 51 Software guide 52 sound 74...

Page 80: ...troubleshooting 53 U USB connector 12 48 mouse 46 USB connector 15 USB floppy disk drive 46 V VAIO Link 3 6 23 53 VAIO Link Response Centre 53 ventilation 70 ventilation slot 13 video camera 50 W warnings 4 weight 75 Windows key 25 26 ...

Reviews: