4
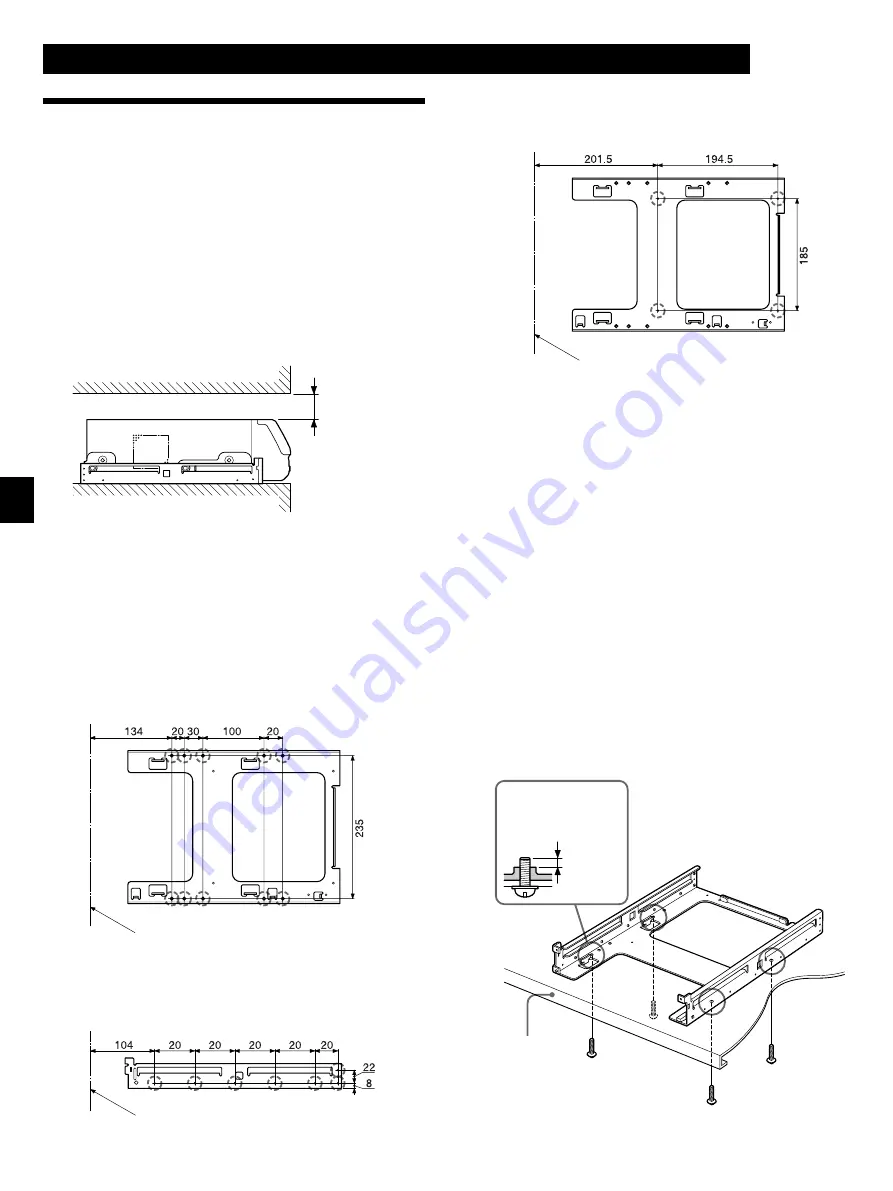
裏側で止める場合
When securing the base from the bottom
取り付けるには
次の手順でスライドアダプターを取り付けます。
To install the rail kit
Proceed as follows to install the rail kit.
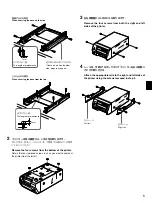
1
ベースを、
4
本のネジで台に取り付ける。
ネジ飛び出し量は、約 1mm です。ネジの長さは、設置台とベー
スの厚み(1.6mm)
とに約1mm足した長さのネジを用意してくだ
さい。
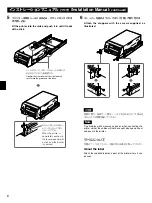
Attach the base onto the rack with four screws.
The screws should protrude from the rail by about 1 mm.
Use screws whose length is equal to the thickness of the rack
and the base (the base thickness is 1.6 mm) and long enough to
allow the screw to protrude about 1 mm from the rail.
ネジ飛び出し量
The length of
protuberance
1mm
設置台
Rack
インストレーションマニュアル
(
つづき)
/Installation Manual
(
continued
)
取り付ける
Installing
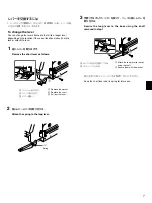
設置場所について
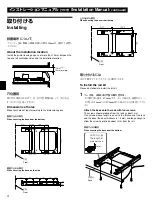
プリンター上面、側面の通風孔部との間は 10mm 以上開けて設置し
てください。
About the installation location
Install the printer leaving a space of more than 10 mm between the
top and left ventilation holes and the installation location.
正面
Front
正面
Front
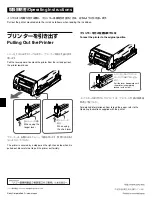
穴位置図
取り付け場所に合わせて、以下の穴位置図に従って、少なくとも
4 つのネジ穴を切ってください。
Dimensions of holes
Make four holes at least according to the dimensions given.
裏側で止める場合
When securing the base from the bottom
正面
Front
10mm
以上
10mm or more
側面で止める場合
When securing the base on the side
上から止める場合
When securing the base from the top


