O
per
at
ion
Adjusting the Gray Balance
14
Adjusting the Gray
Balance
The ink ribbon and the paper are contained in one same
package as a pair. The gray balance may differ
depending on each pair. It is recommended that you
adjust the gray balance each time you reload the ink
ribbon and paper.
The gray balance was set to No.0 at the factory. The
setting of the gray balance remains effective until reset -
even if you turn the power off.
Before adjusting the gray balance
Perform the following:
• Set the adjusted values for printouts, except
SHARPNESS and LAMINATION, to zero (0). (See
page 13.)
If the printout adjustment was performed at the
computer site, then also set them to 0.
• Set the gray balance to pattern No.0, if you adjusted
the gray balance previously. (See explanation
described below.)
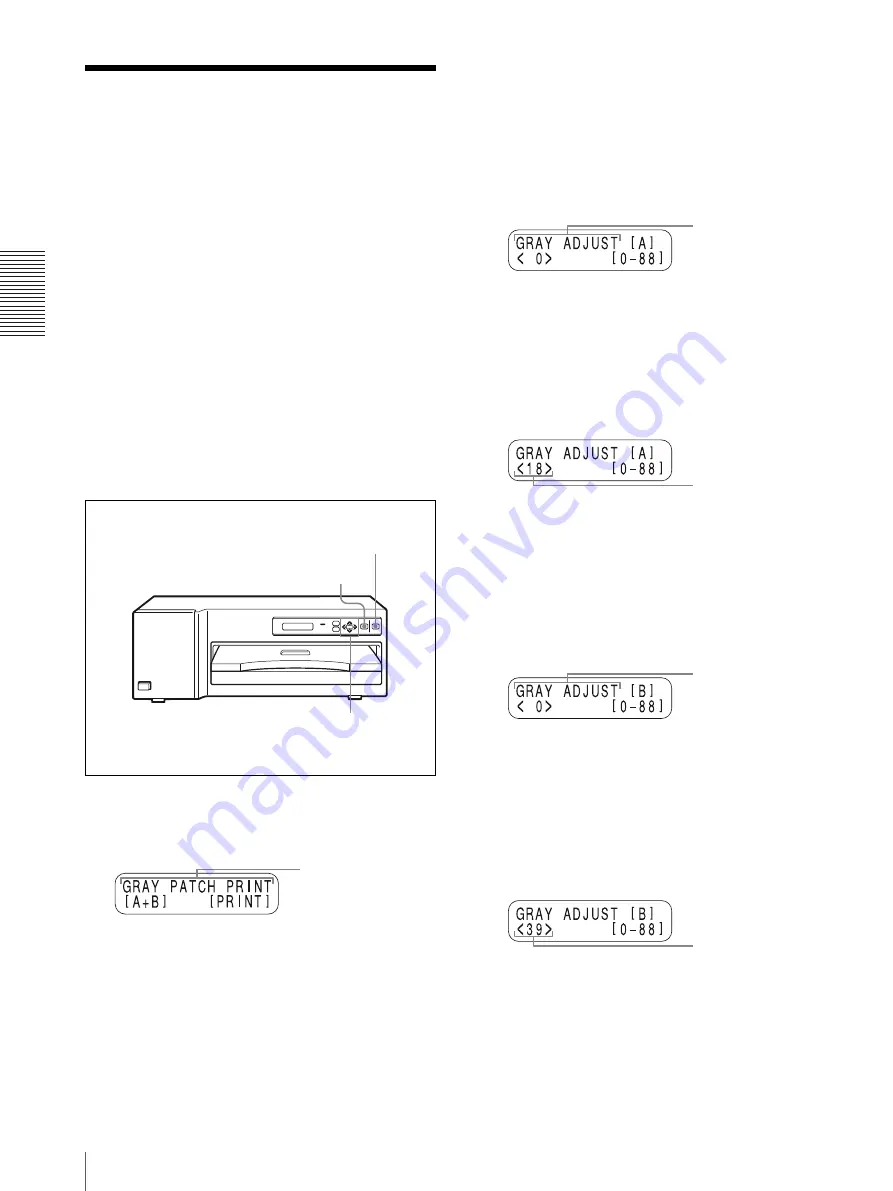
1
Press the CAL button.
GRAY PATCH PRINT appears.
2
Press the PRINT button.
Gray patterns Group A and Group B are printed.
3
Look at the printout of Group A to determine the
best gray balance from this group.
4
Next, look at the printout of Group B to determine
the best gray balance from this group, too.
5
Press the
F
and
f
buttons to select GRAY ADJUST
[A].
The printer enters the gray balance adjustment
mode.
6
Press the
G
and
g
buttons to display the pattern
number determined in step 3.
For example, select 18 if you determined that
pattern No. 18 in the sample provides the best color
tone of the gray balance.
7
Press the
F
and
f
buttons to select GRAY ADJUST
[B].
The printer enters the adjustment mode of the color
tone of the gray balance.
8
Press the
G
and
g
buttons to display the pattern
number determined in step 5.
For example, select 39 if you determined that
pattern No. 39 in the sample provides the best gray
balance.
9
Press the CAL button.
The printer returns to the on-line mode.
1,9
2
5,6,7,8
Press the CAL button to
display GRAY PATCH
PRINT.
Press
F
and
f
to
display GRAY ADJUST
[A].
Press
G
and
g
to
display 18.
Press
F
and
f
to
display GRAY ADJUST
[B].
Press
G
and
g
to
display 39.


