63
US
Us
ing N
e
twork F
eatu
res
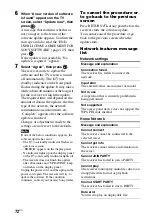
When “No server is available”
appears, or when the server on the list
is not available, press OPTIONS.
Select “Refresh”, then press
. The
refreshed server list appears.
You can also select “HOME NETWORK”
from “Listen” in home menu.
2
Select the server which holds the
content you want to play back.
The content list appears on the TV
screen.
If the server device supports the Wake-on-
LAN standard, the receiver turns the server
on automatically. If the server does not
support the Wake-on-LAN standard, turn on
the server in advance. For details on settings
or operations of Wake-on-LAN of your
server, refer to the operating instructions or
help of your server.
3
Select the item (playlist, album,
folder, etc.) you want, then press
.
If another item appears, repeat this step
to narrow down the choices until the
item you want appears. The items that
are displayed depend on the connected
server.
4
Select the track you want, then
press .
Playback starts.
Make sure that sound is being output
from the speakers of the receiver.
• Tracks that the receiver cannot play appear on
the TV screen as well. You cannot sort a list of
playable tracks.
• “!” appears at the top of a track name that cannot
be played on the receiver, and is skipped during
playback.
• Play is not resumed from the last selected item
if you unplug the power cord from the wall
outlet.
• The receiver may take time to display items
when browsing a folder that contains a large
amount of audio content. In this case, use the
Keyword Search (page 74).
• If you select a folder (such as an artist folder,
genre folder, etc.), then press the
N
button, the
receiver plays all items in the selected folder.
• The receiver resumes from the last selected item
when the function is changed to Home Network
function, until the receiver is turned off. When
“Network Standby” is set to “On”, play resumes
from the last selected item, even if you turned
off the receiver.
You can set access restrictions or
permission for the devices on the device
list.
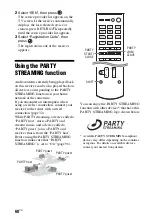
1
Press HOME NETWORK.
2
Press OPTIONS.
3
Select “Access Settings”, then
press .
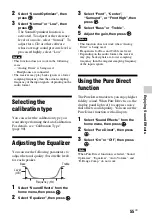
To set the auto access
permission
1
Select “Auto Access” in “Access
Settings”, then press
.
2
Select “Allow” or “Not Allow”, then
press .
•
Allow:
All the device on the home
network are permitted to access this
receiver. This receiver can start a
PARTY as host device and join a
PARTY as a guest device if requested.
•
Not Allow:
The receiver restricts a
new device that is accessing the
receiver. When connecting a new
device to the home network, add the
device to the device list, and set access
permission (page 64).
Up to 20 devices can be added to the device list.
If 20 devices have already been registered,
“Device list is full” appears, and a new device
cannot be added to the list. In this case, delete
unnecessary devices from the list (page 64).
Tip
Note
Notes
Tips
To set Access Settings
Note
Summary of Contents for STR-DN840
Page 1: ...4 454 467 13 1 STR DN840 Multi Channel AV Receiver Operating Instructions ...
Page 138: ......
Page 139: ......
Page 140: ... 2013 Sony Corporation Printed in Malaysia 4 454 467 13 1 ...

