background image

17

GB

D:\NORM'S JOB\SONY HA\SO0062\STR-DN1010\GB\GB03DES_STR-DN1010-CEL.fm

masterpage: Right

STR-DN1010

4-174-068-

11

(1)

a)

See the table on page 18 for information on the 
buttons that you can use to control each 
component.

b)

The following buttons have tactile dots. Use the 
tactile dots as reference when operating the 
receiver.

– number 5, VIDEO 1

N

, CATEGORY MODE (RM-AAP051 only) 

– , TV CH + (RM-AAP051 only), 

PROG + (RM-AAP052 only), 

c


(RM-AAP052 only)

Notes

• Some functions explained in this section may not 

work depending on the model.

• The above explanation is intended to serve as an 

example only. Therefore, depending on the 
component, the above operation may not be 
possible or may operate differently than described.

Name and function

O

TV VOL +/–

a)

 (RM-AAP051 only)

 +/–

a)

 (RM-AAP052 only)

Press TV (

W

), then press TV VOL +/– or 


 +/– to adjust the TV volume level.

MASTER VOL +/–

a)

 (RM-AAP051 only)

 +/–

a)

 (RM-AAP052 only)

Adjust the volume level of all speakers at the 
same time.

P

DISC SKIP

a)

Skips disc when using a multi-disc changer.

Q

RETURN/EXIT 

O

a)

Returns to the previous menu or exits the menu 
while the menu or on-screen guide is displayed 
on the TV screen.
To return to the previous menu of Sony TV, 
press TV (

W

) and then press RETURN/EXIT 

O

.

R


Press 

V

/

v

/

B

/

b

 to select the menu items, then 

press 

 to enter the selection.

S

GUIDE

a)

 (RM-AAP051 only)

a)

 (Guide) (RM-AAP052 only)

Press TV (

W

), then press GUIDE or 

 to 

display the on-screen program guide.

T

DISPLAY

a)

Views information on the display.

DISPLAY

a)

 (RM-AAP051 only)

Press TV (

W

), then press DISPLAY to display 

information of TV.

 (Info, Text reveal) (RM-AAP052 

only)

Press TV (

W

), then press 

 to display 

information such as current channel number and 
screen mode.
In text mode: Press TV (

W

), then press 


to 

reveal hidden information (e.g. answers to a 
quiz).

U

NIGHT MODE

Activates the Night Mode function (page 69).

V

SHIFT

The button lights up and activates the buttons 
with pink printing.

W

TV

The button light up and activates the buttons 
with yellow printing.

,

a)

V

/

v

/

B

/

b

a)

Name and function

X

THEATER (RM-AAP051 only)
THEATRE (RM-AAP052 only)

Sets the optimal picture settings automatically 
for watching movies when you connect a Sony 
TV that is compatible with the THEATER or 
THEATRE button function (page 73).

Y

RM SET UP

Set up the remote.

continued

Summary of Contents for STR-DN1010 - Multi Channel Av Receiver

Page 1: ...TR DN1010 4 174 068 11 1 filename D NORM S JOB SONY HA SO0062 STR DN1010 GB GB01COV_STR DN1010 CEL fm masterpage Right 2010 Sony Corporation 4 174 068 11 1 Multi Channel AV Receiver Operating Instructions STR DN1010 ...

Page 2: ...unit Record these numbers in the space provided below Refer to them whenever you call upon your Sony dealer regarding this product Model No _______________ _____________________________ _________ Serial No ________________ _____________________________ _________ This symbol is intended to alert the user to the presence of uninsulated dangerous voltage within the product s enclosure that may be of ...

Page 3: ...by one or more of the following measures Reorient or relocate the receiving antenna Increase the separation between the equipment and receiver Connect the equipment into an outlet on a circuit different from that to which the receiver is connected Consult the dealer or an experienced radio TV technician for help CAUTION You are cautioned that any changes or modifications not expressly approved in ...

Page 4: ...ies For more detailed information about recycling of this product or battery please contact your local Civic Office your household waste disposal service or the shop where you purchased the product Notice for customers The following information is only applicable to equipment sold in countries applying EU Directives The manufacturer of this product is Sony Corporation 1 7 1 Konan Minato ku Tokyo 1...

Page 5: ...rks and logos are trademarks of Sirius XM Radio Inc and its subsidiaries All rights reserved Service not available in Alaska and Hawaii The font type Shin Go R installed in this receiver is provided by MORISAWA COMPANY LTD These names are the trademarks of MORISAWA COMPANY LTD and the copyright of the font also belongs to MORISAWA COMPANY LTD iPod is a trademark of Apple Inc registered in the U S ...

Page 6: ...iver 52 Tuner Operations Listening to FM AM radio 53 Presetting FM AM radio stations Preset Tuning 55 Using the Radio Data System RDS 56 Models of area code CEK ECE AU1 TW2 only Listening to Satellite Radio 57 Models of area code U2 CA2 only Connecting the SIRIUS Satellite Radio 58 Preparing to listen to the SIRIUS Satellite Radio 58 Selecting a channel of the SIRIUS Satellite Radio 59 Presetting ...

Page 7: ...ed Operations Switching between digital and analog audio INPUT MODE 84 Enjoying the sound images from other inputs 85 Using a bi amplifier connection 88 Using the setting menu 89 Auto Calibration menu 90 Speaker Settings menu 91 Surround Settings menu 95 EQ Settings menu 96 Audio Settings menu 96 Video Settings menu 97 HDMI Settings menu 98 System Settings menu 100 Operating without connecting to ...

Page 8: ...only Remote Commander Observe the correct polarity when installing batteries Notes Do not leave the remote in an extremely hot or humid place Do not use a new battery with old ones Do not mix manganese batteries and other kinds of batteries Do not expose the remote sensor to direct sunlight or lighting apparatuses Doing so may cause a malfunction If you do not intend to use the remote for an exten...

Page 9: ...signals are decoded page 124 E Display Displays the current status of the selected component or a list of selectable items page 11 F INPUT SELECTOR Selects the input source to playback page 46 52 84 Name and function G MUTING Turns off the sound temporarily Press MUTING again to restore the sound page 47 122 H MASTER VOLUME Adjusts the volume level of all speakers at the same time page 46 122 I VI...

Page 10: ...L DIMMER Adjusts the brightness of the display page 111 M INPUT MODE Selects the input mode when the same components are connected to both digital and analog jacks page 84 N 2CH A DIRECT A F D MOVIE MUSIC Selects a sound field page 65 66 O SPEAKERS Selects the front speaker system page 37 P PHONES jack Connects to headphones page 122 ...

Page 11: ...gital signal being input through the COAXIAL jack page 84 OPT When INPUT MODE is set to AUTO and the source signal is a digital signal being input through the OPTICAL jack page 84 D ARC Lights up when TV input is selected and the Audio Return Channel ARC signals are detected page 100 Indicator and explanation E Dolby Digital Surround indicators Lights up one of the respective indicators when the r...

Page 12: ...tion such as Preset Memory page 55 etc is activated SIRIUS Models of area code U2 CA2 only The SiriusConnect Home tuner is connected and SR is selected ST Stereo broadcast O EQ Lights up when the equalizer is activated P D RANGE Lights up when dynamic range compression is activated page 94 Q Lights up when the disc being played back contains an LFE Low Frequency Effect channel and the LFE channel ...

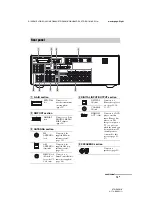
Page 13: ...erial page 35 AM ANTENNA terminals Connects to the supplied AM loop antenna aerial page 35 SIRIUS jack Models of area code U2 CA2 only Connects to a SiriusConnect Home tuner not supplied page 58 D DIGITAL INPUT OUTPUT section OPTICAL IN jacks Connects to a Blu ray disc player etc page 23 30 31 32 COAXIAL IN jack HDMI IN OUT jacks Connects to a DVD player satellite tuner Blu ray disc player etc The...

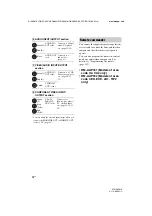
Page 14: ...For details see Programming the remote page 112 RM AAP051 Models of area code U2 CA2 only RM AAP052 Models of area code CEK ECE AU1 TW2 only F AUDIO INPUT OUTPUT section AUDIO IN OUT jacks Connects to a Super Audio CD player etc page 23 24 AUDIO OUT jack Connects to a subwoofer page 21 G VIDEO AUDIO INPUT OUTPUT section AUDIO IN OUT jacks Connects to a VCR Blu ray disc player etc page 30 32 33 VID...

Page 15: ...ically each time you press the input buttons D C AMP The button lights up and activates the receiver operation page 101 D Input buttons VIDEO 1b Selects the component you want to use When you press any of the input buttons the receiver turns on The buttons are initial assigned to control Sony components You can program the remote to control non Sony components following the steps in Programming th...

Page 16: ... category mode for satellite tuner page 59 110 TUNING a Scans a station D TUNING Enters direct tuning mode page 54 109 Name and function K TV CH b a RM AAP051 only PROG b a RM AAP052 only Press TV W then press TV CH or PROG to select preset TV channels PRESET b a Selects preset stations preset channels cb C RM AAP052 only In text mode Press TV W then press c C to select the next or previous page L...

Page 17: ...rns to the previous menu or exits the menu while the menu or on screen guide is displayed on the TV screen To return to the previous menu of Sony TV press TV W and then press RETURN EXIT O R Press V v B b to select the menu items then press to enter the selection S GUIDEa RM AAP051 only a Guide RM AAP052 only Press TV W then press GUIDE or to display the on screen program guide T DISPLAYa Views in...

Page 18: ... B AV 1 z z z z z z z z z z z z D Numeric buttons z z z z z z z z z z z z z z 10 z z z z z z z z z z z ENTER z z z z z z z 4 z z z z z 2 Text z z F Color buttons z z 3 z z z H TOOLS OPTIONS z z z z z z z I MENU HOME z z z z z z z z z z J z z z z z z z z z 5 z z z z z z z z z z m TUNING M TUNING z z z z z z z z z z z z 7 N X x z z z z z z z z z z z z K PRESET TV CH 1 PROG 2 z z z z z z 4 z z z L F1...

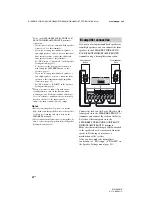
Page 19: ... DVD software recorded sound in the Surround EX format if you connect additional one surround back speaker 6 1 channel or two surround back speakers 7 1 channel You can enjoy vertical sound effects if you connect additional two front high speakers 7 1 channel in PLIIz mode page 66 Example of speaker system configuration AFront speaker Left BFront speaker Right CCenter speaker DSurround speaker Lef...

Page 20: ...ould be the same When you connect a 7 1 channel speaker system with two front high speakers place the front high speakers at an angle between 22 to 45 at least 3 3 feet 1 meter directly above the front speakers When you connect a 6 1 channel speaker system place the surround back speaker behind the listening position Since the subwoofer does not emit highly directional signals you can place it whe...

Page 21: ...necting the speakers Before connecting cords be sure to disconnect the AC power cord mains lead 13 32 10 mm Right Left Right AMonaural audio cord not supplied BSpeaker cord not supplied Left Right Center speaker B Left B B Surround speaker Subwooferb B A Surround back Front high Bi amplifier Front B speakera Front A speaker continued ...

Page 22: ...to on it turns to standby mode automatically based on the level of the input signal to a subwoofer then sound may not be output Notes Before connecting the AC power cord mains lead make sure that metallic wires of the speaker cords are not touching each other between the SPEAKERS terminals After you have install and connect your speaker be sure to select the speaker pattern from the Speaker Settin...

Page 23: ...ck to a TV It is not necessary to connect all the cables Connect audio and video cords according to the jacks of your components Before connecting cords be sure to disconnect the AC power cord mains lead ARC TV A B AComponent video cord not supplied BVideo cord not supplied COptical digital cord not supplied DAudio cord not supplied EHDMI cable not supplied Sony recommends that you use an HDMI aut...

Page 24: ... straight in until they click into place Do not bend or tie optical digital cords Tips All the digital audio jacks are compatible with 32 kHz 44 1 kHz 48 kHz and 96 kHz sampling frequencies The receiver has a video conversion function For details see Function for conversion of video signals page 34 When you connect the audio output jack of the TV to the TV IN jacks of the receiver to output the TV...

Page 25: ...TR DN1010 4 174 068 11 1 Connections You can enjoy the images from the components connected to the DIGITAL MEDIA PORT adapter when you connect the TV to the receiver Super Audio CD player CD player CD recorder AAudio cord not supplied BVideo cord not supplied A DIGITAL MEDIA PORT adapter TV B ...

Page 26: ...necting cords be sure to disconnect the AC power cord mains lead It is not necessary to connect all the cords Connect according to the availability of jacks on the connected components Be sure to turn on the receiver when the video and audio signals of a playback component are being output to a TV via the receiver If the power supply of the receiver is not turned on neither video nor audio signals...

Page 27: ...itted by HDMI can be output from the speakers connected to the receiver This signal supports Dolby Digital DTS and Linear PCM The receiver can receive Multi Linear PCM up to 8 channels with a sampling frequency of 192 kHz or less with an HDMI connection Analog video signals input to the VIDEO jack or COMPONENT VIDEO jacks can be up converted as HDMI signals page 34 Audio signals are not output fro...

Page 28: ...he HDMI 1 4 input button on the remote so that you can use the button to control your components For details see Programming the remote page 112 You can also rename the HDMI input so that it can be displayed on the receiver s display For details see Naming the input Name Input page 47 ARC A AHDMI cable not supplied Sony recommends that you use an HDMI authorized cable or Sony HDMI cable DVD player...

Page 29: ...en the power is turned off Audio signals sampling frequency bit length etc transmitted from an HDMI jack may be suppressed by the connected component Check the setup of the connected component if the image is poor or the sound does not come out of a component connected via the HDMI cable Sound may be interrupted when the sampling frequency the number of channels or audio format of audio output sig...

Page 30: ...omponent equipped with an COAXIAL jack set Input Assign in the Input Option menu page 85 Notes The initial setting of the COMPONENT VIDEO IN 1 jacks are Blu ray disc player If you want to connect your Blu ray disc player to the COMPONENT VIDEO IN 2 or IN 3 jacks set Input Assign in the Input Option menu page 85 To input multi channel digital audio from the Blu ray disc player set the digital audio...

Page 31: ... change the initial setting of the DVD input button on the remote For details see Programming the remote page 112 You can also rename the DVD input so that it can be displayed on the receiver s display For details see Naming the input Name Input page 47 The initial setting of the COMPONENT VIDEO IN 2 jacks are DVD player or DVD recorder If you want to connect your DVD player or DVD recorder to the...

Page 32: ...dio cord not supplied DOptical digital cord not supplied Recommended connection Alternative connection Note The initial setting of the COMPONENT VIDEO IN 3 jacks are satellite tuner or cable TV tuner If you want to connect your satellite tuner or cable TV tuner to the COMPONENT VIDEO IN 1 or IN 2 jacks set Input Assign in the Input Option menu page 85 Connecting a satellite tuner cable TV tuner B ...

Page 33: ... not supplied Notes Be sure to change the initial setting of the VIDEO 1 input button on the remote so that you can use the button to control your DVD recorder For details see Programming the remote page 112 You can also rename the VIDEO 1 input so that it can be displayed on the TV screen and display For details see Naming the input Name Input page 47 Connecting components with analog video and a...

Page 34: ...EO MONITOR OUT jack When you play back a VCR with an image improvement circuit such as TBC the images may be distorted or may not be output In this case set the image improvement circuit function to off The resolution of the signals output to the HDMI TV OUT jacks are converted up to 1080p COMPONENT VIDEO MONITOR OUT jacks have restrictions on resolution when the resolution of video signals protec...

Page 35: ...necting the FM wire antenna aerial keep it as horizontal as possible 6 Inserting the wireless transmitter transceiver To use the S AIR function you need to insert the wireless transmitter not supplied into the S AIR main unit and the wireless transceiver not supplied into the S AIR sub unit Notes Before inserting the wireless transmitter transceiver be sure to disconnect the AC power cord mains le...

Page 36: ...ireless transmitter Note Do not use other screws to fasten the wireless transmitter To insert the wireless transceiver into the S AIR sub unit Refer to the operating instructions supplied with the surround amplifier and S AIR receiver 7 Connecting the AC power cord mains lead Connect the AC power cord mains lead to a wall outlet Notes Before connecting the AC power cord mains lead make sure that m...

Page 37: ...peaker system You can select the front speakers you want to drive Be sure to use the buttons on the receiver for this operation Press SPEAKERS repeatedly to select the front speaker system you want to drive To select SP B or SP A B set SB Assign to Speaker B in the Speaker Settings menu page 91 To turn off the speaker output Press SPEAKERS repeatedly until the SP A and SP B indicators on the displ...

Page 38: ... page 93 Before you perform Auto Calibration check the following items Set up and connect the speakers page 19 21 Connect only the supplied optimizer microphone to the AUTO CAL MIC jack Do not connect other microphones to this jack Set SB Assign to BI AMP in the Speaker Settings menu if you use bi amplifier connection page 91 Set SB Assign to Speaker B in the Speaker Settings menu if you use speak...

Page 39: ...ns at the same height as your ears On setting up the active subwoofer When a subwoofer is connected turn on the subwoofer and turn up the volume beforehand Turn the MASTER VOLUME to just before the mid point If you connect a subwoofer with a crossover frequency function set the value to maximum If you connect a subwoofer with an auto standby function set it to off deactivated Note Depending on the...

Page 40: ...to select Auto Cal Start then press or b 5 Press to select START 6 The measurement starts in five seconds 7 Measurement starts The measurement process will take approximately 30 seconds with a test tone Wait until the measurement process completes Tips Operations other than turning the receiver on or off are deactivated during the measurement The measurements may not be performed correctly or Auto...

Page 41: ... you want then press When the speaker s is are out of the phase OUT is displayed on the TV screen The and terminals of the speaker may be connected the other way around However depending on the speakers OUT appears on the TV screen even though the speakers are connected properly This is because of the speakers specifications In this case you can continue to use the receiver 3 Save the measurement ...

Page 42: ...depending on the position of the optimizer microphone and speakers and the shape of the room It is recommended that you follow the measurement results However you can change those settings in the Speaker Settings menu Save the measurement results first then try to change the settings if you want Calibration type and explanation Full Flat Makes the measurement of frequency from each speaker flat En...

Page 43: ...zer microphone is not connected Either the surround left or surround right speaker is not connected Surround back speakers or front high speakers are connected even though surround speakers are not connected Connect the surround speaker s to the SPEAKERS SURROUND terminals The surround back speaker is connected only to the SPEAKERS SURROUND BACK FRONT HIGH BI AMP FRONT B R terminals When you conne...

Page 44: ... the GUI menu appears on the TV screen Press MENU if the GUI menu does not appear on the TV screen 2 Press V v repeatedly to select a menu you want then press The menu item list appears on the TV screen Example When you select Settings 3 Press V v repeatedly to select the menu item you want to adjust then press to enter the menu item 4 Repeat steps 2 and 3 to select the parameter you want To retur...

Page 45: ... is displayed The option menu appears 4 Press V v repeatedly to select the option menu item you want then press or b 5 Press V v repeatedly to select the parameter you want then press To exit the menu Press MENU Menu icon Description Input Selects the input source component connected to the receiver page 46 Music Selects the music from the audio component connected to the DIGITAL MEDIA PORT adapte...

Page 46: ...ss SOUND FIELD to enjoy the surround sound You can also use 2CH A DIRECT A F D MOVIE MUSIC button on the receiver For details see page 65 Tips You can press INPUT SELECTOR on the receiver repeatedly or press input buttons on the remote to select the component you want You can adjust the volume differently depending on the speed with which you turn the MASTER VOLUME on the receiver To turn the volu...

Page 47: ...elect the input you want 2 Press TOOLS OPTIONS The option menu appears 3 Press V v repeatedly to select Name Input then press 4 Press V v B b to select a character then press The name you entered is registered To cancel naming input Press RETURN EXIT O You can check the sound field etc by changing the information on the display Press AMP then press DISPLAY repeatedly You can also use DISPLAY on th...

Page 48: ... connected to the DIGITAL MEDIA PORT The DIGITAL MEDIA PORT DMPORT allows you to enjoy picture and sound from a network system such as a portable audio video source or computer For details on connecting the DIGITAL MEDIA PORT adapter see Connecting audio components page 24 You can use the following Sony DIGITAL MEDIA PORT adapters TDM BT1 BT10 Bluetooth Wireless Audio Adapter TDM NW10 DIGITAL MEDI...

Page 49: ...de is for the TDM iP50 and TDM NC1 The list of tracks will be displayed on the GUI screen of the receiver You can select a track you want and play it back on each GUI screen iPod This mode is for the TDM iP50 If the option menu does not appear on the screen refer to the operating instructions of the connected component When an adapter other than iPod is connected a hierarchical menu does not appea...

Page 50: ...EDIA PORT adapter using the following buttons on the remote of the receiver Fast backward forward while pressing and holding the m M button iPod Playlists Playlist Track Artists Artist Album Track Albums Album Track Songs Track Genres Genre Artist Album Track Composers Composer Track Audiobooks Audiobook Track Network Client Music Surfina Albumc Track Playlista Playlist Track Web Radioa Station Pr...

Page 51: ... x Repeat TDM iP50 only OFF One All x Shuffle TDM iP50 only OFF Songs Albums x List Mode TDM NC1 only All Tracks Disc List Artist List Genre List x Audiobook TDM iP50 only Low Normal High DIGITAL MEDIA PORT message list TDM NC1 only Selecting the playback mode Message and explanation No Adapter The adapter is not connected No Device There is no device connected to the adapter No Audio No audio fil...

Page 52: ...he receiver You can record from a video audio component using the receiver Refer to the operating instructions supplied with your recording component You can record onto a CD R using the receiver Refer to the operating instructions supplied with your CD recorder 1 Press one of the input buttons to select the playback component You can also use INPUT SELECTOR on the receiver 2 Prepare the playback ...

Page 53: ...es Some sources contain copy guards to prevent recording In this case you may not be able to record from the source Only analog input signals are output from the analog output jack for recording HDMI sound cannot be recorded Listening to FM AM radio You can listen to FM and AM broadcasts through the built in tuner Before operation make sure you have connected the FM and AM antennas aerials to the ...

Page 54: ... You can enter the frequency of a station directly by using the numeric buttons 1 Press GUI MODE After MENU ON appears on the display for a while GUI appears and the GUI menu appears on the TV screen Press MENU if the GUI menu does not appear on the TV screen 2 Press V v repeatedly to select FM or AM then press or b The FM or AM menu list appears on the TV screen 3 Press V v repeatedly to select D...

Page 55: ...eset Tuning You can preset up to 30 FM and 30 AM stations Then you can easily tune in the stations you often listen to 1 Press GUI MODE After MENU ON appears on the display for a while GUI appears and the GUI menu appears on the TV screen Press MENU if the GUI menu does not appear on the TV screen 2 Press V v repeatedly to select FM or AM then press or b The FM or AM menu list appears on the TV sc...

Page 56: ...RDS Models of area code CEK ECE AU1 TW2 only This receiver allows you to use Radio Data System RDS which enables radio stations to send additional information along with the regular program signal This receiver offers convenient RDS features such as Program Service name display Notes RDS is operable only for FM stations Not all FM stations provide RDS service nor do they provide the same type of s...

Page 57: ...ed with the SIRIUS tuner There are a variety of programming packages available including the option of adding The Best of XM programming to the SIRIUS service The Best of XM service is not available to SIRIUS Canada subscribers at this time Please check with SIRIUS Canada for any updates using the numbers and web address below Family friendly packages are also available to restrict channels featur...

Page 58: ...to avoid picking up noise Preparing to listen to the SIRIUS Satellite Radio 1 Press GUI MODE After MENU ON appears on the display for a while GUI appears and the GUI menu appears on the TV screen Press MENU if the GUI menu does not appear on the TV screen 2 Press V v repeatedly to select SR then press or b 3 Press TOOLS OPTIONS then press V v repeatedly to select Sirius ID then press or b 4 Check ...

Page 59: ... b 4 While checking the quality of the reception adjust the direction of the antenna to obtain the best reception To exit the menu Press MENU Selecting a channel of the SIRIUS Satellite Radio You can select a channel from one category or all the categories 1 Press GUI MODE After MENU ON appears on the display for a while GUI appears and the GUI menu appears on the TV screen Press MENU if the GUI m...

Page 60: ...d on the TV screen Note When you select a channel in the Category Mode the channel you selected may not be the one in the category you want This is because one channel may belong to more than one category 1 Press GUI MODE After MENU ON appears on the display for a while GUI appears and the GUI menu appears on the TV screen Press MENU if the GUI menu does not appear on the TV screen 2 Press V v rep...

Page 61: ...ory then press or b 6 Press V v repeatedly to select the preset channel you want then press Preset channels from 1 to 30 are available and a default channel is preset for all the preset channels when you purchase the receiver The selected channel is registered as the preset channel you selected in step 3 7 Repeat steps 3 to 6 to preset another channel 1 Repeat steps 1 and 2 of Presetting channels ...

Page 62: ...hen press the numeric buttons to enter your 4 digit lock code The channel has been locked appears and the Parental Lock is set To delete the numbers you have entered go back to step 2 by pressing RETURN EXIT O and then repeat the procedure above from step 2 To change the lock code Lock Code 1 Select a channel you want to change the lock code using Category Mode page 59 or Direct Tuning page 60 2 P...

Page 63: ...ss or b 4 Press V v repeatedly to select OFF then press Enter your 4 digit lock code appears 5 Press SHIFT then press the numeric buttons to enter your 4 digit lock code The channel has been unlocked appears and the channel is unlocked Notes When you select a channel using Category Mode locked channels are skipped When the receiver is reset to the initial settings the lock code returns to the defa...

Page 64: ...selected channel SR Tuner SR TUNER The SiriusConnect Home tuner is not connected properly Check all the connections and then turn the system on again Also make sure if the AC adaptor supplied with the SiriusConnect Home tuner is connected to a wall socket Invalid INVALID You have entered an invalid channel number The channel to be tuned in is void due to the change by the broadcast service or the ...

Page 65: ...he volume and front speaker level can be adjusted Note You cannot select Analog Direct when you select DVD DMPORT and HDMI 1 4 as input The Auto Format Direct A F D mode allows you to listen to high fidelity sound and select the decoding mode for listening to a 2 channel stereo sound as multi channel sound x A F D AUTO A F D Auto Presets the sound as it was recorded encoded without adding any surr...

Page 66: ... is decoded into 7 channels You can take advantage of surround sound simply by selecting one of the receiver s preprogrammed sound fields They bring the exciting and powerful sound of concert halls into your home x HALL Hall Reproduces the acoustics of a classical concert hall x JAZZ Jazz Club Reproduces the acoustics of a jazz club x CONCERT Live Concert Reproduces the acoustics of a 300 seat liv...

Page 67: ... same time PLIIx is available only when the speaker pattern is set to a setting with surround back speaker s PLIIz is available only when the speaker pattern is set to a setting with front high speakers The sound fields for music and movies do not work in the following cases Signals with a sampling frequency of more than 48 kHz are being received Signals with more than 5 1 channel are being receiv...

Page 68: ...For details refer to the operating instructions of the playback component b Signals with a sampling frequency of more than 96 kHz are played back at 96 kHz or 88 2 kHz When connecting Blu ray disc players and other next generation HD players Audio format Maximumnumber of channels Connection of the playback component and the receiver COAXIAL OPTICAL HDMI Dolby Digital 5 1 a a Dolby Digital EX 6 1 a...

Page 69: ...HT ON The NIGHT MODE function is activated The NIGHT MODE is set to on and off as you press NIGHT MODE Note This function does not work in the following cases Sound Field is set to Analog Direct Signals with a sampling frequency of more than 48 kHz are being received Tip While this function is on the Bass Treble and Effect Levels increase and D Range Comp is automatically set to MAX Resetting soun...

Page 70: ... is compatible with the Control for HDMI Easy Setting function If your TV is compatible with the Control for HDMI Easy Setting function you can set the Control for HDMI function of the receiver and playback components automatically by setting the TV page 70 If your TV is not compatible with the Control for HDMI Easy Setting function set the Control for HDMI function of the receiver playback compon...

Page 71: ...or b 6 Press V v repeatedly to select ON then press The Control for HDMI function is set to on 7 Set the Control for HDMI function of the connected component to on If the Control for HDMI function for the connected component is already set to on you do not need to change the setting For details on setting the TV and connected components refer to the operating instructions of the respective compone...

Page 72: ... by a simple operation You can operate System Audio Control function using the TV menu For details refer to the operating instructions of the TV You can also use the System Audio Control function as follows If you turn on the receiver while the TV is turned on the System Audio Control function will automatically be set to on and the TV sound will output from the speakers connected to the receiver ...

Page 73: ...fore using the System Power Off function For details refer to the operating instructions of the TV Depending on the status the connected components may not be turned off For details refer to the operating instructions of the connected components Enjoying movies with the optimum sound field Theater Theatre Mode Sync Press THEATER or THEATRE on the remote of the receiver TV or the Blu ray disc playe...

Page 74: ...MODE After MENU ON appears on the display for a while GUI appears and the GUI menu appears on the TV screen Press MENU if the GUI menu does not appear on the TV screen 2 Press V v repeatedly to select Settings then press or b The Settings menu list appears on the TV screen 3 Press V v repeatedly to select HDMI then press or b 4 Press V v repeatedly to select ARC then press or b 5 Press V v repeate...

Page 75: ...ound and surround back speakers sound wirelessly For details refer to the operating instructions supplied with the surround amplifier S AIR receiver You can enjoy system sound in another room These S AIR products can be purchased as an option the S AIR product lineup differs depending on the area See the notes or instructions for the S AIR sub unit in this manual only when the S AIR sub unit is us...

Page 76: ...ion Materials or structures such as walls and floors The location where an S AIR product is placed When using S AIR products place them as far as possible from the above electronic equipment or place where S AIR reception is stable Setting up an S AIR product Before using an S AIR product be sure to perform the following settings to establish the sound transmission Inserting thewireless transmitte...

Page 77: ...S AIR ID then press or b The S AIR ID menu appears 5 Press V v repeatedly to select the ID A B or C you want then press The ID of the S AIR main unit is set Set S AIR ID of the sub unit to the same as that of the main unit appears 6 Press 7 Press GUI MODE The GUI menu turns off 8 Set the S AIR sub unit to the same ID Sound transmission is established as follows example Tip To confirm the current I...

Page 78: ...d their IDs are the same as yours your neighbors could receive the sound of your S AIR main unit or vice versa To prevent this you can pair the S AIR main unit with a specific S AIR sub unit by performing the pairing operation x Before pairing Sound transmission is established by the ID example x After pairing Sound transmission is established between the paired S AIR main unit and S AIR sub unit ...

Page 79: ... Press B b repeatedly to select Yes then press The S AIR main unit starts pairing Pairing Do the pairing operation with the S AIR sub unit appears 8 Start pairing of the S AIR sub unit Refer to the operating instructions of the S AIR sub unit Notes Perform pairing within 5 minutes in step 7 If you do not pairing is recognized as failed and the screen changes accordingly In this case see If pairing...

Page 80: ...R receiver For details see Pairing the S AIR main unit with a specific S AIR sub unit Pairing operation page 78 2 Press GUI MODE After MENU ON appears on the display for a while GUI appears and the GUI menu appears on the TV screen Press MENU if the GUI menu does not appear on the TV screen 3 Press V v repeatedly to select Settings then press or b The Settings menu list appears on the TV screen 4 ...

Page 81: ...cannot output to the S AIR receiver To control the system from the S AIR receiver You can control the system from the S AIR receiver by using the following buttons For details refer to the operating instructions of the S AIR receiver Changing the channel for better sound transmission If you use multiple wireless systems which share the 2 4 GHz band such as wireless LAN or Bluetooth the transmissio...

Page 82: ...AIR ID A equivalent channel for IEEE 802 11b g channel 1 S AIR ID B equivalent channel for IEEE 802 11b g channel 6 S AIR ID C equivalent channel for IEEE 802 11b g channel 11 The transmission may be improved by changing the transmission channel frequency of the other wireless system s For details refer to the operating instructions of the other wireless system s Stabilizing S AIR reception Check ...

Page 83: ...ying the S AIR receiver while the S AIR main unit is in standby mode For the S AIR receiver only not supplied You can enjoy the S AIR receiver while the S AIR main unit is in standby mode by setting S AIR Stby to ON 1 Press GUI MODE After MENU ON appears on the display for a while GUI appears and the GUI menu appears on the TV screen Press MENU if the GUI menu does not appear on the TV screen 2 Pr...

Page 84: ...on the S AIR receiver The sound of the S AIR receiver may be cut off by operation of the S AIR main unit When the receiver is in standby mode A STANDBY appears on the display if S AIR Stby is set to ON Switching between digital and analog audio INPUT MODE When you connect components to both digital and analog audio input jacks on the receiver you can fix the audio input mode to either of them or s...

Page 85: ...ode U2 CA2 only Enjoying the sound images from other inputs You can reassign audio and or video signals to another input when they are not currently being used For example when you want to connect your DVD player but cannot find an unused input 1 Press GUI MODE After MENU ON appears on the display for a while GUI appears and the GUI menu appears on the TV screen Press MENU if the GUI menu does not...

Page 86: ... to select Input Assign then press or b The Input Assign screen appears 6 Select the audio and or video signals you want to assign to the input which you selected in step 3 using V v B b 7 Press to enter the setting Name lnput Input Assign Input BD TV VIDEO 1 SAT CATV DVD Select Video Select Audio COMP 3 SAT OPT DVD COAX ANALOG Input Assign RETURN COMP 2 CVBS ...

Page 87: ...ou cannot reassign more than one HDMI input to the same input You cannot reassign more than one digital audio input to the same input You cannot reassign more than one component video input to the same input Input name BD DVD SAT CATV VIDEO 1 VIDEO 2 SA CD CD CD R Assignable video input jacks COMP 1 a a a a a a COMP 2 a a a a a a COMP 3 a a a a a a CVBS a a a a HDMI1 a a a a a a HDMI2 a a a a a a ...

Page 88: ...ly to select the appropriate speaker pattern so that there are no surround back speakers and front high speakers then press 6 Press V v repeatedly to select SB Assign then press or b 7 Press V v repeatedly to select BI AMP then press The same signals output from the SPEAKERS FRONT A terminals can be output from the SPEAKERS SURROUND BACK FRONT HIGH BI AMP FRONT B terminals To exit the menu Press M...

Page 89: ...ars on the TV screen Press MENU if the GUI menu does not appear on the TV screen 2 Press V v repeatedly to select Settings then press or b to enter the menu mode The Setting menu list appears on the TV screen 3 Press V v repeatedly to select the menu item you want then press or b Example When you select Auto Cal 4 Press V v repeatedly to select the parameter you want then press or b To return to t...

Page 90: ...egister 3 patterns as Position 1 2 and 3 depending on the listening position listening environment and measurement conditions Menu Description Auto Cal Sets the speaker level or distance and makes the measurement automatically page 90 Speaker Sets the speaker position manually page 91 Surround Adjusts the sound field surround effect you choose page 95 EQ Adjusts the equalizer bass treble sound pag...

Page 91: ...t Name Input then press or b 3 Press V v B b to select a character then press The name you entered is registered Speaker Settings menu You can adjust each speaker manually You can also adjust the speaker levels after the Auto Calibration is completed Note The speaker settings are only for the current seating position Select SP Pattern according to the speaker system which you are using You do not ...

Page 92: ...or music is selected no sound is output from the subwoofer if all the speakers are set to Large However the sound will be output from the subwoofer if the digital input signal contains LFE signals the front or surround speakers are set to Small the sound field for movie is selected Portable Audio is selected To adjust the distance from the seating position to each speaker You can adjust the distan...

Page 93: ...nd level is lower than you prefer set all speakers to Large If there is not enough bass you can use the equalizer to boost the bass levels The surround back speakers will be set to the same setting as that of the surround speakers When the front speakers are set to Small the center surround and front high speakers are also automatically set to Small If you do not use the subwoofer the front speake...

Page 94: ... FR FL CNT Lets you output front 2 channel source sound instead of the test tone sequentially from adjacent speakers Some items may not be displayed depending on the setting of the speaker pattern 3 Press V v repeatedly to adjust the speaker level then press When a test tone is not output from the speakers The speaker cords may not be connected securely Check to see if they are connected securely ...

Page 95: ...t x METER The distance is displayed in meters Surround Settings menu You can adjust the sound effect on the S F Select screen Note The setup items you can adjust on each menu vary depending on the sound field You can select the surround sound field and adjust the effect level on the S F Select screen For details on the sound field see Enjoying Surround Sound page 65 To select the surround sound fi...

Page 96: ... to suit your preference Lets you delay the output of audio to minimize the time gap between audio output and visual display You can adjust the delay from 0 ms to 300 ms in 10 ms steps Notes This parameter is useful when you use a large LCD or plasma monitor or a projector This function does not work in the following cases Sound Field is set to Analog Direct Signals with a sampling frequency of mo...

Page 97: ...he very beginning of the first track depending on the CD being played back When playback a DTS CD set Dec Priority to AUTO Video Settings menu You can make settings for video Lets you convert the resolution of analog video input signals component video and video and output from the HDMI TV OUT jack x AUTO The resolution is set automatically depending on the connected TV x 480 576p The resolution i...

Page 98: ...signals to the TV even when the receiver is in standby mode x ON When the receiver is in the standby mode the receiver continuously outputs HDMI signals from the receiver s HDMI TV OUT jack x AUTO When the TV is turned on while the receiver is in the standby mode the receiver outputs HDMI signals from the receiver s HDMI TV OUT jack Sony recommends this setting if you use a TV that is compatible w...

Page 99: ...playback component depends on the TV s sound quality such as the number of channels and the sampling frequency etc When the TV has stereo speakers the sound output from the receiver is also stereo as that of the TV even if you play back multi channel source When you connect the receiver to an image display component projector etc sound may not be output from the receiver In this case select AMP Wh...

Page 100: ...ailable when Ctrl for HDMI is set to OFF System Settings menu You can customize the settings of the receiver Lets you set the receiver switch to standby mode automatically when you do not operate the receiver or when there is no signals input to the receiver x ON Switches to standby mode after approximately 30 minutes x OFF Does not switch to standby mode Notes This function does not work in the f...

Page 101: ...et to display on the TV screen using a GUI 1 Press AMP 2 Press MENU 3 Press V v repeatedly to select the menu you want then press or b 4 Press V v repeatedly to select the parameter you want to adjust then press or b 5 Press V v repeatedly to select the setting you want then press To return to the previous display Press B or RETURN EXIT O To exit the menu Press MENU Note Some parameters and settin...

Page 102: ... FR LH RH FL RH FL SR SL FL SB SL SBL SL SBR SBL SR SB SR SBR SR SL FR SR FR SL CNT FR FL CNT OFF Front left speaker levela FL LEVEL FL 10 0 dB to FL 10 0 dB 0 5 dB per step FL 0 dB Front right speaker levela FR LEVEL FR 10 0 dB to FR 10 0 dB 0 5 dB per step FR 0 dB Center speaker levela CNT LEVEL CNT 20 0 dB to CNT 10 0 dB 0 5 dB per step CNT 0 dB Surround left speaker levela SL LEVEL SL 20 0 dB ...

Page 103: ...speaker distancea FR DIST FR 3 3 to FR 32 9 FR 1 00 m to FR 10 00 m 1 inch 0 01 m step FR 9 10 FR 3 00 m Center speaker distancea CNT DIST CNT 3 3 to CNT 32 9 CNT 1 00 m to CNT 10 00 m 1 inch 0 01 m step CNT 9 10 CNT 3 00 m Surround left speaker distancea SL DIST SL 3 3 to SL 32 9 SL 1 00 m to SL 10 00 m 1 inch 0 01 m step SL 9 10 SL 3 00 m Surround right speaker distancea SR DIST SR 3 3 to SR 32 ...

Page 104: ...Hz 10 Hz step CROSS 120 Hz Surround settings SURROUND Sound field selection S F SELECT For details see Enjoying Surround Sound page 65 MULTI ST j Effect levelf EFFECT EFCT MAX EFCT STD EFCT MIN EFCT STD EQ settings EQ Front speakers bass level BASS BASS 10 dB to BASS 10 dB 1 dB per step BASS 0 dB Front speakers treble level TREBLE TREBLE 10 dB to TREBLE 10 dB 1 dB per step TREBLE 0 dB Tuner settin...

Page 105: ...lution RESOLUTION AUTO 480 576p 720p 1080i 1080p AUTO Video input assignment V ASSIGN For details see Enjoying the sound images from other inputs page 85 Switching component signals COMP DEC DEC ON DEC OFF DEC OFF HDMI settings HDMI Control for HDMI CTRL HDMI CTRL ON CTRL OFF CTRL ON HDMI Pass Through PASS THRU ON AUTO OFF OFF Setting HDMI audio input AUDIO OUT AMP TV AMP AMP Subwoofer level for H...

Page 106: ...only select this parameter if you select Cinema Studio A B C as sound field g This parameter is only available if the SiriusConnect Home tuner is connected to the SIRIUS jack on the receiver h This parameter is only available when HDMI input is selected i This parameter is only available if the S AIR transmitter not supplied is inserted to the EZW T100 slot on the receiver j A F D AUTO for models ...

Page 107: ...be canceled when you do the following during the measurement process Press 1 Press the input buttons on the remote or press the INPUT SELECTOR repeatedly on the receiver Press MUTING RM AAP051 only or RM AAP052 only on the remote You can also use MUTING on the receiver Press SPEAKERS on the receiver Change the volume level Connect the headphones Tips Operations other than turning the receiver on o...

Page 108: ...ound left SR Surround right SBL Surround back left SBR Surround back right LH Front left high RH Front right high SW Subwoofer Depending on the measurement result the speaker channel may not appears Item and explanation EXIT Exits the setting process without saving the measurement results LEVEL INFO Displays the measurement result for speaker level DIST INFO Displays the measurement result for spe...

Page 109: ... 1 After selecting the FM or AM band press D TUNING 2 Press SHIFT then press numeric buttons to enter the frequency 3 Press 1 Tune in the station that you want to preset For details on the operation see Tuning radio stations page 109 2 Press SHIFT then press MEMORY MEM lights up for a few seconds Perform steps 3 and 4 before MEM disappears 3 Press PRESET or PRESET to select a preset number 30 FM a...

Page 110: ...r 2 Press TUNING or TUNING to select channel 0 3 Check the SIRIUS ID on the display and write it in the space provided here SIRIUS ID ___________________________ Selecting channels from a category CATEGORY TUNING 1 Press TUNER repeatedly to select SIRIUS You can also use INPUT SELECTOR on the receiver 2 Press CATEGORY MODE repeatedly to select ONE CAT ALL CAT You can select a channel from all the ...

Page 111: ... steps 1 to 4 to preset another channel Selecting a preset channel 1 Press TUNER repeatedly to select SIRIUS 2 Press PRESET or PRESET repeatedly to select the preset channel you want You can also press SHIFT then numeric buttons to select the preset channel you want Then press to enter the selection You can change the brightness of the front panel display 1 Press AMP 2 Press MENU 3 Press V v repea...

Page 112: ...p 3 Press numeric buttons to enter the numeric code or one of the codes if more than one code exists corresponding to the component and the maker of the component you want to control including TV button See the tables on page 113 116 for information on the numeric code s Note For a TV remote code value only numbers in the 500 s are valid 4 Press ENTER Once the numeric code has been verified the RM...

Page 113: ...ogram your remote using one of the codes try using other codes Notes The numeric codes are based on the latest information available for each brand There is a chance however that your component will not respond to some or all of the codes All of the input buttons on this remote may not be available when used with your particular component To control a tuner To control a CD player To control a DAT ...

Page 114: ... SONY 401 402 403 BROKSONIC 424 DENON 405 HITACHI 416 JVC 415 423 MITSUBISHI 419 ORITRON 417 PANASONIC 406 408 425 PHILIPS 407 PIONEER 409 410 RCA 414 SAMSUNG 416 422 TOSHIBA 404 421 ZENITH 418 420 Maker Code s SONY 401 402 403 Maker Code s SONY 411 Maker Code s SONY 401 402 403 Maker Code s SONY 501 502 AIWA 501 536 539 AKAI 503 AOC 503 CENTURION 566 CORONADO 517 CURTIS MATHES 503 551 566 567 DAY...

Page 115: ...45 546 560 567 SCOTT 503 566 SEARS 503 508 510 517 518 551 SHARP 517 535 550 561 565 SYLVANIA 503 518 566 THOMSON 530 537 547 549 TOSHIBA 535 539 540 541 551 TELEFUNKEN 530 537 538 547 549 558 TEKNIKA 517 518 567 WARDS 503 517 566 YORK 566 ZENITH 542 543 567 GE 503 509 510 544 LOEWE 515 534 556 Maker Code s Maker Code s SONY 601 602 603 PIONEER 606 Maker Code s SONY 605 Maker Code s SONY 701 702 7...

Page 116: ... s SONY 801 802 803 804 824 825 865 AMSTRAD 845 846 BskyB 862 GENERAL ELECTRIC GE 866 GRUNDIG 859 860 HUMAX 846 847 THOMSON 857 861 864 876 PACE 848 849 850 852 862 863 864 PANASONIC 818 855 PHILIPS 856 857 858 859 860 864 874 NOKIA 851 853 854 864 RCA PROSCAN 866 871 BITA HITACHI 868 HUGHES 867 JVC Echostar Dish Network 873 MITSUBISHI 872 SAMSUNG 875 TOSHIBA 869 870 Maker Code s SONY 821 822 823 ...

Page 117: ...mposite video A standard format for transmitting video signal information The luminance signal Y and chrominance signal C are combined and transmitted together x Crossover frequency The frequency at which two speaker s frequencies intersect x Deep Color Deep Colour Video signals for which the color depth of signals passing through an HDMI jack have been raised The number of colors that could be ex...

Page 118: ...t to the sound field through the addition of left and right front high speakers It decodes nondirectional elements in the audio mix and reproduces them from the high speakers giving an enhanced sense of depth and airiness to the sound field x Dolby Surround Dolby Pro Logic Audio processing technology developed by Dolby Laboratories Inc Center and mono surround information is matrixed into two ster...

Page 119: ...o signals x High Bitrate Audio It refers to the audio formats of the compression method DTS HD Master Audio Dolby TrueHD etc which is a high bitrate format recorded mainly on Blu ray disc etc x Interlace A scanning method which completes a picture by displaying half of the lines on a tube surface of a TV or monitor each 1 60 second First all the odd numbered lines are drawn leaving spaces between ...

Page 120: ...n safety Should any solid object or liquid fall into the cabinet unplug the receiver and have it checked by qualified personnel before operating it any further On power sources Before operating the receiver check that the operating voltage is identical with your local power supply The operating voltage is indicated on the nameplate on the back of the receiver The unit is not disconnected from the ...

Page 121: ...s transmits sound by radio waves sound may skip when radio waves are obstructed This is a characteristic of radio waves and is not malfunction As the S AIR product s transmits sound by radio waves equipment that generates electromagnetic energy such as a microwave oven may prevent sound transmission As the S AIR function uses the radio waves that share the same frequency as other wireless systems ...

Page 122: ...nt Check that the cord s used for the connection is are fully inserted into the jacks on both the receiver and the component There is no sound from one of the front speakers Connect a pair of headphones to the PHONES jack to verify that sound is output from the headphones If only one channel is output from the headphones the component may not be connected to the receiver correctly Check that all t...

Page 123: ...h alcohol There is no sound or only a very low level sound is heard from the center surround surround back front high speakers Select a Cinema Studio EX mode page 65 66 Adjust the speaker level page 92 Make sure the center surround speaker s is are set to either Small or Large Check that the speaker settings are appropriate using the Auto Calibration menu or SP Pattern in the Speaker Settings menu...

Page 124: ...nel format Check whether the setup on the playback component is set to multi channel sound Check to make sure the selected digital audio input jack is not assigned to other inputs in Input Assign in the Input Option menu page 85 There is no sound from the component connected to the DIGITAL MEDIA PORT adapter Adjust the volume of this receiver The DIGITAL MEDIA PORT adapter and or component is not ...

Page 125: ... The Control for HDMI function does not work Check the HDMI connection page 27 Make sure Ctrl for HDMI is set to ON in HDMI Settings menu Make sure the connected component is compatible with the Control for HDMI function Check the Control for HDMI settings on the connected component Refer to the operating instructions of the connected component Repeat the procedures of Preparing for the BRAVIA Syn...

Page 126: ...er to select the HDMI component you want to enjoy Make sure Pass Through is set to ON in the HDMI Settings menu if you connect components not compatible with the BRAVIA Sync to the receiver page 98 S AIR connection is not established sound transmission is not established e g the indicator of the S AIR sub unit turns off flashes or turns red If you use another S AIR main unit place it more than 26 ...

Page 127: ...rs away from this S AIR main unit Sources with copyright protection may not be playable on S AIR sub unit Place the S AIR main unit and S AIR sub unit closer to each other Avoid using the equipment that generates electromagnetic energy such as a microwave oven Place the S AIR main unit and S AIR sub unit separately from other wireless devices Avoid using any other wireless devices Change the RF Ch...

Page 128: ...ou are tuned to an FM RDS station Select a stronger FM station The RDS information that you want does not appear b Contact the radio station and find out whether they actually provide the service in question If so the service may be temporarily out of order a Models of area code U2 CA2 only b Models of area code CEK ECE AU1 TW2 only The remote does not function Point the remote at the remote senso...

Page 129: ... Models of area code U2 only With 8 ohm loads both channels driven from 20 Hz 20 000 Hz rated 100 watts per channel minimum RMS power with no more than 0 09 total harmonic distortion from 250 milliwatts to rated output Amplifier section Models of area code U21 Minimum RMS Output Power 8 ohms 20 Hz 20 kHz THD 0 09 100 W 100 W Stereo Mode Output Power 8 ohms 1 kHz THD 1 110 W 110 W Surround Mode Out...

Page 130: ...nbalanced Intermediate frequency 10 7 MHz AM tuner section Tuning range Antenna aerial Loop antenna aerial Intermediate frequency 450 kHz Video section Inputs Outputs Video 1 Vp p 75 ohms COMPONENT VIDEO Y 1 Vp p 75 ohms PB CB 0 7 Vp p 75 ohms PR CR 0 7 Vp p 75 ohms 80 MHz HD Pass Through HDMI Video Input Output HDMI Repeater block 640 480p 60 Hz 720 480p 59 94 60 Hz 1280 720p 59 94 60 Hz 1920 108...

Page 131: ...ions width height depth Approx 17 in 6 1 4 in 12 7 8 in 430 mm 157 5 mm 324 5 mm including projecting parts and controls Mass Approx 18 lb 16 oz 8 6 kg Design and specifications are subject to change without notice Area code Power requirements U2 CA2 120 V AC 60 Hz ECE CEK 230 V AC 50 60 Hz AU1 230 V AC 50 Hz TW2 110 V AC 60 Hz Area code Power consumption U2 CA2 CEK ECE AU1 TW2 250 W For details o...

Page 132: ...ncy 93 103 D DCAC DigitalCinemaAuto Calibration 38 Decode Priority 97 105 DIGITAL MEDIA PORT 48 DIMMER 111 Direct Tuning 54 60 109 110 Display 11 Distance Unit 95 103 Dolby Digital EX 68 Dual Mono 96 105 DVD player 28 31 DVD recorder 33 Dynamic range compression 94 102 E Effect level 95 EQ settings 96 104 Error messages 128 F FM 53 109 FM Mode 54 104 G GUI Graphical User Interface 44 H HDMI Pass T...

Page 133: ...S AIR settings 106 Satellite tuner 28 32 Settings menu 89 SIRIUS Satellite Radio 57 110 Sleep Timer 52 Sound Field 65 95 Speaker settings 91 103 Subwoofer Level 99 105 Super Audio CD player 24 Surround settings 95 104 System Audio Control 72 System Power Off 73 System settings 105 T Test Tone 93 102 Theater Theatre Mode Sync 73 Tuner 53 Tuner settings 104 Tuning 54 55 TV 23 28 U Up converting 34 V...

Page 134: ...D NORM S JOB SONY HA SO0062 STR DN1010 GB GB01COV_STR DN1010 CELIX fm masterpage Left STR DN1010 4 174 068 11 1 ...

Page 135: ...D NORM S JOB SONY HA SO0062 STR DN1010 GB GB01COV_STR DN1010 CELIX fm masterpage Left STR DN1010 4 174 068 11 1 ...

Page 136: ...D NORM S JOB SONY HA SO0062 STR DN1010 GB GB01COV_STR DN1010 CELIX fm masterpage Left Sony Corporation Printed in Malaysia model name1 STR DN1010 4 174 068 11 1 ...

Reviews: