VAIO Digital Studio™ System Reference Manual
48
10
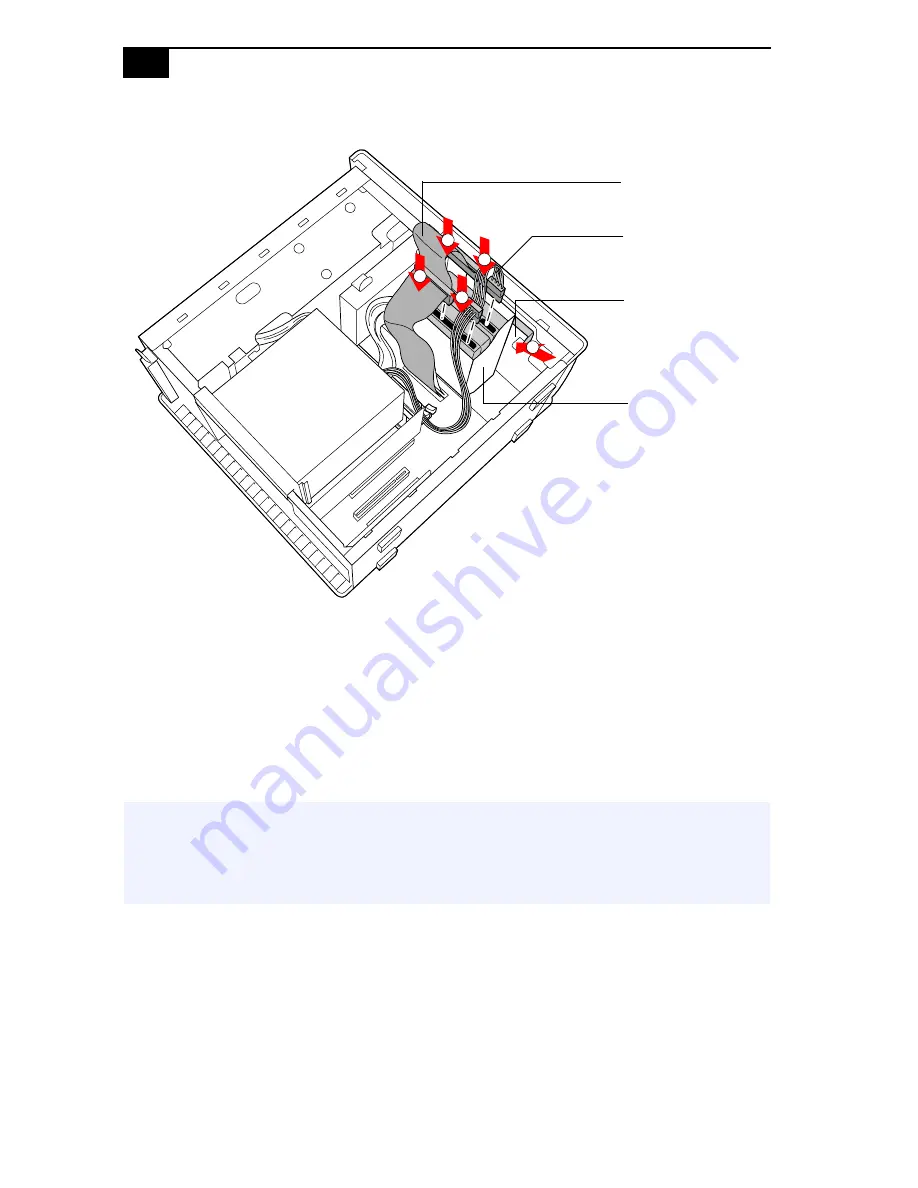
Push in on the tab (A) to securely latch the holder to the chassis.
11
Connect the inner drive cable connector (B) to the first drive.
12
Connect the outer drive cable connector (C) to the second drive.
13
Connect the first power connector (D) to the first drive.
14
Connect the second power connector (E) to the second drive.
15
Replace the side cover (see
“Replacing the Side Cover”
on page 29).
16
Reconnect the power cord to the system and then turn on your
computer.
All models except the PCV-RX490TV will automatically recognize the
new drive and configure itself accordingly when you turn it on. Format
and partition the new drive following the instructions provided with the
drive.
!
For the PCV-RX490TV model, refer to the instructions on the
following page to finish installing your new hard drive. Do not
complete step 16 of this procedure; it will cause functionality
problems to the Giga Pocket card.
C
E
A
B
D
Drive connectors
Power connectors
Tab
Disk drive holder
Summary of Contents for PCV-RX462DS
Page 1: ......
Page 16: ...VAIO Digital Studio System Reference Manual 2 Front View All Models ...
Page 34: ...VAIO Digital Studio System Reference Manual 20 ...
Page 40: ...VAIO Digital Studio System Reference Manual 26 ...
Page 66: ...VAIO Digital Studio System Reference Manual 52 ...
Page 94: ...VAIO Digital Studio System Reference Manual 80 ...


