Removing and Installing Memory Modules
Make sure you read the safety information in
Precautions and Procedures
before you remove or install a memory module.
When installing a memory module, do not open the module package until you are ready to install it. The package protects
the module from Electrostatic discharge (ESD).
For memory upgrades and information about which memory modules to use, refer to your VAIO
®
Computer Specifications
available on the
Welcome
page.
To remove a memory module
1.
Turn off the computer and all attached devices.
2.
Disconnect the power cord, all cables, and remove the battery if it is installed. See "To remove the battery."
3.
Wait for the computer to cool down.
The interior of the computer becomes extremely hot during operation. Wait at least one hour for the computer to
cool down before you remove the screws.
4.
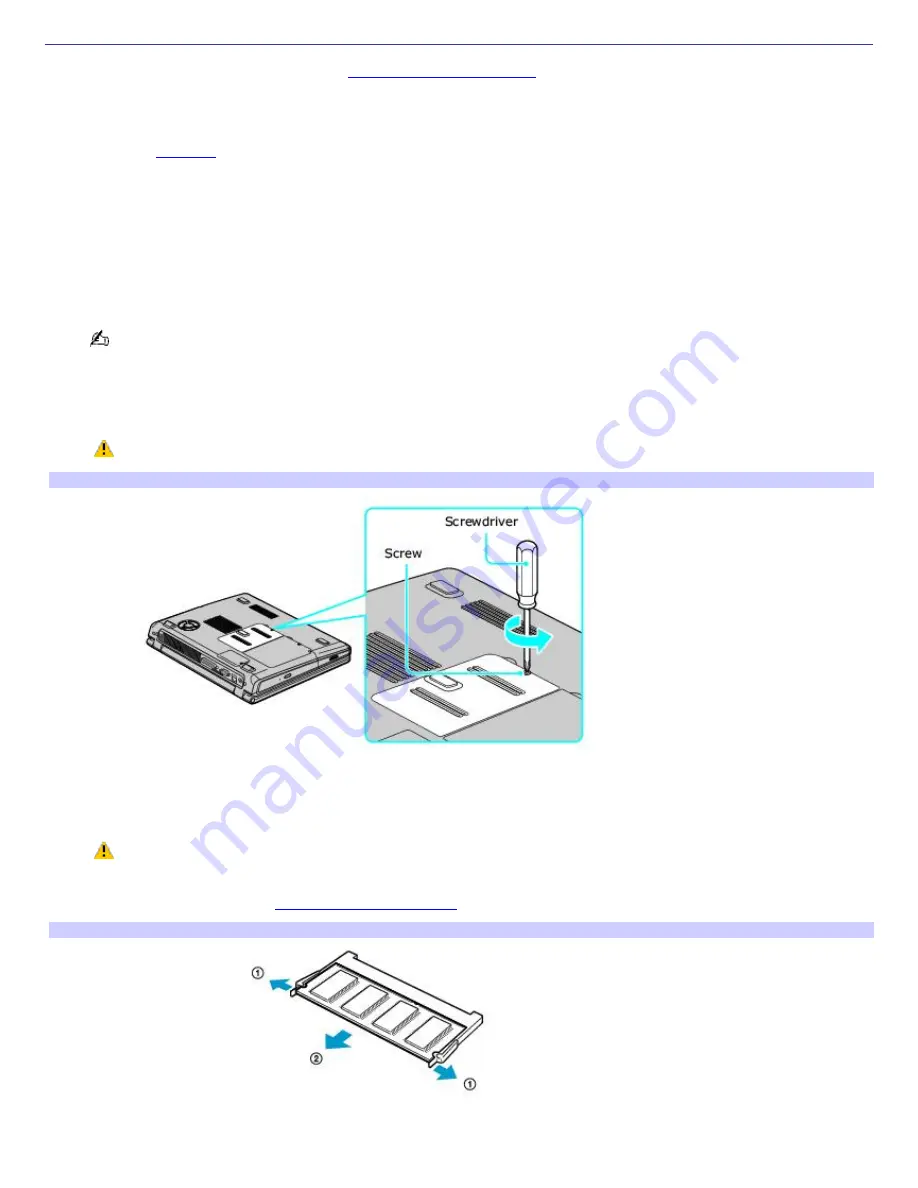
Turn the computer over and use an appropriate screwdriver to loosen and remove the screw(s) on the memory
bay.
To avoid damaging the computer, do not remove or loosen any other screws.
Rem ov ing the Bottom Screw(s)
5.
Remove the cover.
6.
Touch a metal object (such as the connector panel on the back of your computer) to discharge static electricity.
Avoid touching any part of the motherboard or other components inside the computer.
7.
Remove the memory module by pulling out the tabs (see arrows No. 1), and pulling out the module in the
direction of arrow No. 2. See
To install a memory module
for more information.
Rem ov ing a Mem ory Module
To install a memory module
1.
Remove the new memory module from its packaging, and install the memory module by sliding it into the open
Page 139
Summary of Contents for PCG-K13 Marketing
Page 44: ...Page 44 ...
Page 49: ...4 Lift the disc from the drive 5 Push the drive tray gently to close it Page 49 ...
Page 52: ...Page 52 ...
Page 64: ...Printer Connections Printing With Your Computer Page 64 ...
Page 84: ...Floppy Disk and PC Card Connections Using a Floppy Disk Drive Using PC Cards Page 84 ...
Page 96: ...Mice and Keyboards Using the Keyboard Connecting External Mice and Keyboards Page 96 ...
Page 99: ...equivalent of clicking the right mouse button Page 99 ...


