7
GB
S
tar
t-
up G
u
id
e
KLV-20S400A
3-876-379-
13
(1)
3
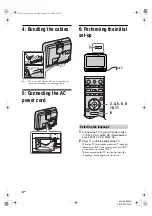
Press
F
/
f
to select the language displayed
on the menu screens, then press .
4
Press
F
/
f
to select the country/region,
then press .
~
• Area 1: Asia (except Philippines), Middle East,
Africa and Oceania.
Area 2: Philippines.
5
Press
F
/
f
to select “Home”, then press .
B
For New Zealand model
6
Press
G
/
g
to select “OK”, then press .
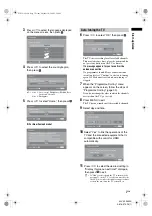
The TV starts searching for all available channels.
This may take some time, please be patient and do
not press any buttons on the TV or remote.
If a message appears for you to confirm the
antenna connection
No programmes found. Please connect antenna
(aerial) and select “Confirm” to start auto-tuning
again. If 100 channels are found, auto-tuning is
stopped.
7
When the “Programme Sorting” menu
appears on the screen, follow the steps of
“Programme Sorting” (page 30).
If you do not change the order in which the channels
are stored on the TV, go to step 8.
8
Press MENU to exit.
The TV has now tuned in all the available channels.
9
Select day and time.
10
Select “Yes” to link the operations of the
TV and the connected equipment that is
compatible with control for HDMI
automatically.
11
Press
G
/
g
to select the desired setting in
“Display this menu next time?” dialogue,
then press
to exit.
z
• If
“Yes”
is selected and the TV is turned off by
pressing
1
on the TV, or is disconnected from
the AC power outlet, the initial set-up procedure
restarts the next time the TV is turned on.
English
Auto-tuning the TV
Do you want to enable control for compatible
HDMI devices?
010COV.book Page 7 Friday, October 10, 2008 2:50 PM


