


XIS-10DC
P
repa
ra
tions
Connecting the Camera to Network
12
To specify the IP address manually:
Select
Use the following DNS server address
, and
type the IP address, Subnet mask and Default
gateway in each box.
4
Set the DNS server addresses.
To obtain the DNS server addresses
automatically:
Select
Obtain DNS server address automatically
.
To specify the DNS server addresses manually:
Select
Use the following DNS server address
, and
type the Primary DNS server address and
Secondary DNS server address in each box.
Note
The Third and Fourth DNS server addresses are
invalid for this application software.
5
Set the HTTP port number.
Normally select
80
for the HTTP port number. To
use another port number, select the text box and
type a port number between 1024 and 65535.
6
Type the Administrator name and Administrator
password.
The default settings of both items are “admin”.
7
Confirm that all items are correctly set, then click
OK
.
If “Setting OK” is displayed, the IP address is
correctly assigned.
8
Repeat steps 2 to 7 for the other camera model.
9
To exit the IP Setup Program, click
at the upper
right corner of the window.
To set the IP address of the camera in
Administrator Tool
1
Double-click the
WODs_Administrator
icon to
start Administrator Tool.
The main window of Administrator Tool opens.
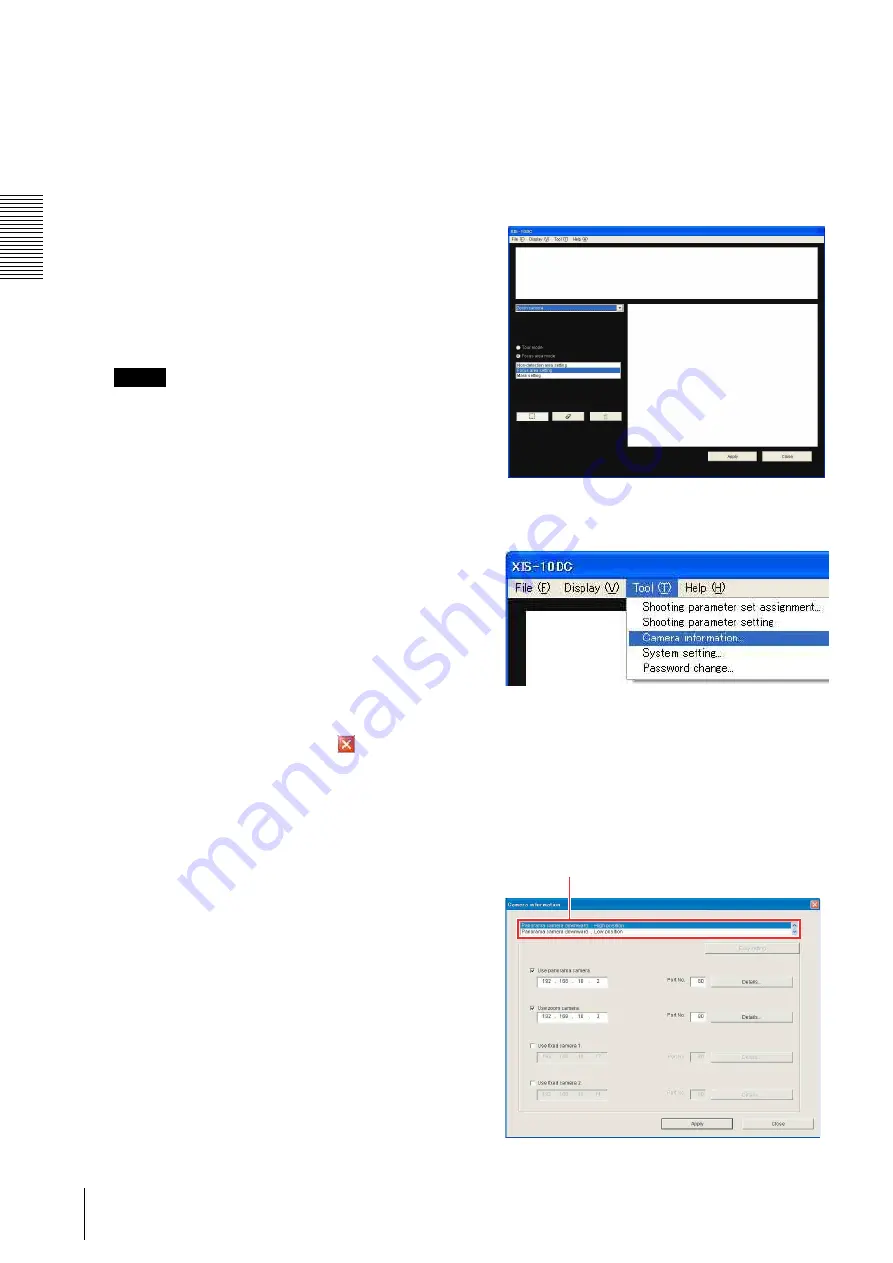
2
Select
Camera information
under
Tool
on the
menu bar.
The
Camera information
dialog opens.
3
According to the camera installation position,
select the appropriate option from among
Panorama camera downward, High position
,
Panorama camera downward, Low position
,
Panorama camera upward, High position
and
Panorama camera upward, Low position
.
Select according to the camera installation position.
Summary of Contents for Ipela XI's XIS-10DC
Page 53: ...XIS 10DC Sony Corporation ...


