


Gettin
g
Sta
rted
9
GB
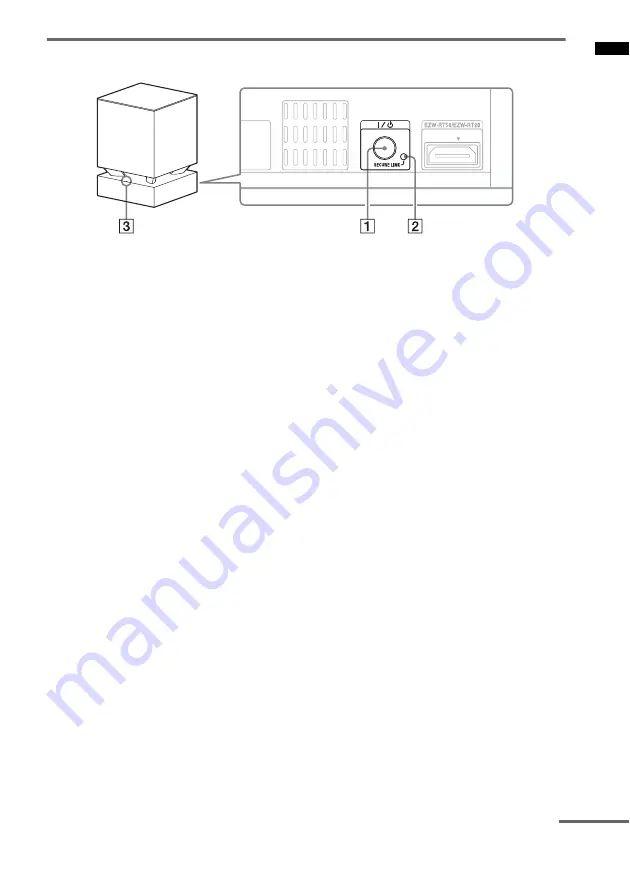
Subwoofer
A
?/1
(power button)
B
SECURE LINK button (page 40)
C
LINK/STANDBY indicator
You can check the status of wireless
transmission between the receiver and the
subwoofer.
• Turns green:
The system is turned on,wireless
transmission is activated and sound
signals are being received.
• Turns amber:
The system is turned on,wireless
transmission is activated with the Secure
Link function, and sound signals are being
received.
• Flashes in green quickly:
The wireless transceiver is not inserted
correctly into the wireless transceiver
(EZW-RT50/EZW-RT20) slot.
• Flashes in green or amber slowly:
Wireless transmission is not activated.
• Turns red:
The subwoofer is in standby mode
(page 19).
• Turns off:
The subwoofer is turned off.
• Flashes in red:
The subwoofer’s protection is activated
(page 44).
continued


