background image

Table of C

on

ten

ts

Sear
ch image

Inde
x

GB


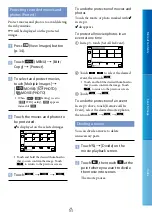
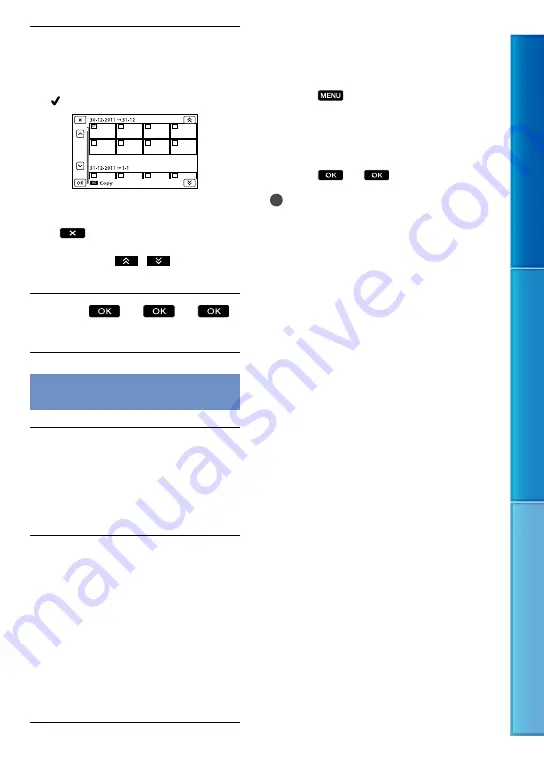
When you selected [Multiple 
Images], touch the image to be 
saved.

 appears.

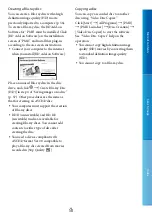
Press and hold the image down on the 

LCD screen to confirm the image. Touch 

 to return to the previous screen.

If you select [All In Event], select the event 

to copy with 

 / 

. You cannot 

select multiple events.


Touch 


on the camcorder screen.

Playing back images in the external 
media device on the camcorder


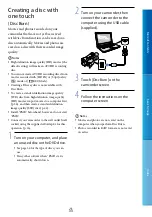
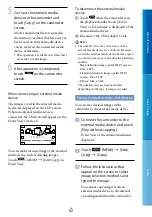
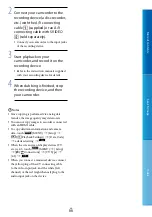
Connect the camcorder to the 
external media device and touch 
[Play without copying.].

Event View of the external media 

device is displayed.


Select the image you want to 
view and play back the image 
(p. 34).

You can also view images on a TV 

connected to your camcorder (p. 38).

You can play back the high definition 

image quality (HD) movies on your 

computer using [Player for AVCHD]. 

Start [Player for AVCHD], and select the 

drive where the external media device is 

connected with [Settings].

To perform [Direct Copy] manually

You can perform [Direct Copy] manually 

while the camcorder is connected to an 

external media device.

 Touch 

 (MENU) 

 [Edit/Copy] 

 [Direct Copy] on the [Event View] 

screen of the external media device.

 Touch [Copy images that have not been 

copied.].

 Touch 


.

Notes

If your camcorder does not recognize the 

external media device, try the following 

operations.

Reconnect the USB Adaptor Cable to your 

camcorder.

If the external media device has the AC power 

cord (mains lead), connect it to the wall outlet 

(wall socket).

Summary of Contents for Handycam NEX-VG20E

Page 1: ...Table of Contents Search image Index GB Click Handycam Handbook NEX VG20E VG20EH 2011 Sony Corporation 4 291 376 11 1 ...

Page 2: ...ur camcorder connected to a computer will be also found in the Operating Guide and the PMB Help that is the Help of the supplied PMB Picture Motion Browser software Searching for information quickly Click an item on the right edge of each page and you will jump to the page for that item You can search for an item by keyword using Adobe Reader Refer to the Help of Adobe Reader for tips on how to us...

Page 3: ...unlight attach the lens cap Exposing the LCD screen the viewfinder or the lens to direct sunlight for long periods of time may cause malfunctions Do not aim at the sun Doing so might cause your camcorder to malfunction Take images of the sun only in low light conditions such as at dusk Do not look at the sun or a strong light through a removed lens This may cause irrecoverable damage to your eyes ...

Page 4: ...or the AC Adaptor after turning off the camcorder Disconnect the AC Adaptor from the camcorder holding both the camcorder and the DC plug Note on the camcorder battery pack temperature When the temperature of the camcorder or battery pack becomes extremely high or extremely low you may not be able to record or play back on the camcorder due to the protection features of the camcorder being activat...

Page 5: ... Otherwise the memory card may be damaged recorded images may be impossible to play back or may be lost or other malfunctions could occur ejecting the memory card when the access lamp p 28 is lit or flashing removing the battery pack or AC Adaptor from the camcorder or applying mechanical shock or vibration to the camcorder when the Movie Photo lamps p 31 or the access lamp p 28 are lit or flashin...

Page 6: ... a Mount Adaptor sold separately enables you to use α lenses A mount lenses as well You can choose the right lens for the recording conditions or subjects A wide variety of characteristic lenses will widen visual expression Manual operability The camcorder allows you to use aperture priority shutter speed priority full manual exposure compensation and adjust gain white balance etc for recording mo...

Page 7: ... clear as still images Defocusing the background 46 Adjusting the color 72 Focusing manually 41 In better brightness 73 Shooting like film image 80 Shooting when holding the camcorder by hand Preventing camera shake 76 Following a moving subject 75 Shooting in low angle 45 ...

Page 8: ...ound clearly Recording the surround sound 44 Recording the loud noise naturally 78 Shooting landscapes The sky in vivid colors 73 Keeping your shot level 78 Shooting clear still images The same scene with different brightness 75 Capturing the best moment 75 ...

Page 9: ...ry cover 14 Step 3 Charging the battery pack 15 Step 4 Attaching the lens 18 Removing the lens 20 Step 5 Turning the power on and setting the date and time 23 Changing the language setting 24 Step 6 Making setting adjustments before recording 25 The LCD panel 25 Changing the display on the LCD screen 25 The viewfinder 26 Step 7 Inserting a memory card 28 Recording Playback Recording 30 Recording m...

Page 10: ...ng good use of your camcorder 50 Deleting movies and photos 50 Protecting recorded movies and photos Protect 51 Dividing a movie 51 Capturing a photo from a movie 52 Saving movies and photos with a computer Selecting the method for creating a disc computer 53 Creating a disc with one touch Disc Burn 55 Importing movies and photos to a computer 56 Saving images on a disc 57 Saving images with an ex...

Page 11: ...tional information Troubleshooting 88 Self diagnosis display Warning indicators 94 Recording time of movies number of recordable photos 97 Expected time of recording and playback with each battery pack 97 Expected recording time of movies 97 Expected number of recordable photos 98 Using your camcorder abroad 99 Maintenance and precautions 101 About the AVCHD format 101 About the memory card 101 Ab...

Page 12: ...s camcorder 1 Body cap attached to camcorder NEX VG20E supplied but not attached to other models 1 p 18 AC Adaptor 1 p 15 Power cord mains lead 1 p 15 Component A V Cable 1 p 38 A V connecting cable 1 p 38 USB cable 1 p 61 Wireless Remote Commander RMT 835 1 p 113 A button type lithium battery is already installed Rechargeable battery pack NP FV70 1 p 15 Battery Cover 1 p 14 Wind Screen 1 p 14 Lar...

Page 13: ...e 1 PMB Software including PMB Help Image Data Converter RAW development software Handycam Handbook PDF Operating Guide 1 NEX VG20EH Zoom lens E 18 200mm F3 5 6 3 OSS attached to the camcorder 1 p 18 Lens hood 1 p 22 Front lens cap attached to the lens 1 p 18 Rear lens cap 1 p 18 ...

Page 14: ...lenses sold separately For NEX VG20EH models the lens is attached to the camcorder at the time of purchase Attaching the Wind Screen Use the Wind Screen when you want to reduce the wind noise recorded by the microphone Attach the Wind Screen with the Sony logo facing down Attaching the battery cover Attach the battery cover after attaching the battery pack Attach the battery cover with the project...

Page 15: ...e V series 1 Slide the POWER switch to OFF the default setting 2 Attach the battery pack by sliding it in the direction of the arrow until it clicks 3 Connect the AC Adaptor and the power cord mains lead to your camcorder and the wall outlet wall socket The CHG charge lamp lights up and charging starts The CHG charge lamp turns off when the battery pack is fully charged Battery pack CHG charge lam...

Page 16: ...ying time When your camcorder is on you can check the approximate amount of remaining battery power with the remaining battery indicator at the upper right on the LCD screen To remove the battery pack Slide the POWER switch to OFF Slide the BATT battery release lever and remove the battery pack To use a wall outlet wall socket as a power source Make the same connections as Step 3 Charging the batt...

Page 17: ... put it in a cool place In the default setting the power turns off automatically if you leave your camcorder without any operation for about 5 minutes to save battery power A Shut Off p 86 Notes on the AC Adaptor Use the nearby wall outlet wall socket when using the AC Adaptor Disconnect the AC Adaptor from the wall outlet wall socket immediately if any malfunction occurs while using your camcorde...

Page 18: ...his switch prevents the lens cylinder from being extended by its own weight when it is being transported etc Turn the zoom ring back toward the W end and slide the switch toward to lock it To unlock it set the switch to the original position Do not touch or dirty the lens contacts Remove the body cap from the camcorder body and the packaging lid from the rear of the lens Zoom ring Focal length sca...

Page 19: ...ttaching a lens do not press the lens release button Do not use force when attaching a lens Mounting the lens forcibly may result in a malfunction or damage of the lens mount There may be some slight movement of the lens in the locked position depending on the lens used This is not a malfunction Hold the camcorder body with the front end downward and quickly change the lens somewhere away from dus...

Page 20: ...ndexes and turn the cap clockwise Before you attach caps remove dust from them Notes When changing the lens if dust or debris gets inside the camcorder body and adheres to the surface of the image sensor the part that acts as the film it may appear on the image depending on the shooting conditions The image sensor is applied with the anti dust coating to prevent dust from adhering to the image sen...

Page 21: ... because it may scatter water droplets inside the camcorder body Do not put the tip of a blower into the cavity beyond the mount so that the tip of the blower does not touch the image sensor Hold the camcorder s face downward to prevent the dust from resettling in the camcorder Do not apply a mechanical shock to the camcorder during cleaning If you cannot clean the image sensor by the above proced...

Page 22: ...ofocus speed will be about 2 seconds to 7 seconds when shooting under Sony measurement condition The speed may vary depending on the subject ambient light etc Notes Some lenses may not be usable or may have limited functionality Check the dedicated support web site or consult your local authorized Sony service facility on compatible lenses The sound of the lens and the camera in operation may be r...

Page 23: ...le pressing the green button 2 Select the desired language then touch Next 3 Select the desired geographical area with then touch Next To set the date and time again touch MENU Setup Clock Settings Date Time Setting Date Time When an item is not on the screen touch until the item appears Touch the button on the LCD screen POWER switch ...

Page 24: ...displayed during playback To display the date and time touch MENU Setup Playback Settings Data Code Date Time You can turn off the operation beeps by touching MENU Setup General Settings Beep Off If the button you touch does not react correctly calibrate the touch panel p 104 To turn off the power Slide the POWER switch to OFF The Movie lamp flashes for a few seconds and the camcorder is turned of...

Page 25: ... those display locations by opening or closing the LCD screen FINDER LCD enables you to use the viewfinder without closing the LCD panel so you can operate buttons which are hidden when the LCD screen is closed You can adjust the brightness of the LCD screen with LCD Brightness p 85 Changing the display on the LCD screen Press DISPLAY to cycle the screen display in the following order Recording De...

Page 26: ...r When you record while viewing through the viewfinder close the LCD panel or press FINDER LCD p 111 If the indications in the viewfinder appear blurred adjust the viewfinder lens adjustment lever located beneath the viewfinder Notes You may see colors red blue green shimmering in the viewfinder when you move your line of sight This is not a malfunction The shimmering colors will not be recorded o...

Page 27: ...clearly under bright circumstances use the supplied large eyecup To attach the large eyecup stretch it slightly and align it with the eyecup groove in the viewfinder You can attach the large eyecup facing either the right or left side Notes Do not remove the pre attached eyecup Large eyecup supplied Attach the projection to be straight ...

Page 28: ...a new Image Database File It may be possible that there is not enough free space is displayed format the memory card p 82 Confirm the direction of the memory card If you forcibly insert the memory card in the wrong direction the memory card memory card slot or image data may be damaged Do not open the cover during recording When inserting or ejecting the memory card be careful so that the memory c...

Page 29: ...y card adaptor Doing so may cause a malfunction Memory Stick PRO Duo media of up to 32 GB and SD cards of up to 64 GB have been verified to operate with your camcorder Notes A MultiMediaCard cannot be used with this camcorder Movies recorded on SDXC memory cards cannot be imported to or played back on computers or AV devices not supporting the exFAT file system by connecting the camcorder to these...

Page 30: ...rding In the default setting movies are recorded with high definition image quality HD 1 Fasten the grip belt 2 To remove the lens cap push the sliders on both sides of the cap 3 Slide the POWER switch to ON while pressing the green button Your camcorder is turned on ...

Page 31: ...ove the battery or AC Adaptor Access lamp p 28 is lit or flashing The media icon in the upper right of the LCD screen is flashing The camcorder does not have a power zoom function Hold the lens with your left hand to support the camera during recording when you do not use a tripod Make sure that your fingers are not touching the microphone Tips See page 97 on the recordable time of movies The IRIS...

Page 32: ...eck them as Data Code during playback To display them touch MENU Setup Playback Settings Data Code a desired setting Shooting photos When disappears the photo is recorded Press MODE to turn on the Photo lamp The LCD screen display switches for photo recording mode Press PHOTO lightly to adjust the focus then press it fully Focus indicator The focus indicator shows the focusing status by lighting f...

Page 33: ...33 Table of Contents Search image Index GB To change the image size touch MENU Image Quality Size Image Size a desired setting You cannot record photos while is displayed ...

Page 34: ... seconds 3 Touch to select the desired event To the MENU screen Events To the previous next event Event name Change to the movie photo recording mode Time line bar Change Event Scale button The Event Index screen appears when you touch the event that is displayed on the center Touch Change Event Scale on the bottom right of the screen so that you can change the time range of the time line bar from...

Page 35: ...n Displays the previous next page Touching and holding the button scrolls the index screen Change to the movie photo recording mode Event title Total time of movies in the Event The total number of still images is displayed when there are still images only Switch Image Type button Movie Photo appears with the movie or photo that was most recently played or recorded If you touch the movie or photo ...

Page 36: ...n currently use and allows you to use those functions easily When playback from the selected image reaches the last image the screen returns to the INDEX screen Touch during pause to play back movies slowly As you repeat touching during playback movies are played as fast as about 5 times about 10 times about 30 times about 60 times The recording date time and shooting conditions are recorded autom...

Page 37: ...ons shown in the figure below while you are viewing photos The figure below will be displayed when you select PHOTO by touching the Switch Image Type button on the Event Index screen Tips To repeat Slideshow touch Slideshow Set To start stop slide show Next Previous Delete Context ...

Page 38: ...hoto on the camcorder p 34 List of connection Connecting to a high definition TV When the recording quality is high definition image quality HD the movies are played back in high definition image quality HD When the recording quality is standard image quality STD the movies are played back in standard definition image quality STD Connecting to a non high definition 16 9 wide or 4 3 TV When movies ...

Page 39: ...t TV Type to 16 9 or 4 3 according to your TV p 83 When you connect with A V connecting cable with S VIDEO When the S VIDEO plug S VIDEO channel is connected audio signals are not output To output audio signals connect the white and red plugs to the audio input jack of your TV This connection produces higher resolution images compared with the A V connecting cable When your TV is monaural When you...

Page 40: ...RAVIA Sync compatible TV launched in 2008 or later with the HDMI cable You can operate the menu of your camcorder by pressing the SYNC MENU button of the remote commander of your TV You can display the camcorder screens such as Event View play selected movies or display selected photos by pressing up down left right enter buttons of the remote commander of your TV Notes There may be some operation...

Page 41: ...et focusing mode to manual appears on the LCD screen in manual focusing mode Use this function in the following cases To record a subject behind a window covered with raindrops To record horizontal stripes To record a subject with little contrast between the subject and its background When you want to focus on a subject in the background To record a stationary subject using a tripod To measure the...

Page 42: ... between expanded and normal display Notes Even though the image appears expanded on the screen the recorded image is not expanded You cannot zoom in when using Spot Meter Fcs Spot Meter or Spot Focus Selecting high definition image quality HD or standard image quality STD You can select the desired image quality from the high definition image quality HD that enables you to record fine images or t...

Page 43: ... external devices see page 61 Types of media Recording mode PS FX FH HQ LP On this camcorder Memory card On external devices External media USB storage devices Blu ray discs AVCHD recording discs PS can be set only when Frame Rate is set to 50p Tips Movies are recorded with the 1920 1080 50p format when the PS mode of high definition image quality HD is selected and with 1920 1080 50i or 1920 1080...

Page 44: ...has priority If the face you touched returns to the screen that face has priority Recording sound with more presence 5 1ch surround recording The camcorder adopts an array microphone system that has a four capsule structure and can record clear low noise sound with 5 1ch surround Realistic sound can be enjoyed when playing a movie on devices that support 5 1ch surround sound Notes To enjoy the 5 1...

Page 45: ...ens side Tips A mirror image of the subject appears on the LCD screen but the image will be normal when recorded This picture is not displayed in the viewfinder Recording at a different angle Your camcorder can record in the following angles according to the object Low angle START STOP button on the LCD panel Low angles START STOP button on the grip ...

Page 46: ... p 48 Aperture value When a setting value is highlighted it can be adjusted by the MANUAL dial Rotate the MANUAL dial to adjust the IRIS Tips Press IRIS again to adjust the IRIS automatically appears next to the aperture value The aperture value adjustment range you can set will vary depending on the lens you use With some lenses the aperture value may change when you zoom from wide angle to telep...

Page 47: ...peed Manual focusing with your camcorder attached to a tripod is recommended When recording under fluorescent lamps sodium lamps mercury lamps or LED lighting the picture may have horizontal bands of noise You may be able to improve the situation by adjusting the Shutter Speed To adjust the Shutter Speed automatically Press SHUTTER SPEED again appears next to the Shutter Speed value Adjusting Expo...

Page 48: ...a Settings MANUAL Button The MANUAL button works in the same way as the IRIS or SHUTTER SPEED button when IRIS or Shutter Speed is assigned This is useful when adjusting the IRIS or Shutter Speed with the LCD screen closed The camera data p 83 that appears on the LCD screen will differ depending on the recording settings of the camcorder The settings will be displayed with the following icons Auto...

Page 49: ...NUAL dial to set the aperture value The values of Shutter Speed and Gain ISO change according to the value set in Exposure Spot Meter etc Full manual You can use full manual mode when you set all of IRIS Shutter Speed and Gain ISO to manual The relationship between the three modes Exposure Spot Meter set to manual auto When all of IRIS Shutter Speed Gain ISO is set to manual At least one of is set...

Page 50: ...ayback screen To delete all images recorded in the memory card and recover all the recordable space of the media format the media p 82 Reduced size images which enable you to view many images at the same time on an index screen are called thumbnails Press View Images button p 34 Touch MENU Edit Copy Delete To select and delete movies touch Multiple Images MOVIE PHOTO MOVIE PHOTO When Setting is se...

Page 51: ... image Touch to return to the previous screen Touch To undo the protection of movies and photos Touch the movie or photo marked with in step 4 disappears To protect all movies photos in an event at one time In step 3 touch Set All In Event Touch to select the desired event then touch Touch and hold the desired thumbnail so that you can confirm the image Touch to return to the previous screen Touch...

Page 52: ...appears on the playback screen of a movie The Photo Capture screen appears Touch then touch at the point where you want to capture a photo The movie pauses Touch to adjust the capturing point with more precision Touch When capturing is finished the screen returns to pause Notes The image size is fixed based on the image quality of the movie If the movie was recorded with one of the following image...

Page 53: ...th high definition image quality HD p 58 Blu ray disc playback devices a Sony Blu ray disc player PlayStation 3 etc To save images on a AVCHD recording disc with high definition image quality HD Creating a disc with one touch Disc Burn p 55 AVCHD format playback devices a Sony Blu ray disc player PlayStation 3 etc Importing movies and photos to a computer p 56 Creating a AVCHD recording disc with ...

Page 54: ...following type with PMB For Blu ray disc see page 58 Disc type Features DVD R DVD R DVD R DL Unrewritable DVD RW DVD RW Rewritable Notes Always maintain your PlayStation 3 to use the latest version of the PlayStation 3 system software The PlayStation 3 may not be available in some countries regions ...

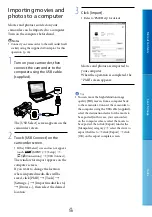
Page 55: ... from high definition image quality HD movies import movies to a computer first p 56 and then create a standard definition image quality STD disc p 42 Install PMB beforehand however do not start PMB Connect your camcorder to the wall outlet wall socket using the supplied AC Adaptor for this operation p 16 1 Turn on your computer and place an unused disc on the DVD drive See page 54 for the type of...

Page 56: ... import appears on the computer screen If you want to change the location where imported media files will be saved click PMB Tools Settings Import media files to Browse then select the desired location 3 Click Import Refer to PMB Help for details Movies and photos are imported to your computer When the operation is completed the PMB screen appears Tips You can move the high definition image qualit...

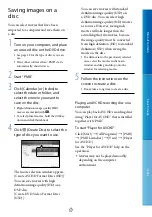
Page 57: ...ate DVD Video Format Discs STD You can save movies with standard definition image quality STD on a DVD disc You can select high definition image quality HD movies as sources However saving such movies will take longer than the actual length of the movies because the image quality must be converted from high definition HD to standard definition STD when saving the movie on the disc To add movies to...

Page 58: ...er procedures are the same as that for creating an AVCHD disc Your computer must support the creation of Blu ray discs BD R unrewritable and BD RE rewritable media are available for creating Blu ray discs You cannot add contents to either type of disc after creating the disc You need a device compliant with AVCHD format Ver 2 0 compatible to play a Blu ray disc created from movies recorded in 50p ...

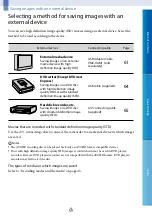
Page 59: ...th standard definition image quality STD USB cable supplied 64 Hard disk recorder etc Saving images on a DVD disc with standard definition image quality STD A V connecting cable supplied 65 Movies that are recorded with standard definition image quality STD Use the A V connecting cable to connect the camcorder to an external device in which images are saved Notes The AVCHD recording disc can be pl...

Page 60: ...HD format playback devices such as a Sony Blu ray disc player or a PlayStation 3 DVD disc with standard definition image quality STD Ordinary DVD playback devices such as a DVD player Notes Always maintain your PlayStation 3 to use the latest version of the PlayStation 3 system software The PlayStation 3 may not be available in some countries regions ...

Page 61: ...ia devices with built in USB hub card reader Notes You may not be able to use external media devices with a code function The FAT file system is available for your camcorder If the storage medium of the external device was formatted for the NTFS file system etc format the external media device using the camcorder before use The format screen appears when an external media device is connected to yo...

Page 62: ...le the camcorder is in the playback standby mode Event View or Event Index is displayed of the external media device Disconnect the USB Adaptor Cable Notes The number of scenes you can save on the external media device are as follows However even if the external media device has free space you cannot save scenes exceeding the following number High definition image quality HD movies Max 3 999 Stand...

Page 63: ...age p 34 You can also view images on a TV connected to your camcorder p 38 You can play back the high definition image quality HD movies on your computer using Player for AVCHD Start Player for AVCHD and select the drive where the external media device is connected with Settings To perform Direct Copy manually You can perform Direct Copy manually while the camcorder is connected to an external med...

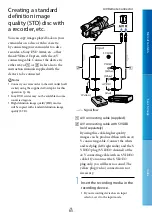
Page 64: ...ns Your camcorder is not compatible with DVDirect Express 1 Connect the AC Adaptor and the power cord mains lead to the DC IN jack of your camcorder and the wall outlet wall socket p 16 2 Turn on your camcorder and connect a DVD writer etc to your camcorder with the USB cable supplied The USB Select screen appears on the camcorder screen If the USB Select screen does not appear touch MENU Setup Co...

Page 65: ...r may not be available in some countries regions High definition image quality HD movies will be copied with standard definition image quality STD A V connecting cable supplied A V connecting cable with S VIDEO sold separately By using this cable higher quality images can be produced than with an A V connecting cable Connect the white and red plug left right audio and the S VIDEO plug S VIDEO chan...

Page 66: ...dubbing is finished stop the recording device and then your camcorder Notes Since copying is performed via analog data transfer the image quality may deteriorate You cannot copy images to recorders connected with an HDMI cable To copy date time information and camera data touch MENU Setup Playback Settings Data Code a desired setting When the screen size of display devices TV etc is 4 3 touch MENU...

Page 67: ...g up image quality or size p 80 Playback Function Items for playback p 34 Edit Copy Items for editing p 82 Setup Other setup items p 82 Operating menus Follow the procedures explained below to set the menu items The Camera Mic and Setup menus have sub categories Touch the sub category icon and the screen changes to other sub category menus Grayed out menu items or settings are not available Notes ...

Page 68: ... still images 74 AE Shift Adjusts the brightness of automatic exposure control 74 White Balance Shift Adjusts the white balance with more precision 75 Camera Settings Cinematone Adjusts the color of the movie automatically to resemble the atmosphere of film camera images 75 Self Timer Sets the self timer when your camcorder is in photo recording mode 75 Drive Mode Sets continuous or bracket shooti...

Page 69: ...e histogram 79 Camera Data Display Displays the value of iris gain ISO and shutter speed 79 Audio Level Display Displays the audio level meter on the screen 79 AF Micro Adjustment Adjusts the focus for the attached lens 80 Image Quality Size REC Mode Sets the mode to record movies 43 Frame Rate Sets the frame rate to record movies 80 Setting Sets image quality for recording playback or editing mov...

Page 70: ...AVIA Sync compatible TV with an HDMI cable sold separately you can play back movies on your camcorder by aiming the TV s Remote Commander at the TV 84 USB Connect Uses a USB connection with the USB cable 85 USB Connect Setting Sets the USB transfer mode for connecting the camcorder to a computer or other USB device 85 Disc Burn Allows you to save images onto discs by a single press of a button 55 ...

Page 71: ... Version Displays the version of your camcorder and lens 87 Clock Settings Date Time Setting Sets the Date Time Summer Time or Date Time Format 87 Date Time Format Sets the Date Time Format 87 Summer Time Sets the Summer Time 87 Date Time Sets the Date Time 87 Area Setting Adjusts for a time difference without stopping the clock 87 ...

Page 72: ...ly Outdoor The white balance is appropriately adjusted for the following recording conditions Outdoors Night views neon signs and fireworks Sunrise or sunset Under daylight fluorescent lamps Indoor The white balance is appropriately adjusted for the following recording conditions Indoors At party scenes or studios where the lighting conditions change quickly Under video lamps in a studio or under ...

Page 73: ...pot Meter p 73 and Spot Focus p 73 at the same time Touch the subject of which you want to adjust the brightness and focus To adjust the brightness and focus automatically touch Auto Notes Exposure and Focus are automatically set to Manual Auto is set when the focus is set to DMF in photo shooting mode Spot Meter Flexible spot meter You can adjust and fix the exposure to the subject so that it is ...

Page 74: ...ster shutter speed and reduce image blur in dark locations or of moving subjects by increasing ISO sensitivity select a larger number Gain ISO Sensitivity Recommended Exposure Index is the sensitivity to light of recording media that incorporates an image sensor that receives light Even when the exposure is the same images differ depending on the Gain ISO setting High Gain ISO sensitivity With hig...

Page 75: ...unction on or off the image will be paused temporarily Self Timer Press PHOTO to start the count down A photo is recorded after about 10 seconds Off Cancels the self timer On Starts the self timer recording To cancel the recording touch Reset Tips You can also operate by pressing PHOTO on the Wireless Remote Commander p 113 Drive Mode You can set the drive mode such as continuous or bracket shooti...

Page 76: ... Set SteadyShot to Off when using a tripod sold separately then the image becomes natural On The SteadyShot function is used Off The SteadyShot function is not used Auto Back Light Your camcorder adjusts the exposure for backlit subjects automatically On Adjusts the exposure for backlit subjects automatically Off Does not adjust the exposure for backlit subjects MANUAL Button You can select an ite...

Page 77: ...u can select the flash level when shooting photos with a compatible external flash sold separately You can set a flash value from 3 0EV to 3 0EV on your camcorder The set value may not be effective depending on the connected flash sold separately Red Eye Reduction A flash sold separately strobes 2 or more times before shooting to reduce the red eye phenomenon This item is available in still image ...

Page 78: ...ed composition The outer frame of Guide Frame shows the display area of a TV which is not compatible with full pixel display Zebra You can display a zebra pattern as a guide for adjusting brightness The zebra pattern will not be recorded with the image Off Does not display the zebra pattern 70 Displays the zebra pattern over the part of an image that exceeds the brightness level of about 70 IRE 10...

Page 79: ...ng the brightness level set with Zebra and the brightness level 100 8 0 Tips The left area of the histogram represents darker areas of the picture while the right represents brighter areas Camera Data Display When you set this function to On you can display the iris gain ISO and shutter speed settings on the screen The default setting is On Tips The settings appear on the screen during the manual ...

Page 80: ...ts value to 0 Alternatively you can reset the values of all lenses with Clear All If you perform AF fine adjustment with a lens of other manufacturers the adjustment values of Sony Minolta and Konica Minolta lenses may be affected Do not use this function with any lens of other manufacturers You cannot individually perform AF fine adjustment when using the Sony Minolta and Konica Minolta lenses th...

Page 81: ... lit See page 98 on the recordable number of photos JPEG image size will be fixed at 16M when RAW JPEG is set to RAW JPEG RAW JPEG Selects the compression format of still images JPEG This is a common compression format RAW This format does not allow you to perform any digital processing on the images RAW J RAW JPEG A RAW image and a JPEG image are created at the same time Tips RAW images The RAW f...

Page 82: ... is not displayed as 0 even if you perform Format p 82 Tips The camcorder can display the information of the memory card Format Formatting deletes all the movies and photos to recover recordable free space Select the media to be formatted touch Notes Connect your camcorder to the wall outlet wall socket using the supplied AC Adaptor for this operation p 16 To avoid the loss of important images you...

Page 83: ... Date Time Camera Data recorded automatically at the time of recording Off Data code is not displayed Date Time Displays the date and time Camera Data Displays camera setting data Date Time Date Time Camera Data SteadyShot off White Balance Shutter Speed IRIS Aperture value Gain Brightness Flash Exposure compensation ISO Tips The data code is displayed on the TV screen if you connect your camcorde...

Page 84: ...ponent input jack and is capable of displaying the 1080i signal 576i Select this when connecting your camcorder to a TV with the component input jack HDMI Resolution Select the output image resolution when connecting your camcorder to a TV with an HDMI cable sold separately Auto Normal setting outputs the signal according to the TV automatically 1080p 576p Outputs high definition image quality HD ...

Page 85: ...cted device When the camcorder is connected to an external device in the MTP mode movie files will be displayed with the recorded date however some information such as area information included in the movie files cannot be displayed on the connected device To import images from the camcorder to your computer use the supplied PMB software If the Device Stage window does not open when you connect th...

Page 86: ...ights up Off The camera recording lamp does not light up Shooting w o Lens Sets whether or not the recording can be started when no lens is attached Disable Recording starts only when a lens is attached Enable Allows you to use non Sony E mount lenses and mount adaptors Remote Ctrl Remote control On Select this when you use the supplied Wireless Remote Commander p 113 Off Select this if you do not...

Page 87: ...and time format Summer Time You can change this setting without stopping the clock Set to On to move the time forward 1 hour Off Does not set the summertime On Sets the summertime Date Time See page 23 Area Setting You can adjust a time difference without stopping the clock Select your local area when using the camcorder in other time zones Refer to the world time difference information on page 10...

Page 88: ...r is set to on It takes a few seconds for your camcorder to be ready to shoot after the power is turned on This is not a malfunction Disconnect the AC Adaptor from the wall outlet wall socket or remove the battery pack then reconnect it after about 1 minute If the functions still do not work press RESET p 111 using a pointed object If you press RESET all settings including the clock setting are re...

Page 89: ...ts disconnect the AC Adaptor from the wall outlet wall socket and contact your Sony dealer The battery pack may be damaged The remaining battery time indicator does not indicate the correct time The ambient temperature is too high or too low This is not a malfunction The battery pack has not been charged enough Fully charge the battery again If the problem persists replace the battery pack with a ...

Page 90: ...rdable capacity of your camcorder Delete unnecessary images p 50 The temperature of your camcorder is extremely high Turn off your camcorder and leave it for a while in a cool place The temperature of your camcorder is extremely low Turn off your camcorder and take it to a warm place Leave the camcorder there for a while then turn on the camcorder The lens is not attached correctly Reattach the le...

Page 91: ...ject If the ISO is changed the flash range also changes with it The subjects passing by the screen very fast appear crooked This is called the focal plane phenomenon This is not a malfunction Because of the way the image device CMOS sensor reads out image signals the subjects passing by the lens rapidly might appear crooked depending on the recording conditions Horizontal stripes appear on the ima...

Page 92: ...he image data base file may be damaged Check the data base file by touching MENU Setup Repair Img DB F If it still appears delete the image with p 50 No sound or only a quiet sound is heard during playback Turn up the volume p 36 Left and right sound will be heard unbalanced when playing back movies on computers or other devices This happens when sound recorded in 5 1ch surround is converted to 2c...

Page 93: ...ages using the outer frame of Guide Frame p 78 as a guide The image appears distorted on the 4 3 TV This happens when viewing an image recorded in the 16 9 wide mode on a 4 3 TV Set TV Type correctly p 83 and play back the image Black bands appear at the top and bottom of the screen of the 4 3 TV This happens when viewing an image recorded in the 16 9 wide mode on a 4 3 TV This is not a malfunctio...

Page 94: ... high Change the battery pack or place it in a cool place Warning indicator pertaining to memory card Slow flashing Free spaces for recording images are running out For the type of memory card you can use with your camcorder see page 29 No memory card is inserted p 29 Fast flashing There are not enough free spaces for recording images After storing the images on other media p 59 delete unnecessary...

Page 95: ... the database information of high definition image quality HD movies has been damaged there are inconsistencies between the information in the database and the information in the file Touch to back up the high definition image quality HD movies and repair the database file You cannot see the backed up movies on the camcorder By connecting the camcorder to a computer after repairing the database yo...

Page 96: ...ect the external media device then format it Note that if you format the external media device all the recorded movies and photos are deleted If you cannot format the external media device the external media device may be incompatible with your camcorder or damaged Replace it with a new one Unable to access external media Use the external media device in stable condition the environment such as no...

Page 97: ...0 F to 86 F is recommended The recording and playback time will be shorter when you use your camcorder in low temperatures The recording and playback time will be shorter depending on the conditions under which you use your camcorder Playing time Approximate time available when you use a fully charged battery pack unit minute Battery pack Image quality HD STD NP FV70 supplied 325 415 355 440 NP FV...

Page 98: ...photos is displayed on the LCD screen during recording p 108 The number of recordable photos of memory card may vary depending on the recording conditions Tips You can also use memory card with a capacity of under 1 GB for recording photos The following list shows the bit rate pixels and aspect ratio of each recording mode movie audio etc High definition image quality HD PS Max 28 Mbps 1 920 1 080...

Page 99: ...iew standard definition image quality STD movies you need a PAL system based TV with AUDIO VIDEO input jacks An A V connecting cable must be connected On TV color systems Your camcorder is a PAL system based camcorder If you want to view the playback image on a TV it must be a PAL system based TV with an AUDIO VIDEO input jack System Used in PAL Australia Austria Belgium China Czech Republic Denma...

Page 100: ...anbul 03 00 Nairobi 03 30 Tehran 04 00 Moscow Abu Dhabi Baku 04 30 Kabul 05 00 Karachi Islamabad 05 30 Calcutta New Delhi 06 00 Almaty Dhaka 06 30 Yangon 07 00 Bangkok Jakarta 08 00 Hong Kong Singapore Beijing 09 00 Seoul Tokyo 09 30 Adelaide Darwin 10 00 Melbourne Sydney 11 00 Solomon Is 12 00 Fiji Wellington Eniwetok Kwajalein Time zone differences Area setting 11 00 Samoa 10 00 Hawaii 09 00 Ala...

Page 101: ...d compatibility with your camcorder Data read write speed may vary depending on the combination of the memory card and memory card compliant product you use Damaged or lost data may occur in the following cases the data will not be compensated for If you eject the memory card or turn off your camcorder while your camcorder is reading or writing image files on the memory card while the access lamp ...

Page 102: ...n InfoLITHIUM V series battery packs InfoLITHIUM V series battery packs have the mark What is an InfoLITHIUM battery pack An InfoLITHIUM battery pack is a lithium ion battery pack that has functions for communicating information related to operating conditions between your camcorder and an AC Adaptor charger sold separately The InfoLITHIUM battery pack calculates the power consumption according to...

Page 103: ... time to replace it with a new one Each battery s life is governed by storage operating and environmental conditions About handling of your camcorder On use and care Do not use or store the camcorder and accessories in the following locations Anywhere extremely hot cold or humid Never leave them exposed to temperatures above 60 C 140 F such as under direct sunlight near heaters or in a car parked ...

Page 104: ... heating device You bring your camcorder from an air conditioned car or room into a hot place outside You use your camcorder after a squall or a shower You use your camcorder in a hot and humid place How to prevent moisture condensation When you bring your camcorder from a cold place into a warm place put your camcorder in a plastic bag and seal it tightly Remove the bag when the air temperature i...

Page 105: ...the date time and other settings even when the LCD screen is closed The pre installed rechargeable battery is always charged while your camcorder is connected to the wall outlet wall socket via the AC Adaptor or while the battery pack is attached The rechargeable battery will be fully discharged in about 3 months if you do not use your camcorder at all Use your camcorder after charging the pre ins...

Page 106: ...of MultiMediaCard Association All other product names mentioned herein may be the trademarks or registered trademarks of their respective companies Furthermore and are not mentioned in each case in this Handbook Notes on the License ANY USE OF THIS PRODUCT OTHER THAN CONSUMER PERSONAL USE IN ANY MANNER THAT COMPLIES WITH THE MPEG 2 STANDARD FOR ENCODING VIDEO INFORMATION FOR PACKAGED MEDIA IS EXPR...

Page 107: ...RL to download it When downloading the source code select NEX VG20 as the model for your camcorder http www sony net Products Linux We would prefer you do not contact us about the contents of source code Read license2 pdf in the License folder on the CD ROM You will find licenses in English of GPL and LGPL software To view the PDF Adobe Reader is needed If it is not installed on your computer you ...

Page 108: ...e quality HD STD frame rate 50p 50i 25p and recording mode PS FX FH HQ LP 43 60 Remaining battery Zoom bar Drive Mode 75 RAW JPEG 81 Recording playback editing media 28 0 00 00 Counter hour minute second 00Min Estimated recording remaining time Photo size 81 9999 Approximate number of recordable photos and photo size Playback folder 100 112 Current playing movie or photo Number of total recorded m...

Page 109: ... ISO 74 4000 Shutter Speed 47 Slide show button 101 0005 Data file name 37 Protected image 51 Flash 77 Flash Level 77 Red Eye Reduction 77 Indicators and their positions are approximate and may differ from what you actually see Some indicators may not appear depending on your camcorder model ...

Page 110: ...ach other and be damaged Auto lock accessory shoe Attach a Sony external flash sold separately etc The flash does not work when Drive Mode is set to Bracket 0 3 EV or Bracket 0 7 EV There are certain Sony flashes or functions that cannot be used with your camcorder For the compatibility of a particular flash unit visit the Sony web site in your area or consult your Sony dealer or local authorized ...

Page 111: ... is convenient during playback operations RESET button Press RESET using a pointed object Press RESET to initialize all the settings including the clock setting Speaker IRIS button 46 View Images button 34 DISPLAY button 25 SHUTTER SPEED button 47 FINDER LCD button 25 PROGRAM AE button 46 Memory card access lamp 28 While the lamp is lit or flashing the camcorder is reading or writing data Memory c...

Page 112: ...d sold separately to the tripod receptacle using a tripod screw sold separately the length of the screw must be less than 5 5 mm 7 32 in Mount 18 Image sensor Do not touch or dirty the image sensor Lens contacts Do not touch or dirty the lens contacts Lens lock pin Lens release button 20 Zoom lock switch 18 Lens hood 13 Lens 18 Zoom ring 41 Focusing ring 18 Camera recording lamp Point the Wireless...

Page 113: ...25 Transmitter START STOP button 31 Power zoom buttons You cannot use this button with this camcorder PAUSE button VISUAL INDEX button 34 Displays an Event Index screen during playback ENTER buttons When you press any of these buttons the orange frame appears on the LCD screen Select a desired button or an item with then press ENTER to enter Notes Remove the insulation sheet before using the Wirel...

Page 114: ... case back into the Wireless Remote Commander until it clicks WARNING Battery may explode if mistreated Do not recharge disassemble or dispose of in fire When the lithium battery becomes weak the operating distance of the Wireless Remote Commander may shorten or the Wireless Remote Commander may not function properly In this case replace the battery with a Sony CR2025 lithium battery Use of anothe...

Page 115: ...ia Settings 28 Memory Stick media 29 101 Memory Stick PRO HG Duo media 29 Memory Stick PRO Duo media 29 Menus 68 Mirror mode 45 Moisture condensation 104 Movies 31 36 MPEG 4 AVC H 264 101 O One Push 72 Outdoor 72 P PAL 99 Peaking 78 Photo Capture 52 Photos 32 37 Playing 34 Playing AVCHD disc 57 PMB Help 2 Power on 23 Symbols 1080i 576i 84 1080p 576p 84 5 1ch surround recording 44 576i 84 A A Shut ...

Page 116: ... diagnosis display Warning indicators 94 Self Timer 75 Setting the date and time 23 Setup 82 Shooting Mode 72 Shooting w o Lens 86 SHUTTER SPEED 46 Spot Focus 73 Spot Meter 73 Spot Meter Fcs 73 SteadyShot Movie 76 SteadyShot Photo 76 SummerTime 87 T Tripod 112 Troubleshooting 88 Turning the power on 23 TV 38 TV color systems 99 TV Type 83 U USB cable 64 USB Connect 56 USB Connect Setting 85 V VBR ...

Page 117: ...Additional information on this product and answers to frequently asked questions can be found at our Customer Support Website http www sony net ...

Reviews: