Sony Handycam CCD-FX310, Operation Manual
The Sony Handycam CCD-FX310 is a versatile camcorder with exceptional video quality. To ensure smooth operation, it is essential to have its comprehensive Operation Manual at hand. Visit our website to effortlessly download the manual for free and make the most of your camcorder's features.
Share
Download


Reviews:
No comments
Related manuals for Handycam CCD-FX310
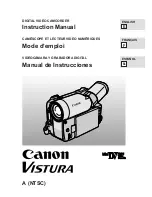
Vistura
Brand: Canon Pages: 56
VIXIA HF M50
Brand: Canon Pages: 110

VIXIA HF S10
Brand: Canon Pages: 13

VIXIA HF R40
Brand: Canon Pages: 116

VIXIA HF R30
Brand: Canon Pages: 226

RUGGED-EYES
Brand: Vantage Point Products Pages: 6

Hi 8 SCL610
Brand: Samsung Pages: 71

VCC-WD8874 - Wide Dynamic Range Color
Brand: Sanyo Pages: 2

VCC-WD8874 - Wide Dynamic Range Color
Brand: Sanyo Pages: 6

VM-D90R
Brand: Sanyo Pages: 24

VM-D66P
Brand: Sanyo Pages: 24

VM-ES88P
Brand: Sanyo Pages: 44

VCC-WD8870P
Brand: Sanyo Pages: 19

VM-D6P
Brand: Sanyo Pages: 38

210*148
Brand: Sanyo Pages: 2

VEM-S1P
Brand: Sanyo Pages: 36

VCC-WD8874 - Wide Dynamic Range Color
Brand: Sanyo Pages: 43

VCC-WD8870P
Brand: Sanyo Pages: 39


