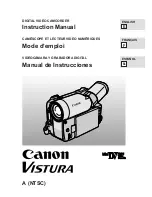
background image

DIGITAL VIDEO CAMCORDER

Instruction Manual

CAMÉSCOPE ET LECTEUR VIDEO NUMÉRIQUES

Mode d’emploi

VIDEOCÁMARA Y GRABADORA DIGITAL

Manual de Instrucciones

ENGLISH

FRANÇAIS

ESPAÑOL

A (NTSC)

E

F

Es

Mini

Digital
Video
Cassette

Summary of Contents for Vistura

Page 1: ...IDEO CAMCORDER Instruction Manual CAM SCOPE ET LECTEUR VIDEO NUM RIQUES Mode d emploi VIDEOC MARA Y GRABADORA DIGITAL Manual de Instrucciones ENGLISH FRAN AIS ESPA OL A NTSC E F Es Mini Digital Video...

Page 2: ...op operation of the equipment Important Usage Instructions WARNING TO REDUCE THE RISK OF FIRE OR ELECTRIC SHOCK DO NOT EXPOSE THIS PRODUCT TO RAIN OR MOISTURE WARNING TO REDUCE THE RISK OF ELECTRIC SH...

Page 3: ...battery power refer to instructions in this manual 11 Polarization The CA R300A Compact Power Adapter is equipped with a polarized 2 prong plug a plug having one blade wider than the other The 2 prong...

Page 4: ...urces including battery and refer servicing to qualified service personnel under the following conditions a When the power supply cord or plug is damaged b If any liquid has been spilled onto or objec...

Page 5: ...well as using the alphabetical index you can look up the different parts and functions in the sections called Nomenclature and Viewfinder Displays There s also a Troubleshooting section in case you r...

Page 6: ...lenging recording conditions With the unique Custom Keys you can decide which functions you want at your fingertips Assign frequently used functions to the keys on the camera body Add an atmospheric t...

Page 7: ...us 20 Custom Keys 22 Image Stabilizer ES280 23 Wireless Controller 24 Date and Time 26 Titles 28 Fade 31 Choosing a Recording Program 32 Focusing 34 Record Search and Record Review 35 Digital Effects...

Page 8: ...rcially available dry type head cleaning cassette 1 Press down the lock button and turn the POWER switch to CAMERA 2 Turn the program selector to n This selects the camera s Automatic recording progra...

Page 9: ...TV or the antenna cable Connecting the camera to an AC outlet Use the power adapter and the DC coupler to provide your camera with instant power from an AC outlet 1 Insert the DC coupler in the camer...

Page 10: ...the battery pack off the adapter and attach it to the camera Insert the end marked with a triangle first then press in the battery pack until it clicks and locks into place 6 Detach the battery pack a...

Page 11: ...g Wait for it cool before charging or using it again It may not reach full charge if warm See the adapter instructions for details save power while you are recording You will get more recording time f...

Page 12: ...ge the battery pack every three months even if you do not otherwise use it Refreshing the battery pack If the battery pack starts to give less recording time use the adapter s refresher function to re...

Page 13: ...may present a risk of fire or explosion Cautions Do not pick up the battery using tweezers or other metal tools this will cause a short circuit Wipe the battery with a clean dry cloth to ensure proper...

Page 14: ...N Notes Do not interfere with the compartment while it is opening or closing automatically After loading a cassette use record search p 35 to find the point where you want to start recording Do not le...

Page 15: ...g switch to the left or right to bring the viewfinder displays clearly into focus The viewfinder also rotates through 90 to give a choice of shooting positions Attach the shoulder strap For extra secu...

Page 16: ...op playback and press the rewind button If the playback picture is rough clean the video heads using a Canon CC 8 Video Head Cleaning Cassette or a commercially available dry type head cleaning casset...

Page 17: ...and stops when the counter nears 0 00 00 You can cancel tape return by pressing the 3 button 3 Start playback Notes When the tape reaches the end during normal playback it rewinds automatically Noise...

Page 18: ...rom the TV speaker is picked up by the microphone an unpleasant high pitched squeal called feedback may be produced If your TV or VCR has audio video input terminals 1 Connect the camera to the TV or...

Page 19: ...on off see page 22 The zoom control continues to work as usual You can freely zoom in and out between 1 and 32 magnification the camera automatically switches between optical zooming up to 16 and dig...

Page 20: ...r ES280 p 23 6Date select p 27 7Date display p 26 8Title p 28 Screen 2 1Date set p 26 2Title set p 29 3Title select p 30 4Custom key set p 22 MENU CUSTOM KEY I D I G I DATE SELECT T I TL E I MAG STAB...

Page 21: ...elections it returns to the top of the list 3 Press the SET button to turn the function on or off or to change its setting 4 Press the MENU button again to move to screen 2 of the menu camera menu onl...

Page 22: ...change the Custom Key settings when necessary To set the function of the Custom Keys CUSTOM KEY SET 1 Press down the lock button and turn the POWER switch to CAMERA 2 Open the camera menu to screen 2...

Page 23: ...the Custom Key function in the viewfinder With most camcorders even the slightest hand movements will be noticeable during telephoto recording However the image stabilizer allows you to obtain steady...

Page 24: ...operated using the wireless controller Tape return p 17 On screen viewfinder displays p 50 Inserting batteries Insert two AA batteries following the and markings Be careful not to reverse the polarity...

Page 25: ...ect the OFF setting and close the menu The tally lamp no longer lights up during recording Notes Sunlight or fluorescent light falling on the sensor may shorten the controller s operating distance by...

Page 26: ...to screen 2 and choose the DATE SET option The year display starts flashing 2 Press the REC SEARCH buttons to move through the years one at a time Press and hold to scan through the years 3 When you h...

Page 27: ...27 Advanced Functions E You can choose between three different date time displays at the camera menu DATE TIME DATE TIME Choosing the display style DATE SELECT DATE TIME M P 3 2 1 5 1 see p 20...

Page 28: ...f the three options AUTO 10S Adds the title to your recordings for the first ten seconds of each scene your record The current title flashes in the viewfinder in record pause mode OFF The title will n...

Page 29: ...You can choose from the following characters If you choose the flashing dot nothing will be recorded at this position You can erase all the characters at and to the right of the cursor by pressing and...

Page 30: ...layed Each time you press the SELECT button the preset titles will be displayed in order one by one 3 Press the SET button to select the preset title and enter the title in the memory 4 Press the MENU...

Page 31: ...pears in the viewfinder To make the scene gradually disappear 1 Press and hold the FADE button during recording 2 When the scene has completely disappeared press the start stop button to end recording...

Page 32: ...BLC button in this mode Auto Recording A The camera provides you with a choice of five recording programs They use different combinations of camera settings in order to adjust the exposure and other...

Page 33: ...atically adjusted for glare free recordings of subjects lit by a concentrated light source Sand Snow Use this program in places where the background is so bright that the subject appears underexposed...

Page 34: ...resent the function of the Custom Keys 3 Press CUSTOM KEY 1 F to take the focus further away and CUSTOM KEY 2 N to bring the focus closer towards you 4 To return to autofocus press the AF MF button ag...

Page 35: ...ion may appear on the screen during record search and record review When the camera is in record pause mode you can use record search to play the tape forwards or backwards to find the point where you...

Page 36: ...ot affected Records the image in black and white Records a monochrome image with a sepia tint Records a color negative of the image White appears as black yellow appears as blue green appears as red e...

Page 37: ...press the key the flashing viewfinder display changes 4 Press CUSTOM KEY 2 the SET button to activate the effect The viewfinder display stops flashing and shines continuously 5 Press CUSTOM KEY 2 to c...

Page 38: ...recording is complete Before editing 1 Connect the camera to the VCR See Playback Connection on p 18 2 Turn the TV on Be sure to set it to the video channel or set the TV VIDEO selector to VIDEO 3 Tu...

Page 39: ...mera on a tripod and operate it with the wireless controller Sound recording For greater creative control you can connect an external microphone to the MIC terminal MIC Composition The most important...

Page 40: ...after a few seconds begin to turn slowly from the waist Hold the final image for a few seconds before you stop recording Tilt the camera up to exaggerate the height of the subject Tilt down from the t...

Page 41: ...BP 711 BP 714 BP E722 BP E722D BP 729 Battery Pack TV VCR VL 20 Battery Video Light SA 1 Adapter Bracket ES280 ES180 HC 910 System Case MM 100 Mixing Microphone DM 300 Super directional Microphone SC...

Page 42: ...a 12 24 V DC negative ground battery MC 100 Multi battery Charger The microprocessor controlled MC 100 takes up to four battery packs at a time and dramatically cuts recharge times it can charge the B...

Page 43: ...ely The SA 1 Adapter Bracket is required MM 100 Mixing Microphone The MM 100 mixes live sound and music so you can create the ideal sound track for your video productions DM 300 Super directional Micr...

Page 44: ...mmend Canon brand accessories or products bearing this same mark C A NON GENU I N E V I D E O A C C E S S O R Y WS 20 Wrist Strap Provides an extra measure of protection for active shooting WS 20 SC 9...

Page 45: ...use the camera close to TV transmitters portable communication devices or other sources of electric or magnetic radiation They may cause picture interference or permanently damage the camera Do not e...

Page 46: ...d moisture and where the temperature is no higher than 86 F 30 C After storage check each part and function of your camera to make sure everything is still working properly Condensation Condensation m...

Page 47: ...n is detected What you should do Remove the cassette leave the cassette compartment open and turn the camera off Leave it in a dry place until the condensation evaporates After the condensation warnin...

Page 48: ...ached p 10 12 You need to select a different recording program to use that function p 32 You left it in record pause mode for more than about five minutes p 8 The battery pack is exhausted p 11 12 The...

Page 49: ...creen If your recordings do not play back smoothly clean the video heads p 46 The video heads need cleaning p 46 The TV VIDEO selector on the TV isn t set to VIDEO p 18 The remote sensor is turned off...

Page 50: ...yback p 16 Fast forward p 16 Rewind p 16 The tape is stopped p 16 8 9 9 1 M P 5 3 2 8 1 T C O The camera is ejecting the tape p 14 The safety mechanism is activated Unload the cassette and turn the ca...

Page 51: ...G BL K WH T AR T During manual focus D ZOOM I MAGE S TAB I L D E SE L EC T D E ON OF F DA T E T I T LE FAR NE AR FADE BL C Custom key settings Tape counter The tape counter indicates the approximate r...

Page 52: ...se button p 16 FADE button p 31 stop button p 16 BLC button p 33 play button p 16 AF MF button p 34 rewind button p 16 REC SEARCH and record review button p 35 fast forward button p 16 REC SEARCH butt...

Page 53: ...bar p 15 Tripod socket p 39 ON SCREEN button p 50 ZOOM buttons p 19 FF button p 16 REW button p 16 START STOP button p 8 TAPE RETURN button p 17 PLAY button p 16 COUNTER RESET button p 17 STOP button...

Page 54: ...3 000 pixel Non directional electret condenser microphone Video terminal 1 Vp p 75 ohms unbalanced Audio terminal 10 dBV less than 3 kohms unbalanced 32 104 F 0 40 C 4 3 16 3 3 16 7 13 16 in 106 5 97...

Page 55: ...d Search 16 Image Stabilizer 23 Introducing the ES280 ES180 6 Lithium Battery 13 Loading Cassettes 14 Maintenance 46 Making Better Videos 39 Manual Focus 34 Microphone 39 Negative Positive Conversion...

Page 56: ...CANON CANADA INC NATIONAL HEADQUARTERS 6390 Dixie Road Mississauga Ontario L5T 1P7 CANON CANADA INC CALGARY 2828 16th Street N E Calgary Alberta T2E 7K7 CANON CANADA INC MONTREAL 5990 C te de Liesse...

Reviews: