8
GB
Setting Up
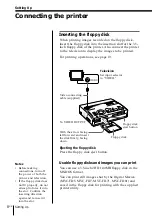
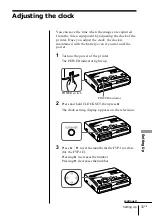
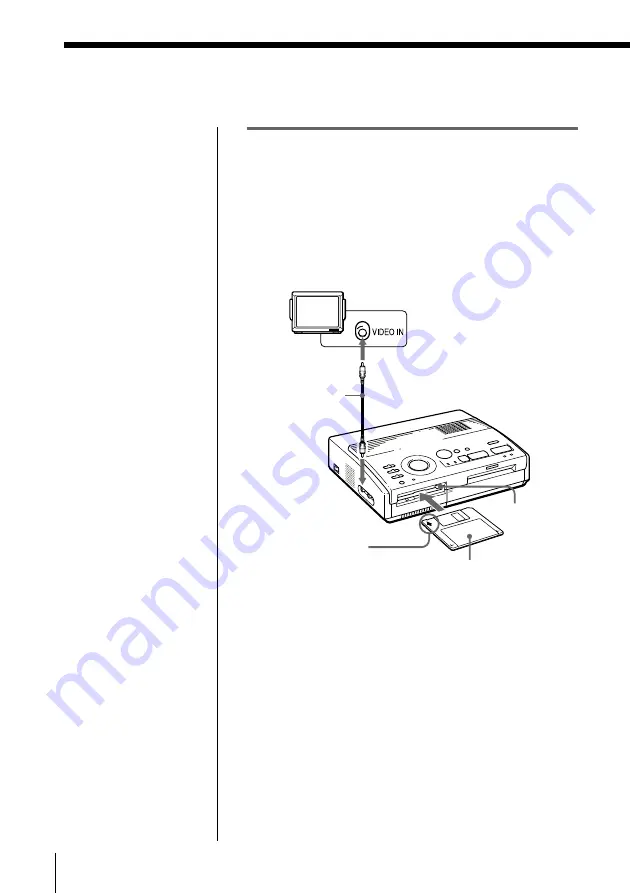
Inserting the floppy disk
When printing images recorded on the floppy disk,
insert the floppy disk into the insertion slot for the 3.5-
inch floppy disk of the printer. Also connect the printer
to the television to display the images to be printed.
For printing operations, see page 19.
Ejecting the floppy disk
Press the floppy disk eject button.
Usable floppy disks and images you can print
You can use a 3.5-inch 2HD 1.44MB floppy disk in the
MS-DOS format.
You can print still images shot by the Digital Mavica
(MVC-FD5, MVC-FD7, MVC-FD71, MVC-FD81) and
saved in the floppy disk for printing with the supplied
printer utility.
Notes
• Before making
connections, turn off
the power of both the
printer and television.
• If the floppy disk does
not fit properly, do not
attempt to force it into
the slot. Confirm the
inserting direction
again and re-insert it
into the slot.
With the arrow facing
left forward and insert
the disk firmly, facing
down.
Television
Set input selector
to “VIDEO.”
Floppy disk
To VIDEO OUTPUT
Setting Up
Connecting the printer
Floppy disk
eject button
Video connecting
cable (supplied)

