63
Setting the IP Address
Se
tu
p
13
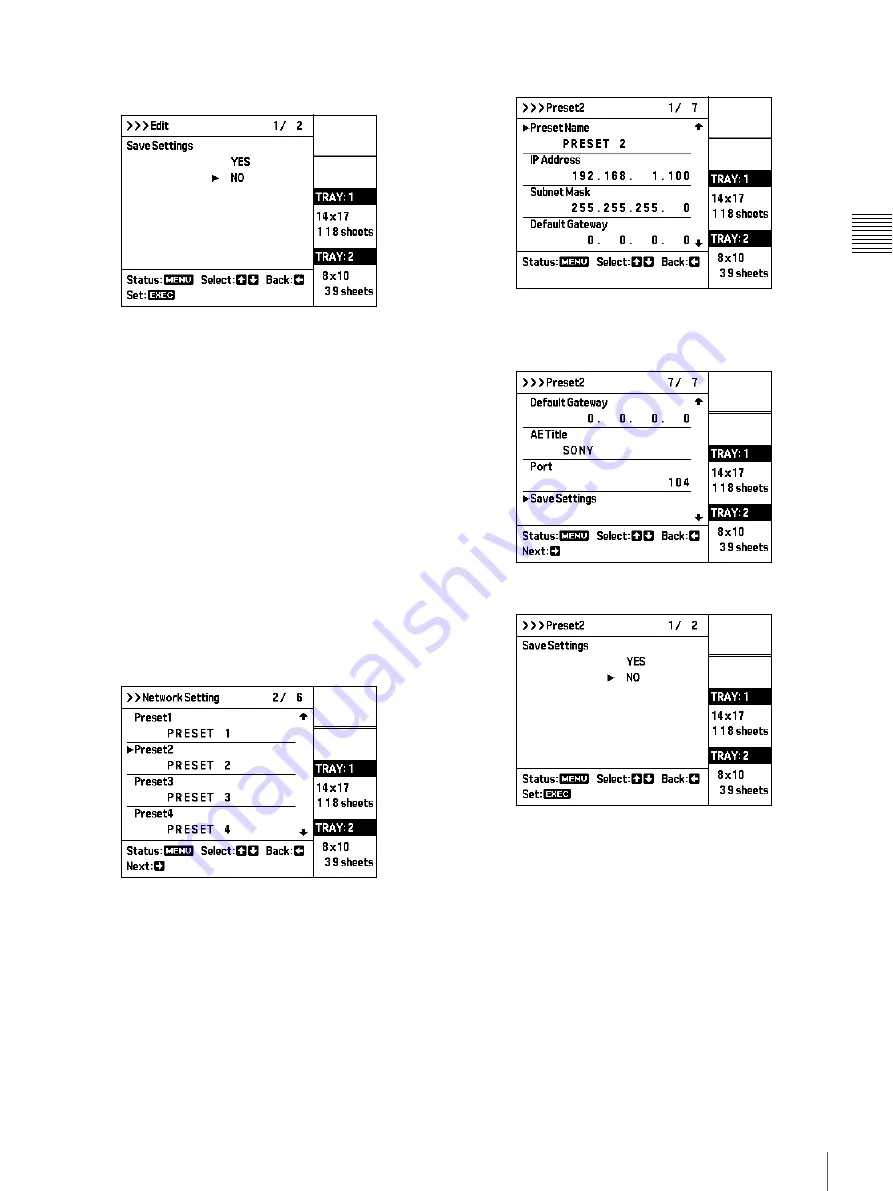
Press the EXEC button.
The Save Settings screen appears.
14
Move the cursor to “YES” and press the EXEC
button.
The settings made up to this point will be applied as
the unit’s network settings. If “Temporary” was
selected in step 2, the Preset contents remain
unchanged and the settings made up to this point will
be applied as the unit’s network settings.
The network settings will be active after the
“Initializing” indication on the display has
disappeared. Activation of the network settings may
take a few minutes.
To call up a preset and use the result as
network settings
1
Use the
F
and
f
buttons to move the cursor to the
number of the Preset to use and press the
g
button.
(In this example, “Preset 2” is selected.)
The current settings of “Preset 2” are shown.
2
Use the
F
and
f
buttons to move the cursor to “Save
Settings” and press the
g
button.
The Save Settings screen appears.
3
Move the cursor to “YES” and press the EXEC
button.
The currently shown settings (saved as Preset 2) will
be applied as the unit’s network settings.
The network settings will be active after the
“Initializing” indication on the display has
disappeared. Activation of the network settings may
take a few minutes.


