background image

16

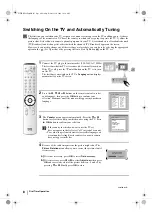
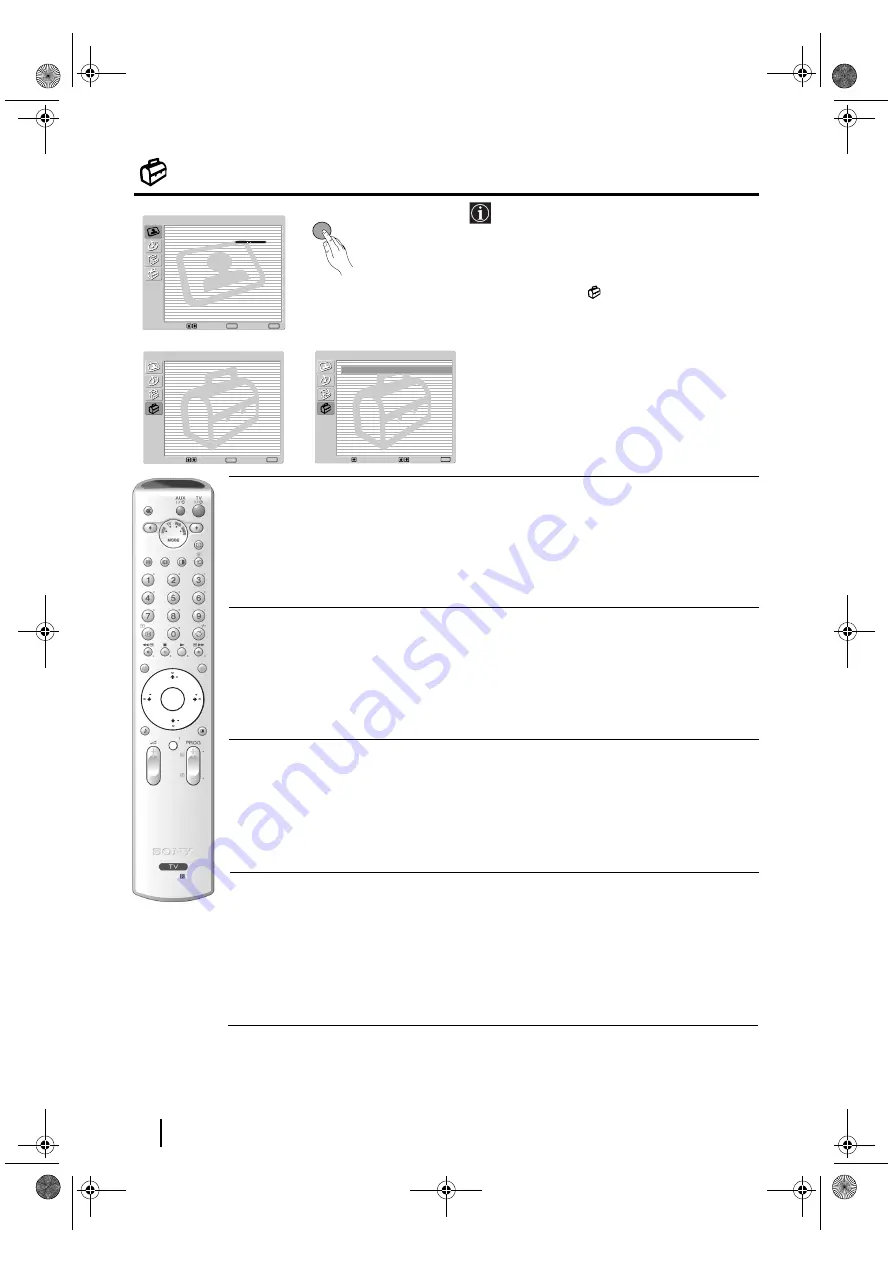
The Set Up Menu

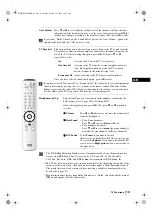
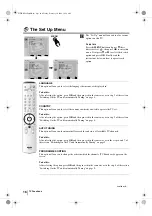
The “Set Up” menu allows you to alter various 

options on this TV.

To do this:


Press the 

MENU

 button and press 

v

 three 

times to select  

, then press 

OK

 to enter this 

menu. Next press 

v


or


V

 to select the desired 

option and press 

OK

. Finally read the 

instructions below on how to operate each 
option.

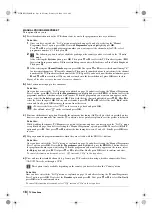
LANGUAGE

This option allows you to select the language that menus are displayed in. 

To do this: 

After selecting the option, press 

OK

 and then proceed in the same way as in step 2 of the section 

"Switching On the TV and Automatically Tuning" on page 8. 

COUNTRY

This option allows you to select the country in which you wish to operate the TV set. 

To do this:


After selecting the option, press 

OK

 and then proceed in the same way as in step 3 of the section 

"Switching On the TV and Automatically Tuning" on page 8. 

AUTO TUNING

This option allows you to automatically search for and store all available TV channels.

To do this: 

After selecting the option, press 

OK

 and then proceed in the same way as in the steps 6 and 7 of 

the section “Switching On the TV and Automatically Tuning” on page 9.

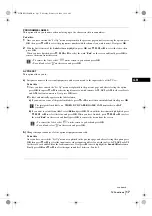
PROGRAMME SORTING

This option allows you to change the order in which the channels (TV Broadcast) appear on the 
screen. 

To do this: 

After selecting the option, press 

OK

 and then proceed in the same way as in the step 8 of the section 

“Switching On the TV and Automatically Tuning” on page 9.

TV Functions

,

m

MENU

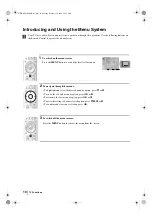
Picture  Adjustment

Select:

Enter:

OK

Exit:

MENU

Picture Mode:

Live

Contrast:
Reset
Noise Reduction:

Auto

Colour Tone:

Cool

Select:

Exit:

MENU

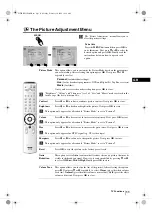
Set Up

Language
Auto Tuning
Programme Sorting
Programme Labels
AV Preset
Manual Programme Preset

Enter:

OK

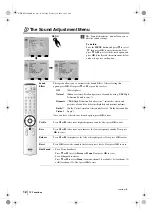
Set Up

Language
Auto Tuning
Programme Sorting
Programme Labels
AV Preset
Manual Programme Preset

Select:

Back:

Enter:

OK

continued...

RM-945

OK

MENU

01GBKV29FQ86B.fm  Page 16  Monday, February 16, 2004  10:18 AM

Summary of Contents for FD Trinitron WEGA KV-28FQ86B

Page 1: ...r Television GB KV 28FQ86B KV 32FQ86B 2004 by Sony Corporation Before operating the TV please read the Safety Information section of this manual Retain this manual for future reference 00COKV32FQ86 B03 fm Page 1 Wednesday December 17 2003 1 07 PM ...

Page 2: ... following instructions The wires in this mains lead are coloured in accordance with the following code Blue Neutral Brown Live As the colours of the wires in the mains lead of this apparatus may not correspond with the coloured markings identifying the terminals in your plug proceed as follows The wire which is coloured blue must be connected to the terminal which is marked with the letter N or c...

Page 3: ...15 Connection Guide 15 Picture rotation 15 RGB Centring 15 100Hz Mode 15 The Set Up menu 16 Language 16 Country 16 Auto Tuning 16 Programme Sorting 16 Programme Labels 17 AV Preset 17 Manual Programme Preset 18 PAP Picture And Picture 19 Teletext 20 NexTView 21 Additional Information Connecting Equipment to the TV 22 Viewing pictures from equipment connected to the TV 23 Remote Control Configurati...

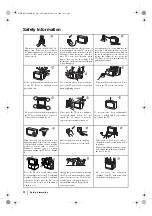
Page 4: ...s this could result in a fire or electric shock Never spill liquid of any kind on the set If any liquid or solid object does fall into the cabinet do not operate the TV Have it checked immediately by qualified personnel Take care not to place heavy objects on the power lead as this could result in damage We recommend you wind any excess lead around the holders provided on the rear of the TV Unplug...

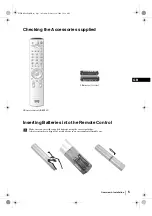
Page 5: ...l Make sure you insert the supplied batteries using the correct polarities Always remember to dispose of used batteries in an environmental friendly way 1 Remote control RM 945 2 Batteries AA size Overview Installation RM 945 01GBKV29FQ86B fm Page 5 Monday February 16 2004 10 18 AM ...

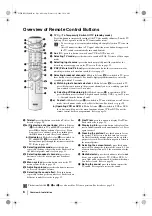
Page 6: ...splaying a channel index if Media Selector w is switched to TV and MENU is switched off press OK to display a channel overview If you want to select a channel press v or V then press the OK button to watch the selected channel b Navigator if Media Selector w is switched to TV and MENU qd is switched on use these buttons to navigate through the menu system of the TV Refer to page 10 qa Selecting pi...

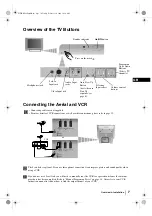
Page 7: ...o a spare channel once the autotune procedure has been completed Refer to Manual Programme Preset on page 18 Also refer to your VCR instruction manual to find out how to find the output channel of your VCR Overview Installation or VCR OUT IN Audio Input jacks Selecting Input source Video Input jack Auto Start Up Button starts the auto Start Up sequence see page 8 Volume control buttons Programme U...

Page 8: ...firm your selection If the country in which you want to use the TV set does not appear in the list select off instead of a country To avoid wrong teletext characters for cyrillic languages we recommend selecting Russia country if your own country does not appear in the list 4 Because of the earth s magnetism the picture might slant The Picture Rotation menu allows you to correct the picture slant ...

Page 9: ... aerial Check the aerial connection refer to page 7 Press the OK button to restart the auto tuning process 8 After all available channels are captured and stored the Programme Sorting menu automatically appears on the screen enabling you to change the order in which the channels are stored a If you wish to keep the broadcast channels in the tuned order go to step 9 b If you wish to store the chann...

Page 10: ...Picture Adjustment Select Enter OK Exit MENU Picture Mode Live Contrast Reset Noise Reduction Auto Colour Tone Cool TV Functions 2 To navigate through the menus To highlight and select the desired menu or option press v or V To enter the selected menu or option press OK or b To return to the last menu or option press OK or B To alter the settings of your selected option press v V B or b To confirm...

Page 11: ... OK to store This option only appears for alteration if Picture Mode is set to Personal Hue Press B or b to decrease or to increase the green tones Next press OK to store This option only appears for NTSC signal e g USA video tapes Sharpness Press B or b to soften or to sharpen the picture Next press OK to store This option only appears for alteration if Picture Mode is set to Personal Reset Press...

Page 12: ...quency sounds Next press OK to store Bass Press B or b to decrease or to increase the lower frequency sounds Next press OK to store Balance Press B or b to emphasise the left or the right speaker Next press OK to store Reset Press OK to reset the sound to the factory preset levels Next press OK to store Dual Sound For a Stereo broadcast Press v or V to select Stereo or Mono Next press OK to store ...

Page 13: ...V set speakers it is from the external equipment Headphones Set Up This option allows you to customise the headphones volume and the PAP settings refer to page 19 for details on PAP After selecting this option press OK Next press v or V repeatedly to select Volume Press B or bto decrease or increase the volume level from the headphones Dual Sound For a Stereo broadcast Press v or V to select Stere...

Page 14: ...ly change the aspect ratio of the screen To do this After selecting the option press OK Then press v or V to select On if you wish the TV set to automatically switch the screen format according to the broadcast signal or Off if you wish to keep your preference Finally press OK to store Even if you have selected On or Off in the Auto Format option you can always modify the format of the screen by p...

Page 15: ...onnect each equipment according to this information to obtain the optimum picture setting of the optional equipment 3 Once you have connected the optional equipment press B or b to select OK and finally press the OK button of the remote control We strongly recommend you to follow our connection proposals but in case you do not agree press B or b to select No then press the OK button A new menu app...

Page 16: ...TO TUNING This option allows you to automatically search for and store all available TV channels To do this After selecting the option press OK and then proceed in the same way as in the steps 6 and 7 of the section Switching On the TV and Automatically Tuning on page 9 PROGRAMME SORTING This option allows you to change the order in which the channels TV Broadcast appear on the screen To do this A...

Page 17: ...and AV4 for front connectors Next press OK twice 2 A label automatically appears in the label column a If you want to use one of the predefined labels press vor Vto select the desired label and finally press OK The total predefined labels are VIDEO DVD CABLE GAME CAM camcorder or SAT satellite b If you want to set a different label select Edit and press OK Then with the first element highlighted p...

Page 18: ...s v V B or b to select the word End on the screen and finally press OK to remove the menu from the screen To correct the letter select on the screen to go back and press OK For a blank select on the screen and press OK c Fine tune the broadcast reception Normally the automatic fine tuning AFT will give the best possible picture however you can manually fine tune the TV to obtain a better picture r...

Page 19: ...e displayed on the left screen 2 Selecting an input source Press the b button to select the right screen as the active screen Next press repeatedly the button to show the input signal of the connected equipment on right screen of the TV For more details on which input symbol you wish to choose please see section Viewing pictures from equipment connected to the TV on page 23 RF signal TV broadcast ...

Page 20: ...is the case input another page number To access the next or preceding page Press PROG or PROG To freeze a teletext page Press button Press again to cancel the freeze To reveal concealed information e g answer to a quiz Press button Press again to conceal the information To select a sub page A teletext page may consist of several sub pages In this case one or more arrows appear next to the page num...

Page 21: ...lected a programme press OK to get more information on the selected programme 4 To switch NexTView off press the button on the remote control Programme List interface fig 1 Overview interface fig 2 1 Programmme list 2 3 Icons key NexTView General P r a e s e n t i e r t v o n I h r e r P r o g r a m m z e i t s c h r www tvmovie de Thu 12 Jun 14 36 Thu 12 AttrText AttrText AttrText AttrText AttrTe...

Page 22: ...ease refer to the instruction manual of your VCR If you use a VCR that supports SmartLink please connect the VCR to the TV to the Scart connector 3 3 E using a Scart lead If you have connected a decoder or a Set Top Box to the Scart 3 3 E or through a VCR connected to this Scart Select the Manual Programme Preset option in the Set Up menu and after entering in the Decoder option select On refer to...

Page 23: ...correct input symbol appears on the screen Symbol Input Signals 1 Audio video input signal through the Scart connector G 1 RGB input signal through the Scart connector G This symbol appears only if an RGB source has been connected 2 Audio video input signal through the Scart connector F 2 RGB input signal through the Scart connector F This symbol appears only if an RGB source has been connected 3 ...

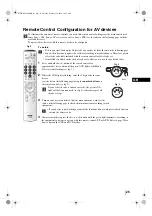
Page 24: ...ons work If your device is not working or some of the functions do not work please check that you entered the correct code set or try the next code listed against the brand Not all brands are covered and not all models of every brand may be covered 4 Always remember to press the T or t button until the green light iluminates according to the equipment you want to operate with this remote control V...

Page 25: ...UX light of the Media Selector starts flashing see fig 1 2 While the AUX light is flashing enter the 3 digit code for your device see the list on the following page using the number buttons on the remote control see fig 2 If your selected code is entered correctly the green AUX light will be lit momentarily see fig 3 otherwise repeat all the above steps 3 Turn on your device and check that the mai...

Page 26: ...f Play Fast Forward Rewind DAV SC6 502 Stop Volume control Menu Cursors DAV SC5 502 DAC SA30 502 CINEMA KIT MODELS HTP 1900 504 HTP 1500 504 HTP 1100 504 HTP 3100 505 Power On Off Volume control HT K250 504 HT DDW750 505 HT SL40 504 HT LS55 504 AV RECEIVER MODELS TV DA9000ES 507 STR DA5000ES 507 STR DA3000ES 506 STR DB2000 505 Power On Off Volume control STR DB790 508 STR DE695 508 STR DE595 507 S...

Page 27: ...Right phono jacks Front Terminals 4 S Video input 4 pin DIN 4 video input phono jack 4 audio input phono jacks headphones jack Sound Output 2 x 20 W music power 2 x 10 W RMS Woofer 30 W music power 15 W RMS Power Consumption KV 28FQ86B 130 W KV 32FQ86B 130 W Standby Power Consumption 0 5 W Dimensions w x h x d KV 28FQ86B approx 789 x 533 x 510 mm KV 32FQ86B approx 910 x 586 x 586 mm Weight KV 28FQ...

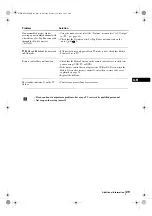
Page 28: ...tedly on the remote control until the correct input symbol is displayed on the screen see page 23 Press the button on the remote control Check that TV Speakers is On in the Sound Adjustment menu see page 13 Check that headphones are not connected Using the menu system select the Picture Adjustment menu and select Reset to return to factory settings see page 11 This is not a malfunction Press the n...

Page 29: ...n the scart 2 2 PAP navigation is only possible in TV mode please check that Media Selector is set to TV Check that the Media Selector on the remote control is set to the device you are using VCR TV or DVD If the remote control does not operate the VCR or DVD even when the Media Selector has been set correctly enter the necessary code set as explained on page 24 Replace the batteries Contact your ...

Page 30: ...01GBKV29FQ86B fm Page 30 Monday February 16 2004 10 18 AM ...

Page 31: ...00COKV32FQ86 B03 fm Page 3 Wednesday December 17 2003 1 07 PM ...

Page 32: ...410312451 Sony Corporation Printed in Spain KV 28FQ86B KV 32FQ86B 4 103 124 51 2 00COKV32FQ86 B03 fm Page 4 Thursday August 12 2004 9 10 AM ...

Reviews: