29
Recording
–
Basics
— Recording – Basics —
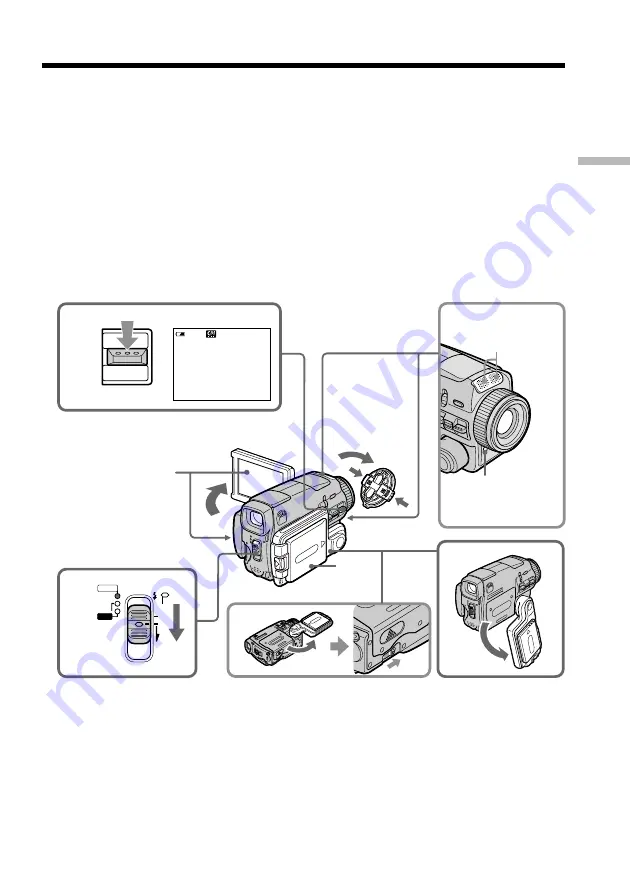
Recording a picture
Your camcorder automatically focuses for you.
(
1
)
Remove the lens cap by pressing both knobs on its sides.
(
2
)
Install the power source and insert a cassette. See “Step 1” to “Step 3” (p. 17 to 26)
for more information.
(
3
)
Turn the grip to the recording position, and hold your camcorder through the wrist
strap. See “Quick Start Guide” (p. 10) for more information.
(
4
)
Set the POWER switch to CAMERA. Your camcorder is set to the recording standby
mode.
(
5
)
Slide OPEN in the direction of the
B
mark indicated on the camcorder to open the
LCD panel. The viewfinder automatically turns off.
(
6
)
Press START/STOP. Your camcorder starts recording. The REC indicator appears.
The camera recording lamp located on the front of your camcorder lights up. To
stop recording, press START/STOP again.
6
3
5
40min
REC 0:00:01
START/STOP
MEMORY/
NET-
WORK
CAMERA
(CHG)
POWER
OFF
ON
MODE
VCR
2
2
1
4
Microphone
Camera
recording lamp


