background image

Cont

ro

l f

o

r HDM

I/Ex

ternal

 A
udi

o De

v

ice

masterpage:Right

specdef v20070110

filename[E:\sagyou\080603\OLD\3398072142\3398072142\3398072142DAVF500CA2\gb08ext.f
m]

 model name [DAV-F500]

 [3-398-072-

14

(2)]

85

GB

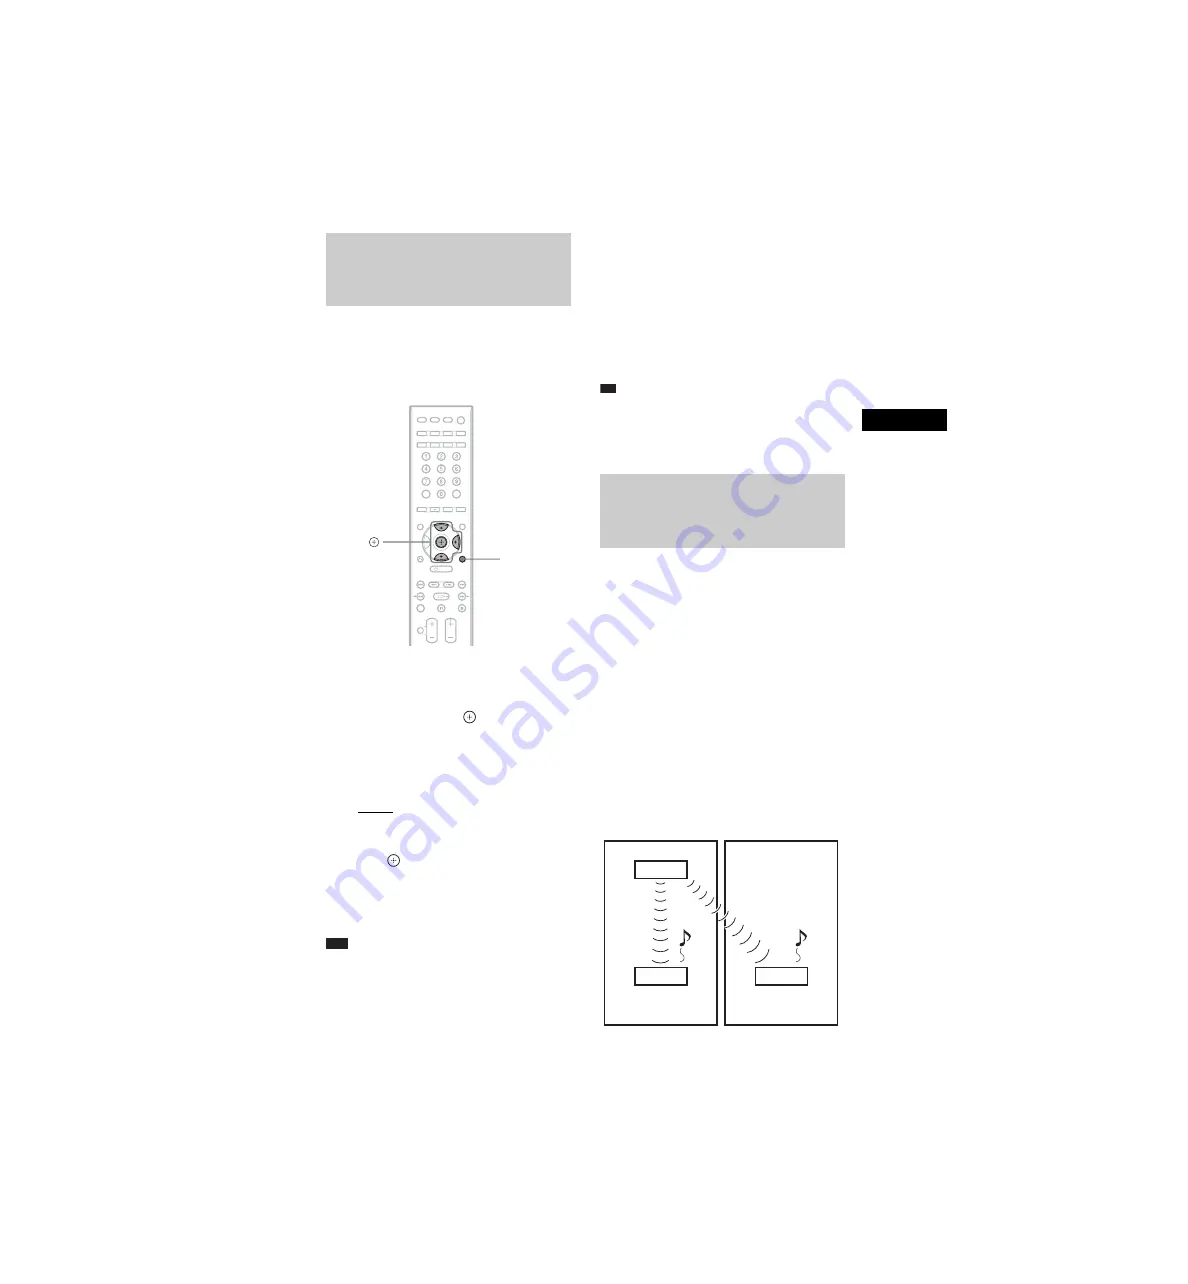
You can enjoy the S-AIR receiver (not supplied) 
while the S-AIR main unit is in standby mode by 
setting “S-AIR STBY” to “ON.”

1

Press SYSTEM MENU.

2

Press 

X

/

x

 repeatedly until “S-AIR 

STBY” appears in the front panel 
display, then press 

 or 

c

.

3

Press 

X

/

x

 to select the desired setting.

• “ON”: You can enjoy the S-AIR receiver 

(not supplied) while the S-AIR main unit 
is in standby mode or turned on.

• “OFF”: You cannot enjoy the S-AIR 

receiver (not supplied) while the S-AIR 
main unit is in standby mode.

4

Press .

The setting is made.

5

Press SYSTEM MENU.

The system menu turns off.

Note

• When you set “S-AIR STBY” to “ON,” the power 

consumption during the standby mode increases.

• When you turn the system off while “S-AIR STBY” 

is set to “ON,” “S-AIR” flashes (when sound 
transmission between the S-AIR main unit and S-AIR 

receiver (not supplied) is not established), or lights up 
(when sound transmission between the S-AIR main 
unit and S-AIR receiver (not supplied) is established) 
in the front panel display.

• “S-AIR STBY” is set to “OFF” automatically when 

the wireless transceiver is removed from the S-AIR 
main unit.

• When you turn the system off while “S-AIR STBY” 

is set to “ON,” you cannot use any buttons other than 

"

/

1

 button.

Tip

• When there is no disc in the S-AIR main unit and 

“S-AIR” lights up in the front panel display, you can 
load a disc into the S-AIR main unit and enjoy music 
by the S-AIR receiver (not supplied).

It is easy to set the same ID for the S-AIR main 
unit and an S-AIR sub unit, such as a surround 
amplifier or S-AIR receiver (not supplied), to 
establish sound transmission. However, 
neighbors may also receive your system’s sound 
if IDs are the same, or you may receive the 
sound from neighbors. To prevent this, you can 
identify the S-AIR main unit with a specific 
S-AIR sub unit by performing the pairing 
operation.

x

Before pairing

Sound transmission is established by the ID 
(example).

Enjoying the S-AIR receiver 
(not supplied) while the S-AIR 
main unit is in standby mode

For the S-AIR receiver (not supplied)

X

/

x

/

c

,


SYSTEM 
MENU

Identifying the S-AIR main unit 
with a specific S-AIR sub unit 
(Pairing operation)

For the surround amplifier
For the S-AIR receiver (not supplied)

S-AIR main unit

ID A

S-AIR sub unit

ID A

ID A

S-AIR sub unit

Your room

Neighbor

Summary of Contents for DAV-F500

Page 1: ...V F500 3 398 072 14 2 Sony Corporation Printed in China sagyou 080603 OLD 3398072142 3398072142 3398072142DAVF500CA2 cover Co fm 2 http www sony net 3 398 072 14 2 2008 Sony Corporation DVD Home Theatre System Operating Instructions ...

Page 2: ...RT10 This class B digital apparatus complies with Canadian ICES 003 This device complies with RSS Gen of IC Rules Operation is subject to the following two conditions 1 this device may not cause interference and 2 this device must accept any interference including interference that may cause undesired operation of this device This equipment complies with IC radiation exposure limits set forth for ...

Page 3: ...R The default setting is underlined About the S AIR function The system is compatible with the S AIR function which allows transmission of sound between S AIR products wirelessly The following S AIR products can be used with the system Surround amplifier supplied You can enjoy surround speaker sound wirelessly S AIR receiver not supplied You can enjoy system sound in another room The S AIR receive...

Page 4: ...Sound 62 Tuner Presetting Radio Stations 63 Listening to the Radio 64 Control for HDMI External Audio Device Using the Control for HDMI Function for BRAVIA Sync 66 Playing Back Audio Files JPEG Image Files of a USB Device 69 Transferring Songs in a USB Device 78 Using the DIGITAL MEDIA PORT Adapter 81 Using an S AIR Product 82 Other Operation Using the Setup Display 89 Calibrating the Appropriate ...

Page 5: ...ion JEITA Type Disc logo Characteristics Icon DVD VIDEO DVD VIDEO DVD R DVD RW in DVD VIDEO format or video mode DVD R DVD RW in DVD VIDEO format VR Video Recording mode DVD R DVD RW in VR Video Recording mode except for DVD R DL VIDEO CD VIDEO CD Ver 1 1 and 2 0 discs Super VCD CD R CD RW CD ROM in video CD format or Super VCD format CD Audio CD CD R CD RW in audio CD format DATA CD CD R CD RW CD...

Page 6: ...rd heart A disc with paper or stickers on it A disc that has the adhesive of cellophane tape or a sticker still left on it In some cases CD R CD RW DVD R DVD RW DVD R DVD RW cannot be played on this system due to the recording quality or physical condition of the disc or the characteristics of the recording device and authoring software The disc will not play if it has not been correctly finalized...

Page 7: ...VIDEO no region code indication may be given even though playing the DVD VIDEO is prohibited by area restrictions Some playback operations on a DVD or VIDEO CD may be intentionally set by software producers Since this system will play a DVD or VIDEO CD according to the disc contents the software producers designed some playback features may not be available Be sure to read the operating instructio...

Page 8: ...e DAV F500 3 398 072 14 2 8GB This system incorporates High Definition Multimedia Interface HDMITM technology HDMI the HDMI logo and High Definition Multimedia Interface are trademarks or registered trademarks of HDMI Licensing LLC BRAVIA is a trademark of Sony Corporation S AIR and its logo are trademarks of Sony Corporation ...

Page 9: ...tand cover 1 Speaker stands 4 Screws large 12 Screws middle 4 Screws small 8 Seals for stand cover 2 FM wire antenna aerial 1 Speaker cords 5 red white green gray blue Video cord 1 Cable tie 1 Remote commander remote 1 R6 size AA batteries 2 Calibration mic 1 Surround amplifier 1 Speaker cord cover 1 Speaker cord holder 1 Wireless transceivers 2 Wall mounting bracket for control unit 1 Wall mounti...

Page 10: ...teries If you do not intend to use the remote for an extended period of time remove the batteries to avoid possible damage from battery leakage and corrosion About operation of the remote You can operate this system and TV using the supplied remote x System operation Press TV so that TV flashes four times The remote enters system operation mode When operating the system point the remote at the cen...

Page 11: ...e E sagyou 080603 OLD 3398072142 3398072142 3398072142DAVF500CA2 gb04gst f m model name DAV F500 3 398 072 14 2 11GB Getting Started Note Do not expose the remote sensor to direct sunlight or lighting apparatus Doing so may cause a malfunction ...

Page 12: ...or to avoid damaging the floor when you assemble the speakers Be especially careful about the combination of parts as a mistake may result in the speaker becoming unstable and therefore a hazard Tip You can use the speaker without the speaker stand by installing it on the wall page 17 1 Draw the speaker cord into the post of the speaker stand for the front and surround speakers Fold back the speak...

Page 13: ...cted Be sure to match the speaker cords to the appropriate terminals on the speakers the speaker cord with the color tube to 3 and the speaker cord without the color tube to Do not catch the speaker cord insulation in the speaker terminals Color tube Connector Rear of speaker Rear of the speaker Speaker cord Color tube Front speaker L White Front speaker R Red Surround speaker L Blue Surround spea...

Page 14: ... the speaker adaptor for the front and surround speakers Hook the speaker on the hook of the speaker adaptor Draw the cord s between the hooks of the speaker adaptor and between the slit of the post 4 Secure the speaker with the screws large for the front and surround speakers Speaker cord Do not get caught the cord s in the hooks Adjust the length of the cord s Rear of the speaker Screws large 3 ...

Page 15: ...2 3398072142DAVF500CA2 gb04gst f m model name DAV F500 3 398 072 14 2 15GB Getting Started Fully assembled illustration Surround speaker L Blue label White Red Surround speaker R Gray label Front speaker L White label Front speaker R Red label Blue Gray Green Center speaker Green label ...

Page 16: ...sty or dirty Very humid Subject to vibrations Subject to direct sunlight Use caution when placing the speakers and or speaker stands attached to the speakers on a specially treated waxed oiled polished etc floor as staining or discoloration may result Do not use any type of abrasive pad scouring powder or solvent such as alcohol or benzine Do not lean or hang on the speaker as the speaker may fall...

Page 17: ...ge the settings For details see Calibrating the Appropriate Settings Automatically page 97 To install the speakers on a wall Before installing the speakers on a wall connect the speaker cord to the speaker Be sure to match the speaker cords to the appropriate terminals on the speakers the speaker cord with the color tube to 3 and the speaker cord without the color tube to 1 Prepare screws not supp...

Page 18: ...ragile attach the screws securely to a beam and fasten them to the wall Install the speakers on a vertical and flat wall where reinforcement is applied Contact a screw shop or installer regarding the wall material or screws to be used Sony is not responsible for accident or damage caused by improper installation insufficient wall strength or improper screw installation natural calamity etc Rear of...

Page 19: ...e control turn up the volume of the other components to a level where sound is not distorted EZW RT10 SPEAKER IMPEDANCE USE 3 FRONT R FRONT L CENTER SYSTEM CONTROL ONLY FOR HCD F500 DVD HOME THEATRE SYSTEM DAV F500 A F D STD D C S FUNCTION VOL 7 AC power cord mains lead 2 Front speaker R 2 Front speaker L 6 Wireless transceiver 4 VCR digital satellite receiver or PlayStation etc 3 TV 7 AC power co...

Page 20: ...to the FRONT L FRONT R and CENTER jacks on the bottom of the subwoofer respectively and insert the speaker connector of the surround speakers into the SPEAKER L and SPEAKER R jacks on the rear of the surround amplifier respectively 1 Connecting the Control unit 2 Connecting the Speakers AUDIO IN VIDEO R L TV ANTENNA P B C B P R C R Y COMPONENT VIDEO OUT COAXIAL DIGITAL OUT DIGITAL IN OPTICAL DIGIT...

Page 21: ...ethod A B or C Picture quality improves in order from A standard to C HDMI When the TV has the digital optical output jack you can improve sound quality by connecting with the digital cord B 3 Connecting the TV EZW RT10 SPEAKER IMPEDANCE USE 3 FRONT R FRONT L CENTER SYSTEM CONTROL ONLY FOR HCD F500 SPEAKER IMPEDANCE USE 3 FRONT R FRONT L CENTER Rear panel of the surround amplifier R SURROUND SELEC...

Page 22: ... both digital and analog signals Digital signals have priority over analog signals COAXIAL has priority over OPTICAL If the digital signal ceases the analog signal will be processed after 2 seconds Tip You can connect another component such as a VCR digital satellite receiver or PlayStation to the TV AUDIO IN jack A or TV DIGITAL IN OPTICAL jack B instead of the TV AUDIO IN VIDEO R L TV ANTENNA P ...

Page 23: ... component using the six speakers of the system Digital satellite receiver etc A DIGITAL MEDIA PORT adapter B Note Connect the DIGITAL MEDIA PORT adapter so that the V marks are aligned When disconnecting pull out while pressing both sides of the connector B To connect the DIGITAL MEDIA PORT adapter Connect a DIGITAL MEDIA PORT adapter not supplied to the DMPORT jack For details see Using the DIGI...

Page 24: ... components Tip If you have poor FM reception use a 75 ohm coaxial cable not supplied to connect the control unit to an outdoor FM antenna aerial as shown below 5 Connecting the FM wire antenna aerial DVD HOME THEATRE SYSTEM DAV F500 A F D STD D C S FUNCTION VOL System Signal flow VCR digital satellite receiver or PlayStation etc TV VCR digital satellite receiver or PlayStation etc AUDIO IN VIDEO ...

Page 25: ...tend the FM wire antenna aerial After bundling the cables keep the FM wire antenna aerial as horizontal as possible Tip If it is difficult to fit the cables into the slit bundle the cables with the cable tie supplied then attach the panel cover AUDIO IN VIDEO R L TV ANTENNA P B C B P R C R Y COMPONENT VIDEO OUT DIGITAL IN OPTICAL DIGITAL IN OPTICAL DIGITAL IN COAXIAL TV SAT CABLE DMPORT SAT CABLE ...

Page 26: ... careful not to pinch any cables while tightening screws 5 Attach the 2 seals for stand cover to hide the tightening screws Sound transmission from the subwoofer to a surround amplifier is enabled after inserting the wireless transceivers into the subwoofer and the surround amplifier 6 Inserting the wireless transceiver AUDIO IN VIDEO R L TV ANTENNA P B C B P R C R Y COMPONENT VIDEO OUT DIGITAL IN...

Page 27: ...f the subwoofer and the surround amplifier to a wall outlet mains connect the front speakers and center speaker to the subwoofer and surround speakers to the surround amplifier 7 Connecting the AC power cords mains leads R SURROUND SELECTOR S AIR ID EZW RT10 SPEAKER SURROUND PAIRING C B A SURROUND BACK L EZW RT10 SPEAKER IMPEDANCE USE 3 FRONT R FRONT L CENTER SYSTEM CONTROL ONLY FOR HCD F500 EZW R...

Page 28: ...tion mode to on off 1 Press 1 The system turns on 2 Press SYSTEM MENU on the remote 3 Press X x repeatedly until DEMO appears in the front panel display then press or c 4 Press X x to select a setting DEMO ON On DEMO OFF Off 5 Press The setting is made 6 Press SYSTEM MENU The system menu turns off Tip When you purchase the system from new or if the system is at its factory default settings page 10...

Page 29: ...ntrol unit by connecting the headphones to the PHONES jack on the surround amplifier Note When you connect headphones to the surround amplifier neither the control unit nor the surround amplifier outputs sound from the system s speakers The volume of the system may become minimum if you turn off the surround amplifier while the headphones are connected to the surround amplifier or radio reception ...

Page 30: ...zing and storing excess speaker cords 1 Attach the speaker cord cover by sliding it down along the grooves along the edges of the surround amplifier Push the speaker cord cover down until you hear a click Turn the surround amplifier upside down then store the cords in the speaker cord cover 2 Insert the tabs of the speaker cord holder in the slots of the speaker cord cover and press it into place ...

Page 31: ...sure that the wall is sufficiently strong 1 Decide the installation location for the bracket for wall Allow sufficient space around screw hole D 150 mm above 150 mm below 250 mm to the left and 400 mm to the right disc slot side Screw hole D will be the center of the control unit s width The location 72 5 mm above from the screw hole D will be the top of the control unit 2 Secure the bracket for w...

Page 32: ...e wall at that point If you do not install the cords inside the wall draw them through areas F or G of the bracket for wall 6 Secure the bracket for control unit with the 4 supplied screws small Note Do not loosen the screws of the brackets or the screws to secure the control unit to the bracket for wall during the assembly process If you fail to do so the control unit may fall and cause an accide...

Page 33: ...V screen If this message does not appear recall the Quick Setup display page 34 and perform again 4 Press without inserting a disc The Setup Display for selecting the language 5 Press X x to select a language The system displays the menu and subtitles in the selected language 6 Press The Setup Display for selecting the aspect ratio of the TV to be connected appears 7 Press X x to select the settin...

Page 34: ...Note The environment of the room in which the system is installed may affect measurements If measurement fails follow the message then retry AUTO CALIBRATION 13Press QUICK SETUP is complete appears on the TV screen and the Quick Setup is finished All connections and setup operations are complete To quit the Quick Setup Press DISPLAY in any Step Tip If you change the position of the speakers reset ...

Page 35: ...then press The options for HDMI SETUP appear 6 Press X x to select HDMI RESOLUTION then press 7 Press X x to select the desired setting then press AUTO 1920 1080p The system outputs the optimal video signal for the connected TV 1920 1080i The system outputs 1920 1080i video signals 1280 720p The system outputs 1280 720p video signals 720 480 576p The system outputs 720 480p or 720 576p video signa...

Page 36: ...press The system outputs the progressive signal for 5 seconds Check that the screen is displayed correctly 9 Press C c to select YES then press The system outputs the progressive signal When you select NO the system does not output the progressive signal Step 6 Changing the Sound Source You can enjoy DVD TV or VCR sound etc by changing the sound source Press FUNCTION repeatedly until the desired f...

Page 37: ...akers 1 Press SYSTEM MENU 2 Press X x repeatedly until DEC MODE appears in the front panel display then press or c 3 Press X x repeatedly until the decoding mode you want appears in the front panel display When you want to output the TV sound or stereo sound of a 2 channel source from the six speakers select the PLII MOVIE or PLII MUSIC decoding mode For details see page 59 4 Press The setting is ...

Page 38: ...c is pulled in automatically The disc is drawn into the control unit automatically 5 Press H The system starts playback continuous play 6 Press VOLUME to adjust the volume The volume level appears on the TV screen and in the front panel display Note When the system is turned off do not push a disc into the control unit Depending on the system status the volume level may not appear on the TV screen...

Page 39: ... Go to the next chapter track or scene1 Go back to the preceding chapter track or scene1 twice in a second When you press once you can go to the beginning of the current chapter track or scene Turn off the sound temporarily MUTING To cancel press it again or VOLUME to adjust the sound volume Stop play and remove the desired disc Z Locate a point quickly by playing a disc in fast forward or fast re...

Page 40: ...tles even if multilingual subtitles are recorded on the disc You also may not be able to turn them off You can change the subtitles if the DivX video file has an AVI or DIVX extension and contains subtitle information within the same file except for North American models When the system is playing a DVD VIDEO or DATA CD DATA DVD DivX video files recorded in multiple audio formats PCM Dolby Digital...

Page 41: ... Super VCD 1 STEREO The stereo sound of the audio track 1 1 1 L The sound of the left channel of the audio track 1 monaural 1 2 R The sound of the right channel of the audio track 1 monaural 2 STEREO The stereo sound of the audio track 2 2 1 L The sound of the left channel of the audio track 2 monaural 2 2 R The sound of the right channel of the audio track 2 monaural Note While the system is play...

Page 42: ...n the VIDEO CD Press ENTER in Step 3 may appear as Press SELECT in the operating instructions supplied with the disc In this case press H Tip To play without using the PBC function press or the number buttons while the system is in stop mode to select a track then press H or The system starts playback You cannot play still pictures such as a menu To return to PBC playback press x twice then press ...

Page 43: ...ed the disc the last time it was played and resumes playback from that point the next time you insert the same disc When the resume playback memory is full the resume playback point for the earliest disc is deleted To activate this function set MULTI DISC RESUME in SYSTEM SETUP to ON For details see MULTI DISC RESUME DVD VIDEO VIDEO CD only page 94 Note This system can store at least 10 resume pla...

Page 44: ...splay is turned off To change or cancel a program 1 Follow Steps 1 to 3 of Creating your own program 2 Press X x to select the program number of the track you want to change or cancel If you want to delete the track from the program press CLEAR 3 Follow Step 5 for new programming To cancel a program select under T then press To cancel all of the tracks in the programmed order 1 Follow Steps 1 to 3...

Page 45: ...the folder on the current disc When no folder is selected the first folder will play in random order Except for North American models 4 Press Shuffle Play starts To return to normal play Press CLEAR or select OFF in Step 3 To turn off the Control Menu display Press DISPLAY repeatedly until the Control Menu display is turned off Note You cannot use Shuffle Play with a VIDEO CD or Super VCD with PBC...

Page 46: ...ivX video files only You can repeat the current file except for North American models x During Shuffle Play or Program Play OFF Off ON You can repeat Shuffle Play or Program Play 4 Press The item is selected To return to normal play Press CLEAR or select OFF in Step 3 To turn off the Control Menu display Press DISPLAY repeatedly until the Control Menu display is turned off Note You cannot use Repe...

Page 47: ...rs on the TV screen The contents of the menu vary depending on the disc 2 Press C X x c or the number buttons to select the item you want to play or change 3 Press To display the DVD s menu on the Control Menu display 1 Press DISPLAY during playback The Control Menu display appears on the TV screen 2 Press X x to select DISC MENU then press The options for DISC MENU appear 3 Press X x to select ME...

Page 48: ...time code 1 Press DISPLAY When playing a DATA CD DATA DVD with JPEG image files press DISPLAY twice The Control Menu display appears on the TV screen 2 Press X x to select the search method Example CHAPTER is selected refers to a number The number in parentheses indicates the total number of titles chapters tracks indexes scenes folders or files 3 Press changes to 4 Press X x or the number buttons...

Page 49: ...le format Design rule for Camera File system Image standards for digital cameras regulated by Japan Electronics and Information Technology Industries Association JEITA Note The system will play any data with the extension MP3 JPG or JPEG even if they are not in MP3 or JPEG format Playing these data may generate a loud noise which could damage your speaker system The system does not conform to audi...

Page 50: ...ile Press to play the next MP3 file Press twice to play the previous MP3 file When you press once you can go to the beginning of the current MP3 file Note that you can select the next folder by continuing to press after the last file on the current folder but that you cannot return to the previous folder by pressing To return to the previous folder select the folder from the folder list To return ...

Page 51: ...turn to the previous JPEG image file select the top JPEG image file and press X To play the next or previous JPEG image file Press c C when the Control Menu display is not displayed Note that you can select the next folder by continuing to press c after the last image on the current folder but that you cannot return to the previous folder by pressing C To return to the previous folder select the f...

Page 52: ...o image data appears In this case select FOLDER LIST to display the list of folders You can play a slide show with sound by first placing both MP3 files and JPEG image files in the same folder on a DATA CD or DATA DVD 1 Load a DATA CD or DATA DVD 2 Press x 3 Press DISPLAY The Control Menu display appears on the TV screen 4 Press X x to select MODE MUSIC IMAGE then press The options for MODE MUSIC ...

Page 53: ...n set the duration shorter than NORMAL SLOW 1 You can set the duration longer than NORMAL SLOW 2 You can set the duration longer than SLOW 1 4 Press Note Some JPEG image files may take longer to display than the option you selected Especially progressive JPEG image files or JPEG image files of 3 000 000 pixels or more Duration of interval depends on the JPEG RESOLUTION setting in HDMI SETUP page 9...

Page 54: ...ach folder Note The system may not be able to play some DATA CDs DATA DVDs created in the Packet Write format DivX video files that the system can play The system can play data that is recorded in DivX format and which has the extension AVI or DIVX The system will not play files with the extension AVI or DIVX if they do not contain a DivX video Tip For details about playable MP3 audio tracks or JP...

Page 55: ...turn to the previous display Press O RETURN To stop playback Press x To play the next or previous DivX video file without turning on the above file list You can select the next or previous DivX video file in the same folder by pressing You can also select the first file of the next folder by pressing during playback of the last file of the current folder Note that you cannot return to the previous...

Page 56: ...r 4 Press X x to select CUSTOM then press The Setup Display appears 5 Press X x to select SYSTEM SETUP then press The options for SYSTEM SETUP appear 6 Press X x to select PARENTAL CONTROL t then press x If you have not entered a password The display for registering a new password appears Enter a 4 digit password using the number buttons then press The display for confirming the password appears x...

Page 57: ...rd then change the level If the Resume Play mode is canceled the level returns to the previous level Tip If you forget your password remove the disc and repeat Steps 1 to 7 of Restricting Playback of the Disc page 56 When you are asked to enter your password enter 199703 using the number buttons then press The display will ask you to enter a new 4 digit password After you enter a new 4 digit passw...

Page 58: ...F500CA2 gb05dsc fm model name DAV F500 3 398 072 14 2 58GB 10Enter a new 4 digit password using the number buttons then press 11To confirm your password re enter it using the number buttons then press If you make a mistake entering your password Press C before you press then input the correct number ...

Page 59: ... as it was recorded encoded Depending on the source the speakers that output sound will vary A F D MULTI AUTO FORMAT DIRECT MULTI 2 channel source Sound that is recorded in 2 channel front left and right channel is also assigned to the surround left and right channel This mode outputs sound from the front left and right speakers surround left and right speakers and subwoofer The center speaker doe...

Page 60: ...iver not supplied may skip Tip The system memorizes the last decoding mode selected for each function mode Whenever you select a function such as DVD or FM the decoding mode that was last applied to the function is automatically applied again when it is returned to For example if you listen to DVD with PLII MOVIE as the decoding mode then change to another function and then return to DVD PLII MOVI...

Page 61: ...uch as news D C S technology is used Note When you connect headphones to the surround amplifier you can select AUTO MOVIE or MUSIC only When you select MOVIE D C S depending on the input stream Dolby Pro Logic may be applied automatically Depending on the disc or source when you select AUTO the beginning of the sound may be cut off as the system selects the optimum mode automatically To avoid cutt...

Page 62: ...ffect may be less noticeable Enjoying Multiplex Broadcast Sound DUAL MONO You can enjoy multiplex broadcast sound when the system receives or plays the Dolby Digital multiplex broadcast signal Note To receive the Dolby Digital signal you need to connect a TV or other component to the control unit with an optical or coaxial digital cord page 21 and set the digital output mode of the TV or other com...

Page 63: ... program appear in the front panel display 3 Press SYSTEM MENU 4 Press X x repeatedly until MEMORY appears in the front panel display 5 Press or c A preset number appears in the front panel display 6 Press X x to select the preset number you want Tip You can select the preset number directly by pressing the number buttons 7 Press COMPLETE appears in the front panel display and the station is store...

Page 64: ...ing press TUNING repeatedly For automatic tuning press and hold TUNING The automatic tuning stops automatically when the system receives the radio station To stop the automatic tuning manually press TUNING or x To listen to radio stations when you know the frequencies 1 Press FUNCTION repeatedly until FM appears in the front panel display 2 Press D TUNING 3 Press the number buttons to select the f...

Page 65: ...ess c to move the cursor to the next position You can input letters numbers and other symbols for a radio station If you make a mistake Press C c repeatedly until the character to be changed flashes then press X x to select the desired character To erase the character press C c repeatedly until the character to be erased flashes then press CLEAR 7 Press COMPLETE appears in the front panel display ...

Page 66: ...ction may not work Refer to the operating instructions supplied with the component The Control for HDMI function may not work if you connect a component other than Sony even if the component is compatible with the Control for HDMI function Control for HDMI Easy Setting The system is compatible with the Control for HDMI Easy Setting function If the TV is compatible with the Control for HDMI Easy Se...

Page 67: ... HDMI connection is correct Theater Theatre Mode If your TV is compatible with the Theater Theatre Mode you can enjoy optimal image suited for movies and the sound is output from the system s speaker automatically by pressing THEATER THEATRE One Touch Play By only pressing ONE TOUCH PLAY the TV turns on the TV is set for DVD input mode and the system starts playing a disc automatically Note One To...

Page 68: ...me by the remote of the TV If you turn the system off or set the function of the system to other than TV TV sound is output from the TV speakers You can also operate the System Audio Control function from the TV menu For details refer to the operating instructions of the TV Note If the TV is turned on before turning on the system TV sound will not be output for a moment While the TV is in PAP pict...

Page 69: ...ailable for purchase in certain areas When formatting a USB device be sure to do so using the device itself or dedicated formatting software for the device Otherwise you may be unable to properly transfer from the USB device to this system 1 Press FUNCTION repeatedly until USB appears in the front panel display 2 Connect a USB device to the USB port When you connect the USB device Reading and the ...

Page 70: ... transferred by a device such as a computer may not be played back in the order in which they were transferred The playback order for the system may differ from the playback order of the connected USB device Always turn off the system before removing the USB device Removing the USB device while the system is on may corrupt the data on the USB device Do not save other types of files or unnecessary ...

Page 71: ... MP3 file Press twice to play the previous MP3 file When you press once you can go to the beginning of the current MP3 file Note that you can select the next folder by continuing to press after the last file on the current folder but that you cannot return to the previous folder by pressing To return to the previous folder select the folder from the folder list To return to the previous display Pr...

Page 72: ...and press X The system can recognize up to 150 JPEG image files in a single folder To play the next or previous JPEG image file Press c C when the Control Menu display is not displayed Note that you can select the next folder by continuing to press c after the last image on the current folder but that you cannot return to the previous folder by pressing C To return to the previous folder select th...

Page 73: ...MODE 3 The JPEG image file stretches out from the center of the TV screen MODE 4 The JPEG image files randomly cycle through the effects MODE 5 The next JPEG image file slides over the previous image OFF Off 4 Press Note The EFFECT setting is not effective when you set JPEG RESOLUTION in HDMI SETUP to 1920 1080i HD or 1920 1080i HD page 93 1 Press DISPLAY during playback The Control Menu display a...

Page 74: ...Shuffle Play starts To return to normal play Press CLEAR or select OFF in Step 3 To turn off the Control Menu display Press DISPLAY repeatedly until the Control Menu display is turned off Note When you press CLEAR to return to normal play and Repeat Play are also canceled You can play the audio files JPEG image files on the USB device repeatedly You can use a combination of Shuffle Play modes 1 Pr...

Page 75: ...and JPEG image files are assigned unique numbers on the USB device you can select the desired audio file or JPEG image file by entering its number 1 Press DISPLAY When playing a JPEG image files press DISPLAY twice The Control Menu display appears on the TV screen 2 Press X x to select the search method TRACK Audio files FILE JPEG image files FOLDER Folders is selected refers to a number The numbe...

Page 76: ...ad The file name may not be displayed depending on the text Playing time of MP3 files may not be displayed correctly You can display the information of an audio file such as time information name of the folder audio file and the audio bit rate the amount of data per second of the current audio on the TV screen Press DISPLAY during playback The information of an audio file appears on the TV screen ...

Page 77: ...t all text characters will be displayed You can check the date information during playback when the Exif tag is recorded in the JPEG image file Press DISPLAY twice during playback The Control Menu display appears on the TV screen Exchangeable Image File Format is a digital camera image format defined by the Japan Electronics and Information Technology Industries Association JEITA Tip Date informat...

Page 78: ...CD text information is not transferred in the created MP3 files If you stop a transferring partway an MP3 file whose transfer was stopped halfway is deleted Transferring stops automatically if The USB device runs out of space during transfer The number of MP3 files on the USB device reaches the limit for the number that the system can recognize You can transfer up to 150 files in a folder You can ...

Page 79: ... to transfer tracks 1 Load a DATA CD DATA DVD 2 Press DISPLAY while the system is in stop mode The Control Menu display appears on the TV screen 3 Press X x to select USB RECORDING then press 4 Press X x to select TRACK or FOLDER then press TRACK The folders recorded on the DATA CD DATA DVD appear You can transfer the desired MP3 file FOLDER The folders recorded on the DATA CD DATA DVD appear You ...

Page 80: ...ly MP3 files can be transferred from a DATA CD DATA DVD You can erase audio files on the USB device 1 Press FUNCTION repeatedly until USB appears in the front panel display 2 Press X x to select a folder x To erase all audio files in a folder Press CLEAR x To erase an audio file Press The list of files contained in the folder appears Press X x to select the desired audio file then press CLEAR 3 Pr...

Page 81: ...e transmission distance between the Bluetooth transmitter and Bluetooth Wireless Audio Adapter may be reduced In this case place the Bluetooth transmitter as far as possible from the system or move the Bluetooth Wireless Audio Adapter closer to the Bluetooth transmitter When you use the system and the Wireless Network Audio Adapter such as TDM NC1 not supplied at the same time place the Wireless N...

Page 82: ...nit and subwoofer in this system This is for transmitting sound You can use up to three S AIR main unit The number of usable S AIR main unit depends on the use environment S AIR sub unit surround amplifier in this system This is for receiving sound Surround amplifier You can enjoy surround speaker sound wirelessly S AIR receiver not supplied You can also enjoy system sound in another room not supp...

Page 83: ...ons for AUDIO SETUP appear 7 Press X x to select S AIR SETUP t then press 8 Press X x to select ID then press 9 Press X x to select the desired ID then press You can select any ID A B or C The confirmation display appears 10Press Set the S AIR sub unit to the same ID Sound transmission is established as follows example Tip To confirm the current ID perform Steps 1 to 7 above When you pair the S AI...

Page 84: ...ain unit see To set the ID of the S AIR main unit page 83 To set the ID of the S AIR receiver not supplied refer to the operating instructions of the S AIR receiver not supplied Note When you are using another S AIR sub unit such as a surround amplifier do not change the ID of the S AIR main unit Set the ID of the S AIR receiver not supplied to the same ID as the S AIR main unit When you pair the ...

Page 85: ...r not supplied is established in the front panel display S AIR STBY is set to OFF automatically when the wireless transceiver is removed from the S AIR main unit When you turn the system off while S AIR STBY is set to ON you cannot use any buttons other than 1 button Tip When there is no disc in the S AIR main unit and S AIR lights up in the front panel display you can load a disc into the S AIR m...

Page 86: ...appears on the TV screen 5 Press X x to select SETUP then press The options for SETUP appear 6 Press X x to select CUSTOM then press The Setup Display appears 7 Press X x to select AUDIO SETUP then press The options for AUDIO SETUP appear 8 Press X x to select S AIR SETUP t then press 9 Press X x to select PAIRING then press The confirmation display appears 10Press C c to select YES then press The...

Page 87: ...it If you select a new ID you can select the same ID as before pairing is canceled If you use multiple wireless systems which sharing the 2 4 GHz band such as wireless LAN or Bluetooth the transmission of S AIR products or other wireless systems may be unstable In this case the transmission may be improved by changing the following RF CHANGE setting 1 Press SYSTEM MENU 2 Press X x repeatedly until...

Page 88: ...F500CA2 gb08ext f m model name DAV F500 3 398 072 14 2 88GB S AIR ID C equivalent channel for Wi Fi channel 11 The transmission may be improved by changing the transmission channel frequency of the other wireless system s For details refer to the operating instructions of the other wireless system s ...

Page 89: ...NGUAGE SETUP page 90 VIDEO SETUP page 90 HDMI SETUP page 92 AUDIO SETUP page 93 SYSTEM SETUP page 94 SPEAKER SETUP page 95 Example VIDEO SETUP 6 Press X x to select an item then press The options for the selected item appear Example TV TYPE 7 Press X x to select a setting then press The setting is selected and setup is complete Note When you turn the system on after resetting and no disc is in the...

Page 90: ...ITLE that is not recorded on the DVD VIDEO one of the recorded languages will be automatically selected depending on the disc the language may not be selected automatically Tip If you select OTHERS t in MENU AUDIO and SUBTITLE select and enter a language code from Language Code List page 126 using the number buttons Select settings according to the TV to be connected x TV TYPE You can select the a...

Page 91: ...lect this when you can change the aspect ratio on your TV NORMAL Select this when you cannot change the aspect ratio on your TV A 16 9 aspect ratio signal with black bands on left and right sides of the image appears Note 4 3 OUTPUT is effective only when you set TV TYPE in VIDEO SETUP to 16 9 x COLOR SYSTEM VIDEO CD Except for North American Latin American and CIS models You can select the color ...

Page 92: ...tion is available when you connect the system and TV with an HDMI cable For details see Using the Control for HDMI Function for BRAVIA Sync page 66 OFF Off ON On You can operate mutually between components that are connected with an HDMI cable Note When you set to ON without the HDMI connection of the TV Please verify the HDMI connection appears and you cannot set to ON x VOLUME LIMIT If you chang...

Page 93: ...u set HDMI RESOLUTION in HDMI SETUP to other than 720 480p or 720 576p You can select 1920 1080i HD or 1920 1080i HD only when you set HDMI RESOLUTION in HDMI SETUP to 1920 1080i If you select 1920 1080i HD or 1920 1080i HD the next image appears after the black screen HDMI signal will stop momentarily when The system is loading or unloading a DATA CD or DATA DVD disc You connect or remove a USB d...

Page 94: ...t picture still picture appears but only when the jacket picture is already recorded on the disc CD EXTRA etc If the disc does not contain a jacket picture the GRAPHICS picture appears GRAPHICS A preset picture stored in the system appears BLUE The background is blue BLACK The background is black x PARENTAL CONTROL You can set the playback restrictions For details see Restricting Playback of the D...

Page 95: ...OOFER YES x DISTANCE FRONT When you move the front speakers center speaker and subwoofer be sure to set the parameters of the distance A from the listening position to the speakers You can set the parameters from 0 00 to 7 00 meters1 0 to 23 ft L R 3 00 m 10 ft2 3 Set the front speaker distance CENTER 3 00 m 10 ft2 3 4 Set the center speaker distance SUBWOOFER 3 00 m 10 ft2 3 Set the subwoofer dis...

Page 96: ...appears when you set CENTER to YES in the CONNECTION setting x LEVEL SURROUND You can adjust the sound level of the surround speakers You can set the parameter from 6 0 dB to 6 0 dB Be sure to set TEST TONE to ON for easy adjustment L R 0 0 dB Set the surround speaker level This item appears when you set SURROUND to YES in the CONNECTION setting x TEST TONE The speakers will emit a test tone to ad...

Page 97: ...he TV screen 3 Press X x to select SETUP then press The options for SETUP appear 4 Press X x to select CUSTOM then press The Setup Display appears 5 Press X x to select AUDIO SETUP then press The options for AUDIO SETUP appear 6 Press X x to select AUTO CALIBRATION then press The options for AUTO CALIBRATION appear 7 Connect the calibration mic supplied to the ECM AC2 jack on the control unit Set ...

Page 98: ...connected 10Press C c to select YES or NO then press x The measurement is OK Disconnect the calibration mic then select YES The result is implemented x The measurement is not OK Follow the message then select YES to retry Note While the Auto Calibration function works do not turn off the power do not press any button do not change the volume do not change the function do not insert or eject a disc...

Page 99: ...y then press or c 4 Press X x to select a setting ATT ON You can attenuate the input level The output level is changed ATT OFF Normal input level 5 Press The setting is made 6 Press SYSTEM MENU The system menu turns off Enjoying the Sound at Low Volume You can enjoy sound effects or dialogue as you would in a movie theater even at low volume It is useful for watching movies at night Press NIGHT NI...

Page 100: ... When you set the sleep timer SLEEP lights up in the front panel display To check the remaining time Press SLEEP once To change the remaining time Press SLEEP repeatedly to select the desired time To cancel the sleep timer function Press SLEEP repeatedly until SLEEP OFF appears in the front panel display Changing the Brightness of the Front Panel Display and Illumination The brightness of the fron...

Page 101: ... of the displayed information see Front panel display page 129 SIMPLE displays the selected function name only 4 Press The setting is made 5 Press SYSTEM MENU The system menu turns off You can set the type of illumination for the front panel 1 Press SYSTEM MENU 2 Press X x repeatedly until ILLUM MODE appears in the front panel display then press or c 3 Press X x to select a setting ON turns on the...

Page 102: ... DVD MP3 file 1 Playing time and current track number 2 Track file name If an MP3 file has the ID3 tag the system will display a folder name track file name from the ID3 tag information The system can support ID3 ver 1 0 1 1 2 2 2 3 ID3 ver 2 2 2 3 tag information display has priority when both ID3 ver 1 0 1 1 and ver 2 2 2 3 tags are used for a single MP3 file x DATA CD DivX video file DATA DVD D...

Page 103: ...functions Playing time of the current scene x VIDEO CD without PBC functions CD T Playing time of the current track T Remaining time of the current track D Playing time of the current disc D Remaining time of the current disc x DATA CD MP3 file DATA DVD MP3 file T Playing time of the current track x DATA CD DivX video file DATA DVD DivX video file Except for North American models Playing time of t...

Page 104: ...an models 2 If an MP3 file has the ID3 tag the system will display a folder name track file name from the ID3 tag information The system can support ID3 ver 1 0 1 1 2 2 2 3 ID3 ver 2 2 2 3 tag information display has priority when both ID3 ver 1 0 1 1 and ver 2 2 2 3 tags are used for a single MP3 file 3 Except for North American models You can check the date information during playback when the E...

Page 105: ...ickly Code numbers of controllable TVs If more than one code number is listed try entering them one at a time until you find the code that works with your TV TV CATV Preparing the remote for controlling the TV TV 1 Manufacturer Code number SONY 501 default AIWA 501 AKAI 503 DAEWOO 503 506 515 544 FISHER 508 545 GE 503 509 510 544 GOLDSTAR LG 503 515 517 544 568 GRUNDIG 533 HITACHI 503 514 515 517 ...

Page 106: ... 834 835 PIONEER 828 829 SCIENTIFIC ATLANTA 815 816 817 844 TOCOM PHILIPS 830 831 ZENITH 826 827 Controlling the TV with the remote By pressing You can TV 1 Turn the TV on off THEATER THEATRE Enjoy optimal image suited for movies INPUT Switch the TV s input source between the TV and other input sources TV VOL Adjust the TV volume Manufacturer Code number PROG c C Select the TV channel After pressi...

Page 107: ...tings wait about 20 seconds before turning on the power by pressing 1 You can return the SETUP settings page 89 other than PARENTAL CONTROL to the default settings 1 Press FUNCTION repeatedly until DVD appears in the front panel display 2 Press DISPLAY while the system is in stop mode The Control Menu display appears on the TV screen 3 Press X x to select SETUP then press The options for SETUP app...

Page 108: ...72142 3398072142 3398072142DAVF500CA2 gb09oth f m model name DAV F500 3 398 072 14 2 108GB 8 Press Do not press 1 while resetting the system as it takes a few seconds to complete Note The MODE MUSIC IMAGE INTERVAL and EFFECT settings also return to the default settings ...

Page 109: ...our until the moisture evaporates When you move the system take out any disc If you don t the disc may be damaged If anything falls into the cabinet unplug the subwoofer and have it checked by qualified personnel before operating it any further On adjusting volume Do not turn up the volume while listening to a section with very low level inputs or no audio signals If you do the speakers may be dam...

Page 110: ...ere About the surround amplifier The nameplate is located on the side exterior Notes about the Discs On handling discs To keep the disc clean handle the disc by its edge Do not touch the surface Do not stick paper or tape on the disc Do not expose the disc to direct sunlight or heat sources such as hot air ducts or leave it in a car parked in direct sunlight as the temperature may rise considerabl...

Page 111: ... dealer The power cannot be turned off The demonstration mode DEMO is set to ON Set DEMO to OFF page 28 Symptom Remedy There is no picture The video connecting cords are not connected securely The video connecting cords are damaged The control unit is not connected to the correct TV input jack page 21 The video input on the TV is not set so that you can view pictures from the system Check the outp...

Page 112: ...he speakers at least 0 3 meters from the TV set If the color irregularity persists turn off the TV set once then turn it on after 15 to 30 minutes If howling occurs reposition the speakers farther away from the TV set Make sure that no magnetic object magnetic latch on a TV stand health care device toy etc is placed near the speakers Symptom Remedy There is no sound The speaker cord is not connect...

Page 113: ...from the center speaker Check the speaker connections and settings pages 20 95 Make sure the DEC MODE setting page 59 Depending on the source the effect of the center speaker may be less noticeable A 2 channel source is being played No sound or only a very low level sound is heard from the surround speakers Check the speaker connections and settings pages 20 95 Make sure the DEC MODE setting page ...

Page 114: ...ideo file except for North American models The JPEG image file cannot be played The DATA CD is not recorded in a JPEG format that conforms to ISO 9660 Level 1 Level 2 or Joliet The DATA DVD is not recorded in a JPEG format that conforms to UDF Universal Disk Format It has an extension other than JPEG or JPG It is larger than 3 072 width 2 048 height in normal mode or more than 2 000 000 pixels in ...

Page 115: ...0 The language for the sound track cannot be changed Multilingual tracks are not recorded on the DVD being played The DVD prohibits changing the language for the sound track The subtitle language cannot be changed Multilingual subtitles are not recorded on the DVD being played The DVD prohibits changing the subtitles The subtitle cannot be turned off The DVD prohibits turning off subtitles The ang...

Page 116: ...6 Symptom Remedy OVERLOAD appears in the front panel display A problem has been detected with the level of electrical current from the USB port Turn off the system and remove the USB device from the USB port Make sure there is no problem with the USB device If this display pattern persists contact your nearest Sony dealer Are you using a supported USB device If you connect an unsupported USB devic...

Page 117: ...ta to the USB device again as the data transferred in the USB device may have been corrupted The character codes that can be displayed by this system are numbers and alphabet only Other characters are not displayed correctly Data Error appears in the front panel display during playback of a USB device The audio file JPEG image file you want to play is broken The data is not MPEG1 Audio Layer 3 dat...

Page 118: ...guidelines Total folders on the USB device 200 or less Total files per folder 150 or less You cannot start transferring to a USB device The following problems may have occurred The USB device is full The number of MP3 files and folders on the USB device has reached the upper limit The USB device is write protected Transferring is stopped before it is finished The communication speed of the USB dev...

Page 119: ...ound is heard from the S AIR sub unit If you use another S AIR main unit place it more than 8 m 26 1 4 feet away from the unit Confirm the ID of the S AIR main unit and S AIR sub unit page 83 Confirm the pairing setting page 85 Install the S AIR main unit and S AIR sub unit closer together Avoid use of equipment that generates electromagnetic energy such as a microwave oven Install the S AIR main ...

Page 120: ...ound amplifier turns green The speaker cord is not connected securely Check the speaker connections and settings The volume of the system is set to minimum The system is in mute status Depending on the source or the settings of the control unit the effect of the speakers may be less noticeable Headphones are connected flashes green The S AIR main unit is not turned on You performed pairing the S A...

Page 121: ...the system the version number VER X XX X is a number may appear on the TV screen Although this is not a malfunction and for Sony service use only normal system operation will not be possible Turn off the system and then turn on the system again to operate First 3 characters of the service number Cause and or corrective action C 13 The disc is dirty Clean the disc with a soft cloth page 110 The dis...

Page 122: ... step Other models 87 5 MHz 108 0 MHz 50 kHz step Antenna aerial FM wire antenna aerial Antenna aerial terminals 75 ohms unbalanced Intermediate frequency 10 7 MHz Video Section Outputs VIDEO 1 Vp p 75 ohms COMPONENT Y 1 Vp p 75 ohms PB CB PR CR 0 7 Vp p 75 ohms HDMI OUT Type A 19 pin Speakers Front and Surround speaker SS TSF500 Speaker system 2 Way 3 Driver speaker system Bass reflex Magneticall...

Page 123: ... 60 Hz Taiwan models 120 V AC 50 60 Hz Latin American models 110 V 240 V AC 50 60 Hz Korean models 220 V AC 60 Hz Thailand models 220 V 50 60 Hz Other models 220 V 240 V AC 50 60 Hz Power consumption On 50 W Rated impedance 3 16 Ω Dimensions approx 85 mm 100 mm 345 mm w h d incl speaker cord cover and speaker cord holder Mass approx 1 7 kg incl speaker cord cover and speaker cord holder Wireless t...

Page 124: ...de and deep sound space DTS Digital audio compression technology developed by DTS Inc This technology conforms to 5 1 channel surround This format comprises of stereo rear channel and there is discrete subwoofer channel in this format DTS provides the same 5 1 discrete channels of high quality digital audio The good channel separation is realized due to the all channel data being recorded discrete...

Page 125: ...d other high quality media To ensure that the subtle nuances of these high quality media are transmitted with no deterioration Sony has developed a technology called S AIR for the radio transmission of digital audio signals with no compression and has incorporated this technology into the EZW RT10 EZW T100 This technology transfers digital audio signals with no compression using the 2 4 GHz band r...

Page 126: ...4 Latvian Lettish 1345 Malagasy 1347 Maori 1349 Macedonian 1350 Malayalam 1352 Mongolian 1353 Moldavian 1356 Marathi 1357 Malay 1358 Maltese 1363 Burmese 1365 Nauru 1369 Nepali 1376 Dutch 1379 Norwegian 1393 Occitan 1403 Afan Oromo 1408 Oriya 1417 Punjabi 1428 Polish 1435 Pashto Pushto 1436 Portuguese 1463 Quechua 1481 Rhaeto Romance 1482 Kirundi 1483 Romanian 1489 Russian 1491 Kinyarwanda 1495 Sa...

Page 127: ...For more information refer to the pages indicated in parentheses A Ventilation slots B 1 on standby button 33 107 C A F D STD indicator D D C S indicator E Play operation buttons Illumination 38 101 F FUNCTION button 36 G Remote sensor 10 H VOL buttons 38 I Z eject button 38 J Front panel display 129 K Disc slot 38 L Stand cover 25 Control unit A F D STD D C S FUNCTION VOL Front view Right side vi...

Page 128: ... OUT VIDEO jack 21 E SAT CABLE DIGITAL IN COAXIAL jack 23 F HDMI OUT jack 21 G SAT CABLE DIGITAL IN OPTICAL jack 23 H TV DIGITAL IN OPTICAL jack 21 I DMPORT jack 23 81 J ECM AC2 jack 33 97 K USB port 69 L Panel cover 20 25 AUDIO IN VIDEO R L TV FM75 COAXIAL ANTENNA DIGITAL IN OPTICAL DIGITAL IN OPTICAL DIGITAL IN COAXIAL TV ECM AC2 SAT CABLE DMPORT SAT CABLE VIDEO OUT DC5V 0 7A Max OUT P B C B P R...

Page 129: ...en a CD or a DATA CD is loaded 5 I Lights up when the S AIR transceiver is inserted in the control unit and the system transmits the sound 82 J Lights up when a disc is loaded K Current surround format except for JPEG image file L Lights up when the night mode is on 99 M Lights up when the HDMI OUT jack is correctly connected to HDCP Highbandwidth Digital Content Protection compliant device with H...

Page 130: ...CA2 gb10add fm model name DAV F500 3 398 072 14 2 130GB A Ventilation slots B SPEAKER FRONT R FRONT L CENTER jacks 20 C SYSTEM CONTROL jack 20 D Wireless transceiver EZW RT10 slot 26 Subwoofer EZW RT10 SPEAKER IMPEDANCE USE 3 FRONT R FRONT L CENTER SYSTEM CONTROL ONLY FOR HCD F500 Rear view Bottom view ...

Page 131: ...ck 29 B POWER button ON OFF 29 83 C POWER ON LINE indicator 29 83 D PAIRING indicator 85 E PAIRING button 85 F Wireless transceiver EZW RT10 slot 26 G S AIR ID switch 83 H SPEAKER L jack 20 I SPEAKER R jack 20 J SURROUND SELECTOR switch 29 83 Surround amplifier PHONES POWER POWER ON LINE R SURROUND SELECTOR S AIR ID EZW RT10 SPEAKER SURROUND PAIRING C B A SURROUND BACK L Front view Rear view ...

Page 132: ... 74 SLEEP ef 100 SOUND MODE qa 61 SUBTITLE wd 40 SYSTEM MENU 8 28 37 59 63 85 98 THEATER THEATRE ql 66 TONE qj 62 TOOLS OPTIONS 8 106 TUNING wk 63 TV qd 105 TV CH qa 106 TV VOL qs 106 VOLUME qs 38 Number buttons 4 42 63 105 1 on standby 1 28 33 38 TV 1 on standby w 105 C X x c qg 28 33 43 63 97 REPLAY ADVANCE wf 38 9 38 m M wk 38 wk 38 H play q 38 x stop wg 38 X pause wj 38 DISPLAY wl 33 43 97 O R...

Page 133: ... function and to view related information Press DISPLAY repeatedly Each time you press DISPLAY the Control Menu display changes 1 t 2 t t 1 t 1 Control Menu display 1 2 Control Menu display 2 appears when available 3 Control Menu display off Note The Control Menu display appears during the DVD or USB function The Control Menu display 1 and 2 will show different items depending on the disc type For...

Page 134: ...n edited PLAY LIST TIME page 49 You can check the elapsed time and the remaining playback time You can play from a desired point by inputting the time code DVD VIDEO DVD VR only PROGRAM page 43 You can select the track to play in the order you want SHUFFLE page 44 You can play the track file in random order REPEAT page 45 You can play the entire disc all titles all tracks all folders all files rep...

Page 135: ...e desired language of the on screen display the aspect ratio of the TV and select yes or no to start the Auto Calibration CUSTOM In addition to the Quick Setup setting you can adjust various other settings FOLDER page 48 You can select the folder to be played FILE page 48 You can select the JPEG image file or DivX video file to be played DATE page 104 You can display the date the picture was taken...

Page 136: ... display the list of folders JPEG image files DATE page 77 You can display the date the picture was taken by a digital camera INTERVAL page 72 You can select the duration for which the slides are displayed on the TV screen EFFECT page 73 You can select the effects to be used for changing slides during a slide show MODE MUSIC IMAGE pages 70 71 You can select the data type MP3 AAC WMA file or JPEG i...

Page 137: ... YCBCR RGB HDMI 92 HDMI High Definition Multimedia Interface 124 HDMI RESOLUTION 92 HDMI SETUP 92 I ILLUMINATION MODE 101 INFORMATION MODE 101 Instant Advance 39 Instant Replay 39 Interlace format 124 INTERVAL 53 72 J JPEG image file 49 69 JPEG RESOLUTION 93 L Language Code List 126 LANGUAGE SETUP 90 M MENU 90 MODE MUSIC IMAGE 52 70 72 MP3 file 49 69 Multi Session CD 7 MULTI DISC RESUME 94 Multipl...

Page 138: ...me E sagyou 080603 OLD 3398072142 3398072142 3398072142DAVF500CA2 gb_IX fm model name DAV F500 3 398 072 14 2 138GB T TEST TONE 96 TIME 49 TRACK SELECTION 93 TREBLE 62 TV TYPE 90 U USB device 69 V VIDEO SETUP 90 VOLUME LIMIT 92 W WMA file 69 ...

Page 139: ...masterpage None Right filename E sagyou 080603 OLD 3398072142 3398072142 3398072142DAVF500CA2 gb_IX fm model name DAV F500 3 398 072 14 2 ...

Reviews: