– 23 –
SECTION 2
TEST PROCEDURES
30.
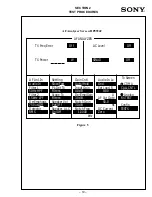
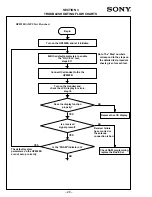
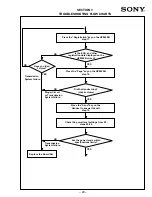
Press the “OPEN LOOP TIME RESPNS” soft key to change
to the “POWER CONTROL Open Loop Time Response”
screen and begin the measurement.
31.
Make sure the time response falls within the displayed
boundary.
32.
Press the “GATED OUTPUT” soft key to change to the
“POWER CONTROL Gated Output” screen.
33.
Press the “RISING EDGE” soft key to measure the rising
edge of the power turn on step. Make sure the rising edge
of the step is within the display boundary.
34.
Press the “FALLING EDGE” soft key to measure the
falling edge of the power turn on step. Make sure the
falling edge of the step is within the display boundary.
35.
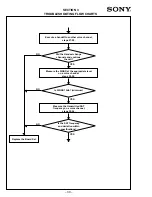
Press the “MAXIMUM OUTPUT” soft key and see if the
“Total Power” field value is within specification limits.
36.
Press the “MENU UP “ button on the front panel of the
CMD80 to return to the “MANUAL TEST Call
Established” screen.
Receiver Quality
37.
Press the “RECEIVER QUALITY” soft key from the
“MANUAL TEST Call Established” screen to change to the
“RECEIVER QUALITY” submenu screen.
38.
Press the “DYNAMIC RANGE” soft key to start the test.
Make sure the Frame Error Rate Meets specification limits.
39.
Press the “MENU UP " button on the front panel of the
CMD80 to return to the “MANUAL TEST Call Establishe”
screen.
Transmitter Quality
40.
Press the “TRANSMITTER QUALITY” soft key to change
to the “TRANSMITTER QUALITY” submenu screen.
41.
Press the “PHASE ERROR” soft key to start the Phase
Error test. Make sure the Handset operates within the
minimum and maximum specification limits.
42.
Press the “MAGNITUDE ERROR” soft key to start the
Magnitude Error test. Make sure the Handset operates
within the minimum and maximum specification limits.
43.
Press the “MENU UP“ button on the front panel of the
CMD80 to return to the “MENU TEST Call Established”
screen.
Ending the Tests
44.
Press the “RELEASE CALL” soft key to end the
Service Operation 2 test.
45.
Press the “POWER” key on the Handset to turn off.
46.
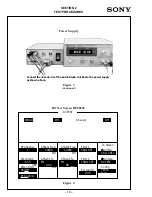
Press the “ON” button in the lower right comer of the
CMD80 to put the tester into the “Standby” state, and turn
the Tester off by using the power switch on the rear panel
of the Tester.
Summary of Contents for CM-Bx200
Page 50: ... 28 ...


