background image

NW-A1000/A3000.GB.2-659-086-12(1)

Additional Information

82


82


Notes on Disposing of the Player

This player has a built-in lithium-ion rechargeable battery. When you dispose 
of the player, be sure to dispose of it properly.
For disposal information for the NW-A1000 series, see 

 page 83.

For disposal information for the NW-A3000 series, see 

 page 84.

Some countries may regulate disposal of the battery used to power this 
product. Please consult with your local authority.

Notes

•  Never disassemble the player except when disposing of it.
•  Be careful when handling internal metallic components of the player. Pay particular 

attention to component edges.

Continued 

Table of 

Contents


Index


Menu

Summary of Contents for CKH-NWA1000

Page 1: ... 2005 Sony Corporation 2 659 086 13 1 Operation Guide NW A1000 series A3000 series Table of Contents Index Menu ...

Page 2: ...ated in the upper right of this manual to jump to Table of Contents Player HOME Menu Reference or Index Jumps to the table of contents Find what you are looking for from a list of topics in the manual Jumps to the HOME menu reference Find what you are looking for from a list of the Option items in the player s HOME menu Jumps to the index Find what you are looking for from a list of key words ment...

Page 3: ...layed side by side with each pair part of a continuous roll of pages When you scroll the previous and next pairs of pages scroll up and down continuously Facing Two pages are displayed side by side When you scroll the display changes to previous or succeeding pairs of pages Using CONNECT Player Help Refer to CONNECT Player Help for details about using CONNECT Player such as importing tracks to you...

Page 4: ...ng the Artist Link Feature Searching for Artists Belonging to Similar Genres Artist Link 42 Settings Customizing Sound Quality 6 Band Equalizer 44 Limiting the Volume from the Headphones 47 Turning Off the Player Operation Beep 48 Settings continued Connecting to Other Devices 49 Setting the Screen Display Option 50 Adjusting the Brightness of the Screen 51 Displaying Player Information 52 Selecti...

Page 5: ...Search Artist 17 Album 17 Song 17 Intelligent Shuffle My Favorite Shuffle 22 Time Machine Shuffle 23 Shuffle All 24 Favorite 100 20 Music Library Playlists 18 All Songs 10 Album 11 Artist 12 Genre 13 Rating 14 Release Date 15 Recent Transfers 16 Play History 21 Settings Play Mode 25 Sound 44 Default Bookmark 31 AVLS Vol Limit 47 Beep 48 Audio Output 49 Display 50 Brightness 51 Unit Information 52 L...

Page 6: ...iod the adaptor should be returned to your nearest Sony Service Center or Sony Authorized Repair Center for replacement or if a problem occurs after the warranty period has expired the adaptor should be discarded Notes When using this player follow the precautions below to avoid damaging the player Do not sit down with the player in your back pocket If you store the player with the headphones earp...

Page 7: ...ge 42 5 way button Starts playback and enables navigation of the player s on screen menus page 9 BACK button Press to go up one list screen level page 8 or to return to the previous screen Press and hold BACK to display the HOME menu OPTION button Displays the Option menu page 28 To turn the player off press and hold the OPTION button or select Shut Down from the Option menu and then press VOL swi...

Page 8: ... the operation button For example a player s screen changes as shown below by selecting Music Library Album from the HOME menu HOME menu Music Library Album list Track list Now Playing screen Select Album and press Select Music Library and press Select your desired album and press Select your desired track and press Playback begins Press BACK Press BACK Press BACK Press BACK Table of Contents Inde...

Page 9: ...reen Bookmark icon Track title Artist name Album title Genre Rating Playing status List screen Index List button is displayed on the left bottom of the player s display while a track is playing When you press during playback appears and the track pauses Press to resume playback This pause and resume feature is available only on the Now Playing screen buttons Press to display the cursor and scroll ...

Page 10: ...itle Press and hold BACK The HOME menu appears Press to select Music Library and then press The list screen appears Press to select All Songs and then press The track list appears Press to select a track and then press Playback starts from the selected track and continues through all tracks on the list Hint You can add a track to the default Bookmark List by pressing while selecting the track in t...

Page 11: ... then press The list screen appears Press to select Album and then press The album list appears Press to select an album and then press The track list appears Press to select a track and then press Playback starts from the selected track and continues through all tracks on the list Hint You can play all tracks of a list item by selecting the item from the list and pressing and holding in step Cont...

Page 12: ...ppears Press to select an artist and then press The album list appears Press to select an album and then press The track list appears Press to select a track and then press Playback starts from the selected track and continues through all tracks on the list Hints If the artist name starts with The or THE the introductory The or THE is ignored in sorting the artist list by name You can play all tra...

Page 13: ...elect a genre and then press The artist list appears Press to select an artist and then press The album list appears Press to select an album and then press The track list appears Press to select a track and then press Playback starts from the selected track and continues through all tracks on the list Hint You can play all tracks of a list item by selecting the item from the list and pressing and...

Page 14: ...ting and then press The list of ratings appears Press to select your desired star rating for the track indicated by 1 to 5 s and then press The track list appears Press to select a track and then press Playback starts from the selected track and continues through all tracks on the list Hints Rating includes automatically assigned ratings indicated by hollow stars and manually assigned ratings indi...

Page 15: ...e list of release years appears Press to select a year and then press The artist list appears Press to select an artist and then press The track list appears Press to select a track and then press Playback starts from the selected track and continues through all tracks on the list Hint You can play all tracks of a list item by selecting the item from the list and pressing and holding in steps to C...

Page 16: ...s and then press A selection list appears for the three most recent transfer sessions with CONNECT Player Press to select the time of a transfer session and then press The album list from the selected session appears Press to select an album and then press The track list appears Press to select a track and then press Playback starts from the selected track and continues through all tracks on the l...

Page 17: ...cter and then press A list of categories you can search by appears Song searches by the track title Artist searches by the artist name and Album searches by the album title Press to select a category and then press Searching appears When the search finishes the results are displayed When you select Artist or Album you can narrow the search results and select a specific track When Artist or Album i...

Page 18: ...t a playlist type appears For details of each of playlist type see page 19 Press to select a playlist and then press The track list appears Press to select a track and then press Playback of the selected track starts Hints You can also access playlists by selecting Playlists from the Music Library screen You can play all tracks of a list item by selecting the item from the list and pressing and ho...

Page 19: ... playlist refer to CONNECT Player Help Favorite 100 A playlist created automatically by CONNECT Player that includes the 100 tracks that the player has played the most displayed in descending order by how many times they have been played This playlist is updated each time you connect the player to CONNECT Player Trash Bin A playlist that includes tracks to be deleted from the player Tracks added t...

Page 20: ... to select a track and then press Playback starts from the selected track and continues through all tracks on the list Hints The track play counts used to select the top 100 are updated each time you connect the player to CONNECT Player If the total number of tracks stored on the player is less than 100 all tracks on the player are played If fewer than 100 tracks on the player have ever been playe...

Page 21: ... and then press A list of tracks played on the selected date appears Press to select a track and then press Playback starts from the selected track and continues through all tracks on the list Hints The history of when tracks were played for more than 15 seconds is updated and that record is applied to the play history only when you connect the player to CONNECT Player When a track is played for l...

Page 22: ...e play 100 favorite songs appears and playback starts If you select a shuffle type while a track is playing the track stops after the message appears and a randomly selected track starts playing Intelligent Shuffle play Hints Intelligent Shuffle play is automatically cancelled by any of the following operations Starting playback of a track by selecting it from the Music Library Using the Artist Li...

Page 23: ... selected track starts playing Intelligent Shuffle play Hint Intelligent Shuffle play is automatically cancelled by any of the following operations Starting playback of a track by selecting it from the Music Library Using the Artist Link feature Changing the play mode Notes The controls of the player cannot be operated while a year is being selected A shuffle play of all tracks begins if none of t...

Page 24: ... appears and a randomly selected track starts playing Intelligent Shuffle play Hint Intelligent Shuffle play is automatically cancelled by any of the following operations Starting playback of a track by selecting it from the Music Library Using the Artist Link feature Changing the play mode Notes To move back through as many as the last 20 tracks played during shuffle play press repeatedly Moving ...

Page 25: ...o select Play Mode and then press The list of play modes appears You can also display the list of play modes when playing a track by pressing OPTION and selecting Play Mode from the Option menu that appears Press to select a play mode see page 26 and then press If you selected Play Mode from the HOME menu the HOME menu reappears If you selected Play Mode by pressing OPTION while playing a track th...

Page 26: ...ist item such as an album or artist list are played in random order Shuffle Repeat After the currently playing track or the track selected from a track list finishes tracks on the currently playing list item such as an album or artist list are played repeatedly in random order Repeat 1 Song The currently playing track or the track selected from a track list is played repeatedly Notes When you star...

Page 27: ...ying track appears Hint If you display the Option menu from the Now Playing screen and select Detailed Information you can view detailed information about the track such as release year playing time audio format and bit rate If the track has a variable bite rate VBR is shown for the bit rate Note When playing tracks recorded using variable bite rate VBR recording the progress bar that shows the el...

Page 28: ...iety of player features 5 way button OPTION button Press OPTION The Option menu appears Press to select an option item and then press Depending upon the item selected either an option setting screen appears or the selected item is activated For details on each of the option item see the table on page 29 Continued Table of Contents Index Menu ...

Page 29: ...e 35 Add to Trash Bin See page 38 Rescue See page 39 Rescue All from Trash Bin See page 40 Play Mode See page 25 Rating See page 41 Detailed Information See page 27 Shut Down Turns off the player Now Playing Displays the Now Playing screen Play Starts playback Re order Songs See page 36 Change Icon See page 37 HOME menu Displays the HOME menu Notes The Option menu cannot be displayed on some of th...

Page 30: ...ress to select Now Playing and then press Detailed Information about the currently playing track appears Press OPTION The Option menu appears Press to select an option item and then press Go to Album displays a track list of the currently playing album Go to Artist displays a list of albums by the artist of the currently playing track Go to Genre displays a list of artists who belong to the same g...

Page 31: ...Now Playing screen of the track you want to add to the Bookmark List and then press and hold Added to Bookmark List 1 the number is that of the current default Bookmark List appears and the Bookmark List icon lights up Hints Initially the default Bookmark List is set to B mark List 1 You can also add a track to the default Bookmark List by pressing and holding while the track is selected in a trac...

Page 32: ...the Bookmark List you selected appears and the Bookmark List icon lights up Hints Repeat steps 1 to 4 to add more tracks to the Bookmark List You can also add a track to a bookmark list by pressing OPTION while selecting the track in a track list and then selecting Select Bookmark from the Option menu You can also add a track to the Trash Bin by pressing OPTION while selecting the track in a track...

Page 33: ...n press 3 Press to select Default Bookmark and then press A list of the Bookmark Lists appears 4 Press to select the Bookmark List you want to set as the default Bookmark List and then press The selected Bookmark List is set as the default for tracks added using the button Hint Initially the default Bookmark List is set to B mark List 1 Continued Table of Contents Index Menu ...
Page 34: ...Remove Bookmark and then press Removed from Bookmark List 1 the number is that of the Bookmark List you selected appears and the next track appears on the screen When you remove the last track from the Bookmark List the list of playlists appears Hint If you play a track from a Bookmark List and then press and hold the track is removed from the Bookmark list Notes When you remove a track that is co...

Page 35: ...move all tracks and then press The track list appears 4 Select any track from the list and press Playback of the selected Bookmark List starts 5 Press OPTION The Option menu appears 6 Press to select Clear Bookmark List and then press A confirmation dialog appears 7 Press to select Yes and then press All tracks are removed from the selected Bookmark List If you select No the Bookmark List remains ...

Page 36: ...Re order Songs and then press The screen to change the track order appears 6 Press to select a track to move and then press The arrow appears next to the title of the selected track and the screen to select a destination appears 7 Press to select a destination for the track and then press The track you selected in step 6 is moved to the location you selected in step 7 To move additional tracks rep...

Page 37: ...o select Playlists and then press The list of playlists appears 3 Press to select the Bookmark List whose icon you want to change and then press The track list appears 4 Press OPTION The Option menu appears 5 Press to select Change Icon and then press The screen to select an icon appears 6 Press to select the icon and then press The Bookmark List icon changes to the selected icon Hint You can also...

Page 38: ...d to the Trash Bin and Added to Trash Bin appears The track added to the Trash Bin are indicated by the Trash Bin icon Tracks added to the Trash Bin are deleted from the player the next time you connect the player to CONNECT Player Hint You can also add a track to the Trash Bin by selecting it from a track list pressing OPTION to display the Option menu and selecting Add to Trash Bin from the Opti...

Page 39: ...nu appears 2 Press to select Playlists and then press The list of playlists appears 3 Press to select Trash Bin and then press The track list appears 4 Press to select a track to restore and then press Playback of the selected track starts 5 Press OPTION The Option menu appears 6 Press to select Rescue and then press Rescued from Trash Bin appears and the next track on the list begins playing Cont...

Page 40: ...aylists and then press The list of playlists appears 3 Press to select Trash Bin and then press The track list appears 4 Press Playback starts 5 Press OPTION The Option menu appears 6 Press to select Rescue All from Trash Bin and then press A confirmation dialog appears 7 Press to select Yes and then press All songs rescued appears and the list of playlists reappears If you select No no tracks are...

Page 41: ...reen reappears Note When you apply ratings to tracks the ratings are not available for searching until the next time you connect the player to CONNECT Player To rate a track automatically based on its rating in CONNECT Player 1 Press OPTION while playing the track you want to rate An Option menu appears 2 Press to select Rating and then press The setup screen appears 3 Press to select Auto and the...

Page 42: ...ationships to the genre so more artists can be found Press to select a track and then press Playback of the selected track starts and continues through the succeeding tracks Hints If you select any artist in the artist list and press and hold all tracks of the selected artist are played The previous screen reappears when you press BACK If you press LINK while an artist name or track title is selec...

Page 43: ...ing for Artists Belonging to a Particular Genre page 42 and then press The search begins When the search is finished a list of related artists appears If you select All Related Songs preview selections of all tracks of all artists on the artist list are played If you select Decrease search range the artist list reappears If the player cannot find any artists or tracks related to the original track...

Page 44: ... to match the genre of music you want to listen to Press and hold BACK The HOME menu appears Press to select Settings and then press The list of setup options appears Press to select Sound and then press The list of sound quality settings appears Press to select your desired setting and then press The selected sound setting is applied and the Settings screen reappears For details of each sound set...

Page 45: ...al sounds emphasizing high and low range audio more than middle range Custom 1 User customizable sound settings for which you can adjust each frequency range individually See page 46 for details Custom 2 Notes If your chosen sound setting causes the sound to be distorted when you turn up the volume try turning the volume down If your personal settings saved as Custom 1 and Custom 2 seem to produce...

Page 46: ...ress to select Settings and then press The list of setup options appears Press to select Sound and then press The list of sound quality settings appears Press to select Custom 1 or Custom 2 and then press The setting screen appears Press to select a frequency range and press to select sound level for the frequency range Each of the six frequency ranges can be set to any of seven sound levels Press...

Page 47: ... to select Settings and then press The list of setup options appears Press to select AVLS Vol Limit and then press Press to select On and then press AVLS is now on limiting the headphones volume AVLS is an abbreviation of the Automatic Volume Limiter System To cancel AVLS Vol Limit 1 Select Off in step The headphone volume level is no longer limited returning control to the player s volume setting...

Page 48: ...d BACK The HOME menu appears Press to select Settings and then press The list of setup option appears Press to select Beep and then press Press to select Off and then press The beep is turned off To beep the sound 1 Select On in step The beep sounds when you operate the player Table of Contents Index Menu ...

Page 49: ...s to select Settings and then press The list of setup options appears Press to select Audio Output and then press Press to select Line Out and then press Sound is output from the device connected to the player Notes Before beginning playback turn down the volume of the connected device Failure to turn down the connected device may cause the sound volume from the device s speakers to be too loud di...

Page 50: ...o 1 Screen stays on for 30 seconds after the last user operation Screen stays on while you scroll through a list An animation replaces the screen display when a normal screen display turns off while playing a track Default setting Auto 2 Screen stays on for 30 seconds after the last user operation Screen stays on while you scroll through a list An animation replaces the screen display when a norma...

Page 51: ...ghtness settings Press and hold BACK The HOME menu appears Press to select Settings and then press The list of setup items appears Press to select Brightness and then press The brightness adjustment screen appears Press to select a level and then press Table of Contents Index Menu ...
Page 52: ... Unit Information and then press The list of available player information options appears You can view the player information by scrolling through the list with Available player information Option Description Model Displays the model name of the player Default setting Serial number Displays the player s serial number which is needed to register your player Version Displays version information for ...

Page 53: ...ng see the table below Display language settings Setting Description Messages and menus are displayed in Japanese English Messages and menus are displayed in English Default setting Français Messages and menus are displayed in French Deutsch Messages and menus are displayed in German Italiano Messages and menus are displayed in Italian Español Messages and menus are displayed in Spanish Messages a...

Page 54: ...ss The list of setup options appears Press to select Reset all Settings and then press The setting screen appears Press to select Yes and then press Restored factory settings appears and the list of setup options reappears To cancel restoration of factory settings 1 Select No in step and then press The player s settings are left unchanged and the list of setup options reappears Note Factory settin...

Page 55: ... Yes and then press A confirmation dialog appears Press to select Yes and then press Initialize Disk appears When initialization finishes Hard disk initialization complete appears and the setting screen reappears To cancel hard disk initialization 1 Select No in step or and then press The contents of the hard disk remain unchanged and the setting screen reappears Notes Do not initialize the hard d...

Page 56: ... charges to about 80 in approximately 1 hour a full charge requires approximately 2 hours NW A3000 series The battery charges to about 80 in approximately 2 hour a full charge requires approximately 3 hours These charging times are estimates based on an empty battery charging at typical room temperature The actual charging time will differ depending upon the initial amount of charge in the battery...

Page 57: ...esults charge the battery in an environment of between 5 to 35ºC 41 to 95ºF The battery indicator on the display is only an estimate For example one section of black in the indicator will not always indicate exactly one fourth of the battery s charge The accuracy of the battery indicator on the display may vary depending on the operating conditions and environment of the player If you connect the ...

Page 58: ...ns page 50 Adjust the brightness of the screen Setting Brightness to the lower setting reduces battery use while the display is on page 51 Setting the sound quality off A Sound setting of None offers longer battery life than the other sound quality options page 45 Do not let your computer sleep when the player is connected If the computer enters a power saving mode such as the system suspend sleep...

Page 59: ...sfies the demand for both high sound quality and high compression rates ATRAC3 can compress audio files to about 1 10 of the size of standard CD audio tracks ATRAC3plus a more advanced version of ATRAC3 can compress audio files to about 1 20 of the size of standard CD audio tracks What is bit rate Bit rate refers to the amount of data used to store each second of audio Generally higher bit rates p...

Page 60: ...e with no pauses between songs can be played continuously without pauses after the tracks are imported to CONNECT player in ATRAC format and then transferred to the player Notes For tracks to be played without pauses you must import all the tracks into CONNECT Player as a single album in the same ATRAC format Although the tracks are played without pauses by the player when ATRAC format tracks are ...

Page 61: ... about importing tracks into CONNECT Player refer to CONNECT Player Help Note Tracks in SonicStage that have an omg file extension OpenMG format files cannot be imported into CONNECT Player To import these tracks into CONNECT Player convert them to the oma extension format using the SonicStage file conversion tool For details refer to CONNECT Player Help Table of Contents Index Menu ...
Page 62: ...arge When tracks are transferred to the player this track information is transferred along with the tracks Having this information attached to your tracks makes possible various advanced searching features of the player Note Track information of some CDs may not be able to retrieved from the Internet For tracks that are not in the Internet database you can manually enter and edit track information...

Page 63: ... not disconnect the USB cable while transferring data between a computer and the player because the data being transferred could be damaged Do not initialize the player s hard disk from the computer If the player s hard disk must be initialized follow the initialization procedure on page 55 The size shown in Windows Explorer for the player s hard disk is smaller than the actual size of the disk be...

Page 64: ...date tool to your computer from the Web site Connect the player to your computer and then start up the Digital Player Software Update tool Follow the on screen instructions to transfer the firmware update to the player When the update finishes by following the on screen instructions The software update was prepared Execute Safely remove USB device and disconnect the USB cable with the device The so...

Page 65: ...minals of the USB adaptor are dirty Wipe them with a soft dry cloth The player is not connected to the USB cable Insert the USB cable straight into the port until it is firmly seated Make sure that the lamp of the USB cable lights up The player turned off automatically The player turns off if left in pause mode for a few minutes Press any button other than the HOLD button to turn the player on Bat...

Page 66: ...e page 49 When using the player with a stereo system connected the sound is distorted or noisy Audio Output is set to Headphone Set it to Line Out page 49 Operation Playback Symptom Cause or corrective action Buttons do not work The buttons are locked Press and hold the HOLD button for a few seconds to unlock it page 7 Press any button other than the HOLD button The HOLD message appears when you p...

Page 67: ...track that is incompatible with the player playback stops page 90 Press to select another track The player has been subjected to vibration for a long period of time Remove the player from the source of the vibration and start playback again is displayed as part of a title The title contains characters that the player cannot display Use the CONNECT Player software to rename the title with appropria...

Page 68: ... hard disk of your computer You need 200 MB or more of free space Delete any unnecessary files on your computer If you are not logged on as an Administrator the installation of CONNECT Player might fail Make sure that you are logged on using an account with Administrator privileges The progress bar on the display of your computer is not moving The access lamp of your computer has not lit for a few...

Page 69: ...56 The installation of the CONNECT Player software was not successful Disconnect the player from your computer and reinstall the software using the supplied CD ROM Quick Start Guide Audio tracks registered with the earlier installation will be available with the new CONNECT Player installation The player is not recognized by the computer when it is connected to the computer The USB cable is not co...

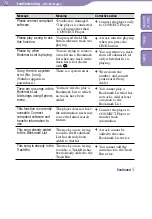
Page 70: ...yer s hard disk Transfer any unnecessary tracks back to your computer to increase the free space page 38 Data other than audio data is stored in the player s hard disk Move non audio data to the computer to increase the free space Audio data cannot be transferred back to your computer from the player The computer you are trying to transfer tracks to is not the same computer from which the tracks w...

Page 71: ...nd vibration from these operations may be perceptible This behavior is normal and not cause for concern The screen turns on whenever tracks change Display is set to Auto 2 Set it to Auto 1 or 15 sec page 50 The player does not lie in a stable position The player does not lie in a stable position on a flat surface such as a table Carry the player in your hand or hold the player in your hand while y...

Page 72: ... a Bookmark List when any track in the track list is shown with Start playback of the track from a genre or album list and then add it to the Bookmark List Cannot add when playing from Trash Bin You are trying to add tracks to the Trash Bin when any track in the track list is shown with You can add a track to the Trash Bin only when in the stop mode Cannot change sound settings when audio output i...

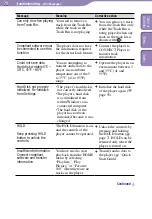
Page 73: ...track is not permitted to be played back on the player The tracks with a limited playing count are playing You cannot play back tracks that are not permitted to be played back on the player Cannot play License expired Connect compliant software and update information The playback license that limits when the track can be played has expired Tracks with a limited playing time can only be played back...

Page 74: ... in an environment between 5 and 35 C 41 and 95ºF Hard Disk not properly initialized Re Initialize from Settings The player s hard disk is not correctly initialized The player s hard disk was initialized from within Windows on a connected computer The hard disk of the player has not been initialized because it was changed Initialize the hard disk of the player again page 55 HOLD Keep pressing HOLD...

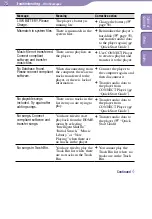
Page 75: ...er or there is lack of information Connect the player to the computer again and then disconnect it Transfer audio data to the player from CONNECT Player Quick Start Guide No playable songs included Try again after adding songs There are no tracks in the list item you are trying to play Transfer audio data to the player from CONNECT Player Quick Start Guide No songs Connect compliant software and t...

Page 76: ...t your nearest Sony dealer There are no songs in this Bookmark List Add songs using Options menu You have tried to play a Bookmark List to which no tracks have been added You cannot play a Bookmark List that has no tracks Add at least one track to the Bookmark List This function is currently unusable Connect compliant software and transfer information to use The player does not have the informatio...

Page 77: ...n hours remaining on license Please connect to compliant PC software to update is the number of hours remaining The license limiting when the track can be played will expire in hours Connect the player to CONNECT Player to update the license Table of Contents Index Menu ...
Page 78: ... list and then click Change and Remove 2 Follow the displayed instruction and restart your computer The uninstallation is completed when the computer has restarted 1 Settings Control Panel in the case of Windows 2000 2 Change Remove in the case of Windows 2000 Note When you install CONNECT Player OpenMG Secure Module is installed at the same time Do not delete OpenMG Secure Module since it may be ...

Page 79: ...rsuant to Part 15 of the FCC Rules These limits are designed to provide reasonable protection against harmful interference in a residential installation This equipment generates uses and can radiate radio frequency energy and if not installed and used in accordance with the instructions may cause harmful interference to radio communications However there is no guarantee that interference will not ...

Page 80: ...laration of Conformity Trade Name SONY Model No NW A1000 A3000 Responsible Party Sony Electronics Inc Address 16450 W Bernardo Dr San Diego CA 92127 USA Telephone Number 858 942 2230 This device complies with Part 15 of the FCC Rules Operation is subject to the following two conditions 1 This device may not cause harmful interference and 2 this device must accept any interference received includin...

Page 81: ...ms This symbol on the product or on its packaging indicates that this product shall not be treated as household waste Instead it shall be handed over to the applicable collection point for the recycling of electrical and electronic equipment By ensuring this product is disposed of correctly you will help prevent potential negative consequences for the environment and human health which could other...

Page 82: ...NW A1000 series see page 83 For disposal information for the NW A3000 series see page 84 Some countries may regulate disposal of the battery used to power this product Please consult with your local authority Notes Never disassemble the player except when disposing of it Be careful when handling internal metallic components of the player Pay particular attention to component edges Continued Table ...

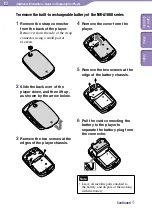
Page 83: ...e the back over of the player down and then lift up as shown by the arrow below 3 Remove the two screws at the edges of the player chassis 4 Remove the cover from the player 5 Remove the two screws at the edge of the battery chassis 6 Pull the cord connecting the battery to the player to separate the battery plug from the connector Note Leave all metallic parts attached to the battery and dispose ...

Page 84: ...2 Remove the two screws behind the cover 3 Slide the back over of the player down and then lift up as shown by the arrow below 4 Remove the four screws at the edges of the player s chassis 5 Remove the battery from the player 6 Pull the cord connecting the battery to the player to separate the battery plug from the connector Note Leave all metallic parts attached to the battery and dispose of them...

Page 85: ...in the player while charging if it is used for an extended period of time On the headphones Road safety Do not use headphones while driving cycling or operating any motorized vehicle It may create a traffic hazard and is illegal in many areas It can also be potentially dangerous to play at a high volume while walking especially at pedestrian crossings You should exercise extreme caution or discont...

Page 86: ...er or a mild detergent solution Do not use any type of abrasive pad scouring powder or solvent such as alcohol or benzene as it may mar the finish of the case Be careful not to let water get into the player from the opening near the connector Clean the headphones plug periodically If you have any questions or problems concerning the player consult your nearest Sony dealer NOTES The recorded music ...

Page 87: ... designated Please note that due to continued efforts to improve quality the software specifications may be changed without notice Operation of this player with software other than that provided is not covered by the warranty The ability to display the languages on your CONNECT Player will depend on the installed OS on your PC For better results please ensure that the installed OS is compatible wi...

Page 88: ...g on the types of the text and characters the text shown on the player may not be displayed properly on device This is due to The capacity of the connected player The player is not functioning normally The ID3 TAG information for the track is written in the language or the character that is not supported by the player About the customer support Web site If you have any questions about or issue wit...

Page 89: ...ks of International Business Machines Corporation Pentium is a trademark or a registered trademark of Intel Corporation CD and music related data from Gracenote Inc copyright 2000 2004 Gracenote Gracenote CDDB Client Software copyright 2000 2004 Gracenote This product and service may practice one or more of the following U S Patents 5 987 525 6 061 680 6 154 773 6 161 132 6 230 192 6 230 207 6 240...

Page 90: ... 4 900 326 hours 40 minutes 160 kbps 1 200 80 hours 4 000 266 hours 40 minutes 192 kbps 1 000 66 hours 40 minutes 3 300 220 hours 256 kbps 750 50 hours 2 500 166 hours 40 minutes 320 kbps 600 40 hours 2 000 133 hours 20 minutes When transferring four minute tracks Supported bit rates MP3 32 to 320 kbps supports variable bite rate VBR WMA 48 to 192 kbps supports variable bite rate VBR ATRAC 48 64 6...

Page 91: ...T Player Minimum System Requirements Computer IBM PC AT or compatible computer preinstalled with Windows CONNECT Player is compatible with the following Windows operating systems Windows 2000 Professional Service Pack 4 or later Windows XP Home Edition Windows XP Professional Windows XP Media Center Edition Windows XP Media Center Edition 2004 Windows XP Media Center Edition 2005 CPU Pentium III 4...

Page 92: ...listed above Please ask the dealer for detailed information about the accessories available in your country or region Notes Some features of the remote control RM MC35ELK may not be compatible with your player model For detail on other optional accessories visit one of the following Web sites For customers in the USA http www sony com walkmansupport For customers in Canada http www sony ca Electro...

Page 93: ... 48 Bit rate 59 Bookmark List 31 Add 31 Change icon 37 Rearrange 36 Remove 34 Remove all 35 Brightness setting 51 C Charge the battery 56 CONNECT Player 3 68 Custom 45 46 D Delete tracks 38 F Favorite 100 19 20 Firmware 64 Format 59 H Heavy 45 HOLD button 7 67 HOME Menu 5 I Initialize Disk 55 Initial Search 17 Intelligent Shuffle 22 J Jazz 45 L Language 53 LINK button 7 42 M Multiple connector 7 5...

Page 94: ...7 By Rating 14 By release year 15 By track name 10 From albums recently transferred 16 From playlists 18 Serial number 52 Settings 44 AVLS Vol Limit 47 Beep 48 Brightness 51 Display 50 Language 53 Sound Quality 44 Shuffle All 24 Shuffle play 22 My Favorite Shuffle 22 Shuffle All 24 Time Machine Shuffle 23 Sound quality 44 T Time Machine Shuffle 23 Total number of tracks 52 Track Information 62 Tra...

Reviews: