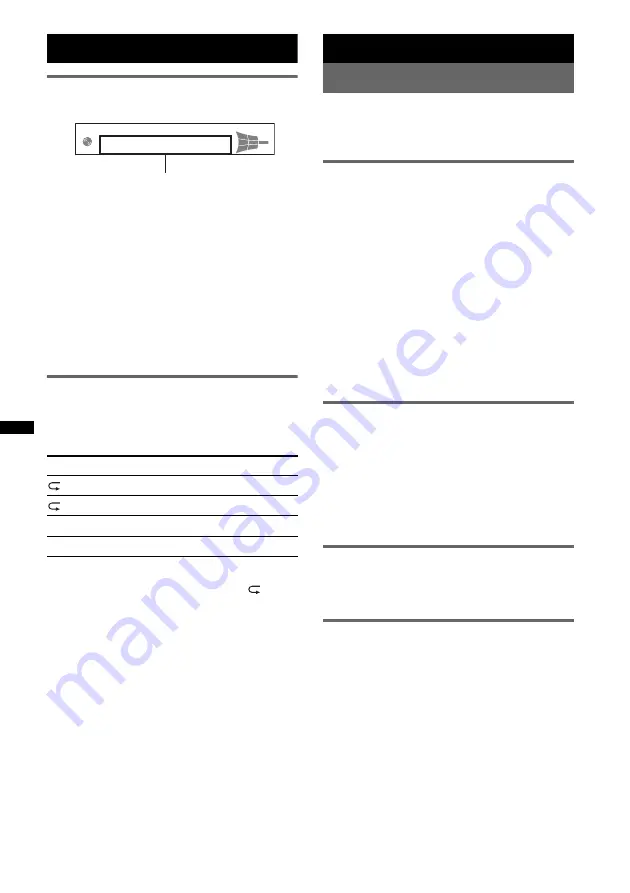
background image

8

CD

Display items

*1

Album number is displayed only when the album is 
changed.

*2

When playing an MP3, ID3 tag is displayed, and 
when playing a WMA, WMA tag is displayed.

To change display items, press 

(DSPL)

.

Tip

Displayed items may differ depending on model, disc 
type, recording format and settings. For details on 
MP3/WMA, see page 12
.

Repeat and shuffle play

1

During playback, press 

(3)

 (REP) or 

(4)

 (SHUF) repeatedly until the 

desired setting appears.

*

When an MP3/WMA is played.

To return to normal play mode, select “

 OFF” 

or “SHUF OFF.”

Radio

Storing and receiving stations

Caution

When tuning in stations while driving, use Best 
Tuning Memory (BTM) to prevent an accident.

Storing automatically — BTM

1

Press 

(SOURCE)

 repeatedly until 

“TUNER” appears.

To change the band, press 

(MODE)


repeatedly. You can select from FM1, FM2, 
FM3, MW, SW1 or SW2.

2

Press and hold the select button.

The setup display appears.

3

Press the select button repeatedly 
until “BTM” appears.

4

Push 

(SEEK)

 +/– control up.

The unit stores stations in order of frequency 
on the number buttons.
A beep sounds when the setting is stored.

Storing manually

1

While receiving the station that you 
want to store, press and hold a 
number button (

(1)

 to 

(6)

) until 

“MEMORY” appears.

Note

If you try to store another station on the same number 
button, the previously stored station will be replaced.

Receiving the stored stations

1

Select the band, then press a number 
button (

(1)

 to 

(6)

).

Tuning automatically

1

Select the band, then push 

(SEEK)

 +/– 

control up or down to search for the 
station.

Scanning stops when the unit receives a 
station. Repeat this procedure until the 
desired station is received.

Tip

If you know the frequency of the station you want to 
listen to, push and hold 

(SEEK)

 +/

 control to locate 

the approximate frequency, then push 

(SEEK)

 +/


control up or down repeatedly to fine adjust to the 
desired frequency (manual tuning).

Select

To play

 TRACK

track repeatedly.

 ALBUM

*

album repeatedly.

SHUF ALBUM

*

album in random order.

SHUF DISC

disc in random order.

Track number/Elapsed playing time, 

Disc/artist name, Album number*

1

Album name, Track name, Text 

information*

2

, Clock

Summary of Contents for CDX-GT380

Page 1: ...GB Operating Instructions To cancel the demonstration DEMO display see page 9 4 111 888 12 1 CDX GT385 CDX GT383 2008 Sony Corporation CDX GT380 FM MW SW Compact Disc Player ...

Page 2: ... drain If you do not set the Auto Off function press and hold OFF until the display disappears each time you turn the ignition off For installation and connections see the supplied installation connections manual This label is located on the bottom of the chassis Microsoft Windows Media and the Windows logo are trademarks or registered trademarks of Microsoft Corporation in the United States and o...

Page 3: ...utomatically BTM 8 Storing manually 8 Receiving the stored stations 8 Tuning automatically 8 Other functions Changing the sound settings 9 Adjusting the sound characteristics BAL FAD SUB 9 Customizing the equalizer curve EQ3 9 Adjusting setup items SET 9 Using optional equipment 10 Auxiliary audio equipment 10 Additional Information Precautions 11 Notes on discs 11 Playback order of MP3 WMA files ...

Page 4: ...ted Preparing the card remote commander Before using the card remote commander for the first time remove the insulation film Tip For how to replace the battery see Replacing the lithium battery of the card remote commander on page 12 Setting the clock The clock uses a 12 hour digital indication 1 Press and hold the select button The setup display appears 2 Press the select button repeatedly until ...

Page 5: ...Press OFF The unit is turned off 2 Press then pull it off towards you Notes Do not drop or put excessive pressure on the front panel and display window Do not subject the front panel to heat high temperature or moisture Avoid leaving it in a parked car or on a dashboard rear tray Attaching the front panel Engage part A of the front panel with part B of the unit as illustrated and push the left sid...

Page 6: ... select setup items press and rotate D Disc slot Insert the disc label side up playback starts E Display window F Z eject button To eject the disc G SEEK control CD To skip tracks push up down skip tracks continuously push up down then push up down again within about 1 second and hold reverse fast forward a track push up down and hold Radio To tune in stations automatically push up down find a sta...

Page 7: ...mote commander have also different buttons functions from the unit Remove the insulation film before use page 4 qg buttons To control CD radio the same as SEEK control on the unit Setup sound setting etc can be operated by qh DSPL display button To change display items qj VOL volume button To adjust volume qk ATT attenuate button To attenuate the sound To cancel press again ql SEL select button Th...

Page 8: ...sh SEEK control up The unit stores stations in order of frequency on the number buttons A beep sounds when the setting is stored Storing manually 1 While receiving the station that you want to store press and hold a number button 1 to 6 until MEMORY appears Note If you try to store another station on the same number button the previously stored station will be replaced Receiving the stored station...

Page 9: ...tion mode Tip Other equalizer types are also adjustable Adjusting setup items SET 1 Press and hold the select button The setup display appears 2 Press the select button repeatedly until the desired item appears 3 Rotate the volume control dial to select the setting example ON or OFF 4 Press and hold the select button The setup is complete and the display returns to normal play reception mode Note ...

Page 10: ...otate the volume control dial to adjust the input level 8 dB to 18 dB M DSPL Motion Display M DSPL ON z to show moving patterns M DSPL OFF to deactivate the Motion Display A SCRL Auto Scroll To scroll long displayed item automatically when the disc album track is changed A SCRL ON z to scroll A SCRL OFF to not scroll LOCAL Local Seek Mode LOCAL ON to only tune into stations with stronger signals L...

Page 11: ...nter out Do not use solvents such as benzine thinner commercially available cleaners or antistatic spray intended for analog discs Notes on CD R CD RW discs Some CD Rs CD RWs depending on the equipment used for its recording or the condition of the disc may not play on this unit You cannot play a CD R a CD RW that is not finalized The unit is compatible with the ISO 9660 level 1 level 2 format Jol...

Page 12: ... have any questions or problems concerning your unit that are not covered in this manual consult your nearest Sony dealer Maintenance Replacing the lithium battery of the card remote commander Under normal conditions the battery will last approximately 1 year The service life may be shorter depending on the conditions of use When the battery becomes weak the range of the card remote commander beco...

Page 13: ... off the ignition before cleaning the connectors and remove the key from the ignition switch Never touch the connectors directly with your fingers or with any metal device Removing the unit 1 Remove the protection collar 1Detach the front panel page 5 2Pinch both edges of the protection collar then pull it out 2 Remove the unit 1Insert both release keys simultaneously until they click 2Pull the re...

Page 14: ...eral Outputs Audio outputs terminal front sub rear switchable Power antenna aerial relay control terminal Power amplifier control terminal Inputs Antenna aerial input terminal AUX input jack stereo mini jack Tone controls Low 10 dB at 60 Hz XPLOD Mid 10 dB at 1 kHz XPLOD High 10 dB at 10 kHz XPLOD Power requirements 12 V DC car battery negative ground earth Dimensions Approx 178 50 179 mm 7 1 8 2 ...

Page 15: ...s not appear in the display window The dimmer is set DIM ON page 9 The display disappears if you press and hold OFF tPress and hold OFF on the unit until the display appears The connectors are dirty page 13 The Auto Off function does not operate The unit is turned on The Auto Off function activates after turning off the unit tTurn off the unit The display disappears while the unit is operating The...

Page 16: ...gnal is too weak tSet MONO ON page 10 An FM program broadcast in stereo is heard in monaural The unit is in monaural reception mode tSet MONO OFF page 10 ERROR The disc is dirty or inserted upside down tClean or insert the disc correctly A blank disc has been inserted The disc cannot play due to a problem tInsert another disc FAILURE The connection of speakers amplifiers is incorrect tSee the inst...

Page 17: ... U X nO p œ T ÆbOM œ Ë O uD U bOM eOL p œ ÆX Áb œ Ë v U p œ p Æœu g Ä b u vL vKJA qO œ t p œ T ÆbOM œ Ë Èd œ p œ FAILURE ÆX X œU U ÁbMM X uI ØU uÖ bMK UB T UB vMO U È d b s UB VB ÈULM ÆbO UL tE ö LOAD ÆbM v È cÖ U p œ œ œ ÁbMM ÁU œ T Æœu q U È cÖ U U bOM d L SEEK ÆX s Ë U œu v U Ãu sO œ vK Èu X U NO INFO ÈU q U œ s U ö MP3 WMA Æœu vL t u NO MUSIC Æb U vL vIO u q U ÈËU p œ T p CD ÆÁU œ s œ vIO u NO...

Page 18: ...ﻫﺮ ÈË d ÁbMM U DIM ON Æ π t H X Áb rOEM UL dÖ OFF g UL t H b œ ÁU Ë Áœ œ UA Æœu v u T OFF U b œ ÁU Ë Áœ œ UA ÁU œ ÈË d Æœu d U g UL t H Æ t H bM nO U ÁbM œ UB ﻛﻨﺪ ﻧﻤﻰ ﻛﺎر ﺧﻮدﻛﺎر ﺧﺎﻣﻮﺷﻰ ﻋﻤﻠﻜﺮد tJM bF U œu v u U œdJKL ÆX s Ë ÁU œ Æœu v UF b u U ÁU œ T ÆbOM u U ÁU œ ﺷﻮد ﻣﻰ ﻣﺤﻮ ﻧﻤﺎﻳﺶ ﺻﻔﺤﻪ اﺳﺖ ﻛﺎر ﺣﺎل در دﺳﺘﮕﺎه ﺣﺎﻟﻴﻜﻪ در Æ π t H X Áb rOEM s Ë ÈË d q U lD œdJKL ﻧﻴﺴﺖ ﻣﻤﻜﻦ ﻛﺎرت دور راه از ﻛﻨﺘﺮل دﺳﺘﮕﺎه ﻋﻤﻠ...

Page 19: ... d b r œ Ë µ ﻋﻤﻮﻣﻰ ﻣﻮارد v Ëd v AÄØv d Ø ÈuK i uF q U b ÈU v Ëd UMO d v d s X uI d M UMO d ËdO ÁbMM X uI d M UMO d U ÈœË Ë s ÈœË Ë UMO d ÈœË Ë gO AUX u d pÇu gO Êu ÈU d M sO UÄ e d œ q v œ XPLOD j u e d uKO œ q v œ XPLOD ôU e d uKO œ q v œ XPLOD UO œ u d X Ë rOI d qO u Èd U sO sO vHM œUF oL ØŸUH Ø d d LOKO π µ U dI VB œUF oL ØŸUH Ø d d LOKO µ U dI Âd ÂdÖuKO U dI Áb tLOL v U  u U Ëœ Á d M ÁU œ RM ...

Page 20: ... X sJL ﺟﻠﻮﻳﻰ ﭘﺎﻧﻞ ﭘﺸﺖ اﺻﻠﻰ دﺳﺘﮕﺎه ﻧﻜﺎت d U ÁbM œ UB Êœd eOL gOÄ vML uEM t ÆbOM à U d êOzu bOK Ë bOM u U t uÖ d U U œu ÊU A U ULOI U ÁbM œ UB eÖd ÆbOMJ fL ÈeK ÁU œ دﺳﺘﮕﺎه ﻛﺮدن ﺧﺎرج 1 ﻛﻨﻴﺪ ﺧﺎرج را ﻣﺤﺎﻓﻆ ﺑﺪﻧﻪ 1 Æ µ t H bOM à U v uK q UÄ 2 Ê fá Ë b dO k U t b t Ëœ d ÆbOAJ ÊËdO x 2 ﻛﻨﻴﺪ ﺧﺎرج را دﺳﺘﮕﺎه 1 œ Ë ÊU eL uD È U œ ÈU bOK Ëœ d ÆbM œ pO È b U Ê U bOM 2 ÆbOM b ÁU œ U bOAJ È U œ ÈU bOK 3 ÆbO eGK ÊË...

Page 21: ... œu d HM Á U Ëœ vM e U œu Ë vK œ œdJKL u p X U v U sOMÇ œ Æb U t œ v u ÁbM Ëd s d J œe Sony œu ÆbO UL uA آﻣﭙﺮ ۱۰ ﻓﻴﻮز ﻫﺎى ﻓﺎﻳﻞ ﭘﺨﺶ ﺗﺮﺗﻴﺐ MP3 WMA ﻫﺎى ﻓﺎﻳﻞ ﻣﻮرد در MP3 MP3 dB t MPEG 1 Audio Layer 3 b U v Ê ÆX vIO u q U È U ÁœdA X d œ b U p ÈU Áœ œ CD Ê vK Á b Ø U dI U v u ÆbM v ÁœdA ÈU t 1 0 1 1 2 2 2 3 Ë 2 4 u ID3 t UNM MP3 u Æb œ œd U ID3 d U µ 1 0 Ë 1 1 d U Ø U 2 2 2 3 Ë 2 4 ÆX q U p È c U ÂU M M...

Page 22: ...M eOL tÇ UÄ p Ê e d p œ d ÆbOM eOL v U ö ÆbOM eOL ÊËdO t Ë ÈU ÁbMM eOL dMO s eM dOE s U dO Èdá U U œ œu u ÈU p œ È d ÁœUH œ u ÆbOMJ ÁœUH u U ﻫﺎى دﻳﺴﻚ ﻣﻮرد در ﻧﻜﺎت CD R CD RW ÈU p œ vCF CD R CD RW eON t t X sJL p œ j d U Ê j È d ÁœUH œ u Æb uA g Ä ÁU œ s ÈË d p bO u vL UL CD R p CD RW e ôUM U t ÆbOM g Ä X ÁbA D Ø D X d U ÁU œ ISO 9660 Joliet Romeo È t K bMÇ Ë t U d Ö X d œ Multi Session ÆX UÖ U œ b...

Page 23: ...FF z Ë r È b ÊœdJ X uI È d Æd BTM t H ÆX u U ÁU œ t v U M U b u vL ÁU œ X UF q U lD œdJKL t v U M Æœu t dÖ UJ U Ëœ Á d M ÁU œ t v U M FM Æœu v X U œ ÈË d b v Ëd t v U M SUB ÆX Áb rOEM اﺧﺘﻴﺎرى ﺗﺠﻬﻴﺰات از اﺳﺘﻔﺎده اﺿﺎﻓﻰ ﺻﻮﺗﻰ ﺗﺠﻬﻴﺰات t È UO qL q U v u ÁU œ p Êœd q Ë U ÈœË Ë gO AUX ÈË d u d pÇu gO bO u v UL l M U UNM fá Ë ÁU œ b Ê eO ÆbO œ uÖ œu qO u ÈU uÖbMK o d qL q U v u ÁU œ Ë ÁU œ ÊUO ËUH d È d bO...

Page 24: ...U t bF ÆœœdÖ v U ÈœU X U œØg Ä X U t اﺷﺎره ÆbM rOEM q U eO e ôu Ÿ u d U ﺑﺮوﻳﺪ ﺑﻌﺪ ﺻﻔﺤﻪ ﺑﻪ T ﺗﻨﻈﻴﻢ ﻫﺎى آﻳﺘﻢ ﻛﺮدن ﺗﻨﻈﻴﻢ SET 1 دارﻳﺪ ﻧﮕﺎه و داده ﻓﺸﺎر را اﻧﺘﺨﺎب دﻛﻤﻪ Æœu v d U rOEM g UL t H 2 ﻣﻮرد آﻳﺘﻢ ﺗﺎ دﻫﻴﺪ ﻓﺸﺎر ﻣﻜﺮر ﺑﻄﻮر را اﻧﺘﺨﺎب دﻛﻤﻪ ﺷﻮد ﻇﺎﻫﺮ دﻟﺨﻮاه 3 ﻣﺜﺎل ﺑﺮاى ﺗﻨﻈﻴﻢ ﺗﺎ ﺑﭽﺮﺧﺎﻧﻴﺪ را ﺻﺪا ﻛﻨﺘﺮل درﺟﻪ ON ﻳﺎ OFF ﻛﻨﻴﺪ اﻧﺘﺨﺎب را 4 دارﻳﺪ ﻧﮕﺎه و دﻫﻴﺪ ﻓﺸﺎر را اﻧﺘﺨﺎب دﻛﻤﻪ Øg Ä X U t g UL t H Ë œu v q U rOEM...

Page 25: ...ر را ﺧﻮدﻛﺎر ﻳﺎﺑﻰ ﻣﻮج 1 ﻛﻨﺘﺮل ﺳﭙﺲ ﻛﻨﻴﺪ اﻧﺘﺨﺎب را ﺑﺎﻧﺪ SEEK ﺑﻪ را ﻛﻨﻴﺪ ﺟﺴﺘﺠﻮ را اﻳﺴﺘﮕﺎه ﺗﺎ دﻫﻴﺪ ﻓﺸﺎر ﭘﺎﻳﻴﻦ ﻳﺎ ﺑﺎﻻ bM v X U œ ÁU p ÁU œ t v U M U bOM dJ b Ë s Æœu v n u u Æœu X U œ Á u œ œ u ÁU اﺷﺎره v bO œ uÖ bO u v t v U f U d UL dÖ d M bO œ SEEK f U d U b œ ÁU Ë ÁœdA d M fá bOM bOÄ v dI SEEK U ôU t dJ Ãu bOM rOEM v u œ f U d t UIO œ U bO œ UA sO UÄ Æ v œ v U CD ﻧﻤﺎﻳﺶ ﻫﺎى آﻳﺘﻢ Øp œ ÂU Áb Èdá g Ä ÊU...

Page 26: ...ﺖ qf ورودى ﻓﻴﺶ AUX t H ÆqL q U v u ÁU œ p Êœd q Ë È d eO U Ëœ Á d M ÁU œ ÈË d d ÈU tL œ Æb œ ÁU œ t X v ËUH ÈU œdJKL ØU tL œ Æ t H bOM à U o U g Ë ÁœUH gOÄ qg ﻫﺎى دﻛﻤﻪ Êœd d M È d CD d M bM U u œ SEEK ÆÁU œ ÈË d U Ê u v ÁdO Ë b rOEM rOEM ÆX dÖ UJ qh دﻛﻤﻪ DSPL ﻧﻤﺎﻳﺶ Æg UL ÈU r Êœ œ dOOG È d qj دﻛﻤﻪ VOL ﺻﺪا درﺟﻪ Æ b rOEM È d qk دﻛﻤﻪ ATT ﻛﺮدن ﻧﺎزك Á U Ëœ Êœd uG È d Æ b Êœd U È d ÆbO œ UA ql دﻛﻤﻪ SEL ...

Page 27: ... dâ Ë bO œ UA bOM U 4 دﻳﺴﻚ ﺷﻜﺎف t Ë V Çd È œ d p œ Êœd œ Ë È d Æœu v ŸËd g Ä ôU 5 ﻧﻤﺎﻳﺶ ﭘﻨﺠﺮه 6 دﻛﻤﻪ Z ﺧﺮوج Æp œ Êœd à U È d 7 ت ﻛﻨﺘﺮل SEEK CD ª bO œ UA sO UÄØôU t U d Êœd œ È d UA sO UÄØôU t t uOÄ uD U d Êœd œ sO UÄØôU t tO U b œ Á U Ëœ fá bO œ uK t l d ØÊb œdÖd ª b œ ÁU Ë bO œ UA Æ b œ ÁU Ë bO œ UA sO UÄØôU t u œ t U œu u t U ÁU sO œ v UO u È d t ÁU p Êœd bOÄ ª bO œ UA sO UÄØôU Æ b œ ÁU Ë bO œ U...

Page 28: ...t b b u 1 OFF دﻫﻴﺪ ﻓﺸﺎر را Æœu v u U ÁU œ 2 ﺑﻜﺸﻴﺪ ﺧﻮد ﻃﺮف ﺑﻪ را آن ﺳﭙﺲ دﻫﻴﺪ ﻓﺸﺎر را ﻧﻜﺎت d b gO UA U b b UO g UL Ád MÄ Ë v uK q UÄ ÆbOMJ œ Ë U Ê ÈË ÆbO b d X u U ôU ØÂdÖ ÈU œ dF œ v uK q UÄ p ÈË d U Áb UÄ qO u p œ Ê Êœd U ÆbOM È œœu v I vMO Øœ u œ ﺟﻠﻮﻳﻰ ﭘﺎﻧﻞ ﻛﺮدن وﺻﻞ XL A XL t v uK q UÄ B ÁU œ XL Ë bOM q Ë b œ v ÊUA d uB t uD UL Æb œ pO È b U bO œ UA XOF u q œ t éÇ B A ﻧﻜﺘﻪ ÆbO b d v uK q UÄ vK œ ...

Page 29: ...qL q U v u ÁU œ p ﻛﺎر ﺑﻪ ﺷﺮوع دور راه از ﻛﻨﺘﺮل دﺳﺘﮕﺎه ﻛﺮدن آﻣﺎده ﻛﺎرت È d U Ëœ Á d M ÁU œ ÈdOÖ UJ gOÄ Æb œd o U g Ë U sO Ë اﺷﺎره Èd U vM e U Áu v UÖ È d v uO O Èd U Êœd s e U U Ëœ Á d M ÁU œ ÆbO UL tE ö t H œ ﺳﺎﻋﺖ ﺗﻨﻈﻴﻢ ÆbM v ÁœUH t U U O œ d UA p X U 1 دارﻳﺪ ﻧﮕﺎه و داده ﻓﺸﺎر را اﻧﺘﺨﺎب دﻛﻤﻪ Æœu v d U rOEM g UL t H 2 ﺗﺎ دﻫﻴﺪ ﻓﺸﺎر ﻣﻜﺮر ﺑﻄﻮر را اﻧﺘﺨﺎب دﻛﻤﻪ CLOCK ADJ ﺷﻮد ﻇﺎﻫﺮ 3 ﻛﻨﺘﺮل SEEK دﻫﻴﺪ ﻓﺸﺎر ﺑﺎ...

Page 30: ...ÆÆÆÆÆ Áb ÁdO ÈU ÁU X U œ ÆÆÆÆÆÆÆÆÆÆÆÆÆÆÆÆÆ U œu v U Ãu ÆÆÆÆÆÆÆÆÆÆÆÆÆÆÆÆÆÆÆÆÆÆÆÆÆÆÆÆÆÆÆ ﻋﻤﻠﻜﺮدﻫﺎ ﺳﺎﻳﺮ b ULOEM Êœ œ dOOG ÆÆÆÆÆÆÆÆÆÆÆÆÆÆÆÆÆÆÆÆÆÆÆÆÆÆ π b ÈU vÖó Ë rOEM BAL FAD SUB ÆÆÆÆÆÆ π e ôu vM M È U v UH EQ3 ÆÆÆÆÆÆÆÆÆÆ π rOEM ÈU r Êœd rOEM SET ÆÆÆÆÆÆÆÆÆÆÆÆÆÆÆÆÆ π È UO eON ÁœUH ÆÆÆÆÆÆÆÆÆÆÆÆÆÆÆÆÆÆÆÆÆ v U v u eON ÆÆÆÆÆÆÆÆÆÆÆÆÆÆÆÆÆÆÆÆÆÆÆ اﺿﺎﻓﻰ اﻃﻼﻋﺎت U UD ÆÆÆÆÆÆÆÆÆÆÆÆÆÆÆÆÆÆÆÆÆÆÆÆÆÆÆÆÆÆÆÆÆÆÆÆÆÆÆÆ U p œ...

Page 31: ... U Microsoft Corporation ôU œ ÆbM U v U uA d U U ØË Áb داراى ﺷﻤﺎ اﺗﻮﻣﺒﻴﻞ اﺣﺘﺮاق ﻛﻪ ﺻﻮرﺗﻰ در ﻫﺸﺪار ﻣﻮﻗﻌﻴﺖ ACC ﺑﺎﺷﺪ ﻧﻤﻰ U œu v u U œdJKL t bOM q U ÊUMOL bF ÁU œ ÆbOM v rOEM π t H U œu Ë q U uD Áb sOOF ÊU œ v u U ÈdOÖuK Èd U Êb v U t œu v u U ÆbM v vL rOEM U œu v u U œdJKL UL dÖ bOM v u U d UL t U d bOM OFF t H t v Ë U b œ ÁU Ë Áœ œ UA Æœu u g UL ...

Page 32: ...PR vA UL t uL uG È d DEMO ÆbO UL tE ö π t H FM MW SW Compact Disc Player CDX GT380 CDX GT385 CDX GT383 v UOKL ÈU qLF u œ Sony Corporation Printed in China http www sony net ...

Reviews: