6.
19.
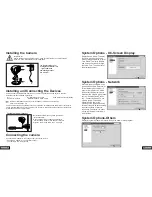
Installing the Camera
Fastening the wall bracket
Installing and Connecting the Devices
Select a suitable installation site from which you want to monitor the desired object. A suitable
installation site has the following features:
Dry
As Dust-Free as Possible Solid Surface wiithout Vibration
Good Air Circulation
Electrical Outlet in Close Vicinity
1. Rain protection cover
2. Integrated LEDs for low
light conditions
3. Mounting bracket
4. AC Power
Connecting the camera
1
2
3
4
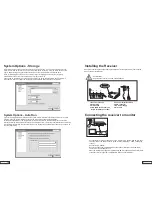
System Options - On-Screen Display
Display Device Name: To display
the name of the device on the
video or images captured. Display
Time Stamp: To display the date
and time on the video or images
captured. Font: To set the font of
the displayed content.
System Options - Network
Internet Connection Mode: It can
be set to either "Auto Detection" or
"Direct Network Connection". In
general, "Auto Detection" will do.
In case that the program cannot
detect out the network type, please
set it to "Direct Network Connec-
tion". Connection Speed: To set
network speed. This setting
determines the frame rate
provided to the remote monitoring
terminal. It should be set according
to actual condition of Internet
connection. Otherwise, the effect
of viewing remote monitoring will
be influenced.
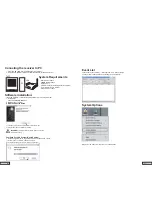
System Options-Others
Display program hot keys: Hot keys will be set to show or hide program.
ATTENTION!
Prior to drilling and inserting the screws, make sure that there are no electric cables,
pipes, etc. in the wall that may become damaged.
Select an installation site that is not surrounded by reinforced concrete walls,
mirrors, metal shelves, etc.
There should not be any appliances (such as microwaves, cordless phones and wireless routers) with
strong electrical fields close to the camera or the receiver. A strong electrical environment could cause
interference and reduce performance.
- Select the desired mounting place (near power
outlet if possible)
- Use supplied screws to attach wall bracket to
wall or suitable platform. Use dowels if relevant.
- Align the camera and screw the T - bolt tight.
Connect the AC adapter to the voltage supply jack of the camera.
- Insert the AC adapter into an electrical socket.
- The camera is now ready for use.

