– 14 –
WAX2
RM-ED005
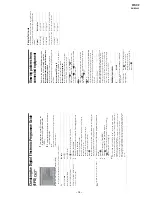
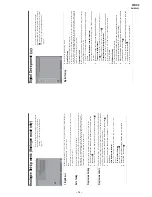
Analogue Set-up menu (Analogue mode only)
You can change/set the
an
alogue
settin
gs using the
Analogue Set-up menu.
To
select options
in
“Settings”, see “Navigating
through menus”
(p
age
19)
.
1 Digit Direct
When “1
Digit Direct” is set to “On”, you can select an
analogue
channel using one
preset
number b
utto
n (0
-
9) on
th
e
remote.
No
te
When “1 Digit Direct”
is set to
“O
n”, you ca
nnot
select
channe
l numbers
1
0
and abo
ve en
terin
g
tw
o digits using the remote.
Auto Tuning
Tunes in all
the availa
ble analogue
ch
annels.
Usually you d
o not
need to
do th
is operation because the
channels
are already tuned
when
the TV was
first
installed
(page
5,
6). However, this o
ptio
n allows
you to
repeat
the process
(e.g., to
retune
the TV after moving house,
or to search for new
channels th
at
have
been laun
ched by
broadcaster
s).
Programme Sorting
Chan
ges the
order in which
the anal
ogue channels
are stored
on the
TV.
1
Pr
e
ss
F
/
f
to select th
e ch
ann
el y
ou w
ant to
mo
v
e
to a ne
w po
si
ti
on,
the
n press
.
2
Pr
e
ss
F
/
f
to select th
e ne
w posi
ti
on f
o
r y
our chann
el, th
en press
.
Programme Labels
Assign
s
a
channel name of
your
ch
oice u
p to
five
letters
or
numbers.
The name will
be display
ed briefly on th
e screen when the ch
annel
is selected.
(Names
for channels
are usually taken automaticall
y fr
om
Text
(if
available).)
1
Pr
e
ss
F
/
f
to select th
e ch
ann
el y
ou w
ant to
n
a
me
, then pre
ss
.
2
Pr
e
ss
F
/
f
to
se
lect th
e desi
re
d letter or n
u
mber (“_” f
o
r a b
lank spa
ce),
the
n press
g
.
If you inp
ut a
wro
ng
character
Press
G
/
g
to
sele
ct
th
e wrong
character. Then, press
F
/
f
to select the
correct
ch
aracter.
T
o delete
all the characters
S
ele
ct
“Re
se
t”, then
press
.
3
Repe
at the proce
dure in
step 2 until
the na
me
i
s
compl
ete
.
4
Se
lect
“OK”, then pre
ss
.
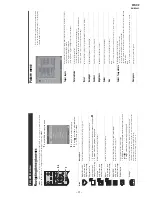
Digital Set-up menu
You can change/set the
digital setting
s using the
Di
gital Set-up
menu.
Sel
ect “Digital Set-up” an
d press
to display
the following menus. To select
o
ptio
ns
in
“Settings”, see “Navigating
through menus”
(p
age
19)
.
Digital Tuning
Displays
the “Digital Tunin
g”
menu.
Di
gital
Aut
o Tun
ing
Tunes i
n all
the ava
ilable di
gital
channels.
Usually you d
o not
need to
do th
is operation because the
channels
are already tuned
when the TV was first instal
led (page
6). However, this op
tion
allows
you to
repeat
the process (e.g.,
to r
etu
ne the
TV after moving
house, or
to search for
new channels
that have
been launched by broad
casters).
Pr
ogramme List
E
d
it
Removes any u
nwanted digita
l
channels stored on
the
TV
, an
d ch
anges
the order of
the di
gital
channe
ls
stor
ed on the TV.
1
Pr
e
ss
F
/
f
to select th
e ch
ann
el y
ou w
ant to
remo
v
e
o
r mo
v
e
to a ne
w
position
.
If you kn
ow
the
p
rogramme numbe
r
(frequency)
P
ress
th
e number b
utt
ons
to
ente
r
the
th
re
e-
digi
t programme nu
m
b
er
of t
he broad
cast
y
ou wan
t.
2
Remo
v
e
or chang
e th
e
o
rder of
the
di
gital cha
nnel
s
a
s
f
o
llo
ws:
T
o remove the digital
channe
l
P
ress
. A
message th
at confirm
s whether
th
e selec
ted digital channel is to be
d
elet
ed appe
ars.
Press
G
to
select “Yes”, then
press
.
T
o
change the order of the
digital
channels
Press
g
, then
press
F
/
f
to
select the
new po
sition
for
the
cha
nnel and
press
G
.
Repeat the
proce
dure
in step
s 1 and 2 to move other
ch
annels
if
requ
ired.
3
Pre
s
s RETURN.
Digital Manual Tuning
Tunes the
digital chan
nels
manually.
1
Pre
s
s the n
u
mber b
u
tton to se
lect the
cha
nne
l n
u
mb
er
y
o
u w
a
nt
to
ma
n
u
ally tune
, the
n press
F
/
f
t
o
tune the channel.
2
When
the
a
v
a
ila
b
le chan
nel
s are f
o
u
nd,
p
ress
F
/
f
to
select the channel
y
o
u w
ant
to store
, then
pre
ss
.
3
Pr
e
ss
F
/
f
to
sele
ct the
prog
ramme
n
u
mber
where
y
ou
w
ant to store
th
e
ne
w chan
nel, th
en press
.
Repeat
the procedure
above
to tune other channels manually.
Continued
Summary of Contents for BRAVIA KDL-32V2000
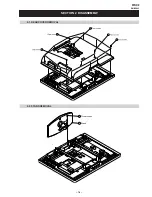
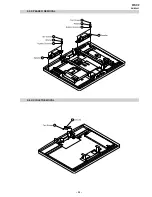
Page 19: ... 18 WAX2 RM ED005 SECTION 2 DISASSEMBLY 2 2 STAND REMOVAL 2 1 REAR COVER REMOVAL ...
Page 20: ... 19 WAX2 RM ED005 2 3 VESA BRACKET REMOVAL 2 4 SHIELD COVER REMOVAL ...
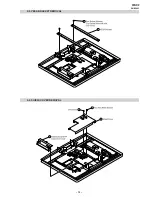
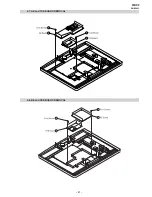
Page 21: ... 20 WAX2 RM ED005 2 5 SPEAKER REMOVAL 2 6 AC INLET REMOVAL ...
Page 22: ... 21 WAX2 RM ED005 2 7 AE and TUE BOARD REMOVAL 2 8 BE and FEE BOARD REMOVAL ...
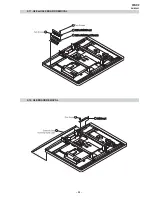
Page 23: ... 22 WAX2 RM ED005 2 9 G1 or G2 BOARD REMOVAL 2 10 H1E BOARD REMOVAL ...
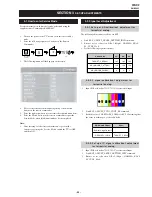
Page 25: ... 24 WAX2 RM ED005 2 13 SHIELD BASE REMOVAL 2 14 LCD PANEL REMOVAL ...

