background image

28

GB

4

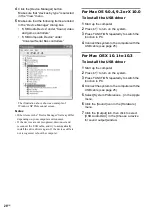
Click the [Device Manager] button.
Make sure that “devices by type” is selected 
in the “View” menu.

5

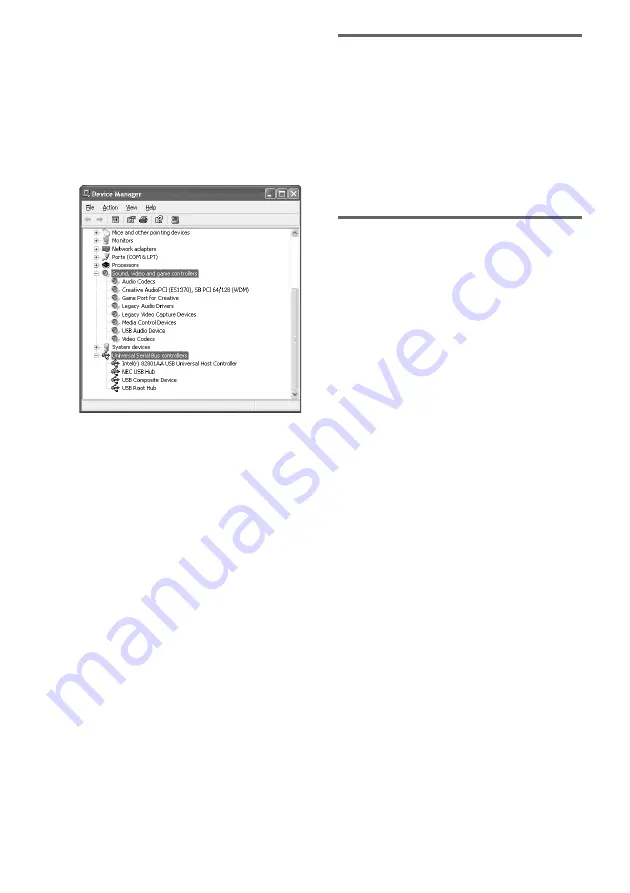
Make sure that the following items are listed 
in the “Device Manager” dialog box.

• “USB Audio Device” under “Sound, video 

and game controllers”

• “USB Composite Device” under 

“Universal Serial Bus controllers”

The illustration above shows an example of 
Windows XP Professional screen.

Notes

• Other items in the “Device Manager” list may differ 

depending on your computer environment.

• If the devices are not recognized, disconnect and 

reconnect the USB cable, and try to automatically 
install the drive drivers again. If the devices still are 
not recognized, reboot the computer.

For Mac OS 9.0.4, 9.2 or X 10.0

To install the USB driver

1

Start up the computer.

2

Press 

?/1

 to turn on the system.

3

Press FUNCTION repeatedly to switch the 
function to PC.

4

Connect the system to the computer with the 
USB cable (see page 25).

For Mac OS X 10.1 to 10.3

To install the USB driver

1

Start up the computer.

2

Press 

?/1

 to turn on the system.

3

Press FUNCTION repeatedly to switch the 
function to PC.

4

Connect the system to the computer with the 
USB cable (see page 25).

5

Select [System Preferences...] in the Apple 
menu.

6

Click the [Sound] icon in the [Hardware] 
menu.

7

Click the [Output] tab, then click to select 
[USB Audio DAC] in the [Choose a device 
for sound output] window.

Summary of Contents for AWP-ZX7

Page 1: ...s Owner s Record The model and serial numbers are located on the rear of the unit Record the serial number in the space provided below Refer to them whenever you call upon your Aiwa dealer regarding this product Model No ______________ Serial No ______________ ...

Page 2: ...st harmful interference in a residential installation This equipment generates uses and can radiate radio frequency energy and if not installed and used in accordance with the instructions may cause harmful interference to radio communications However there is no guarantee that interference will not occur in a particular installation If this equipment does cause harmful interference to radio or te...

Page 3: ...is product meets the ENERGY STAR guidelines for energy efficiency Declaration of Conformity Trade name AIWA Model No AWP ZX7 Responsible Party Sony Electronics Inc Address 16450 W Bernardo Dr San Diego CA 92127 U S A Telephone No 858 942 2230 This device complies with Part 15 of the FCC Rules Operation is subject to the following two conditions 1 This device may not cause harmful interference and ...

Page 4: ...ding on a tape manually 19 Manual Recording Sound Adjustment Adjusting the sound 20 Timer Falling asleep to music 20 Sleep Timer Waking up to music 21 Play Timer Timer recording radio programs 22 Rec Timer Display Turning off the display 23 Power Saving Mode Viewing information about the disc in the display 23 Optional Personal Computer Connecting a personal computer to the system 25 Installing th...

Page 5: ...r similar names You can play back the following discs on this system Other discs cannot be played back List of playable discs Discs that this system cannot play An 8 cm disc An 8 cm disc converted to a standard disc using an adaptor CD ROMs CD Rs CD RWs other than those recorded in the following formats music CD format MP3 format that conforms to ISO9660 ...

Page 6: ...wing discs take a longer time to start playback a disc recorded with complicated tree structure a disc recorded in Multi Session a disc to which data can be added non finalized disc Music discs encoded with copyright protection technologies This product is designed to playback discs that conform to the Compact Disc CD standard Recently various music discs encoded with copyright protection technolo...

Page 7: ... Connect the speakers Connect the right and left speaker cords to the SPEAKER terminals as shown below Main Unit Speakers Getting Started Hooking up the system AM loop antenna Right speaker Left speaker FM lead antenna Copper 3 Silver Insert only the stripped portion Copper 3 Silver Insert only the stripped portion continued ...

Page 8: ...ug does not fit the wall socket detach the supplied plug adaptor only for models equipped with an adaptor To turn on the system press 1 Inserting two R6 size AA batteries into the remote Note If you do not use the remote for a long period of time remove the batteries to avoid possible damage from battery leakage and corrosion Tip When the remote no longer operates the system replace both batteries...

Page 9: ...ess CLOCK TIMER SET 2 Press or until CLOCK SET appears then press ENTER 3 Do the same procedures as step 3 to 6 above Notes The clock settings are canceled when you disconnect the power cord or if a power failure occurs You cannot set the clock in Power Saving Mode page 23 When carrying this system Perform the following procedure to protect the CD mechanism 1 Make sure that all discs are removed f...

Page 10: ...in the disc slot Doing so may cause the disc to fall Do not use a disc with tape seals or paste on it as this may cause malfunction Do not load an 8 cm disc with an adaptor Doing so may cause the system to malfunction When you eject a disc handle the disc by its edge Do not touch the surface If you load a disc that is not playable by this system it will be ejected automatically This system lets yo...

Page 11: ...DISC SHUF Shuffle Play The tracks on the disc you have selected in random order ALBM SHUF Shuffle Play The MP3 audio tracks in the album on the disc you have selected in random order When playing a non MP3 disc Album Shuffle Play becomes 1DISC SHUF Play PGM Program Play The tracks on the disc in the order you want them to be played see Creating your own program on page 13 To Do this Stop play Pres...

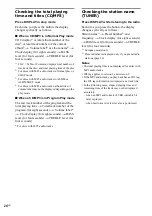
Page 12: ... albums that can be contained on a single disc is 300 Playback is possible up to 8 levels MP3 audio tracks are played back in alphabetical order Depending on the encoding writing software recording device or the recording media used at the time an MP3 audio track is recorded you may encounter such problems as disabled playback sound interruptions and noise Tip When disc access takes a long time se...

Page 13: ... Program Play starts Other operations Tips The program you made remains after Program Play finishes To play the same program again press CD or FUNCTION repeatedly to switch the function to CD then press N or CD NX on the unit When you eject a disc after programming tracks from multiple discs only the tracks contained on the ejected disc are deleted from the program appears when the total CD progra...

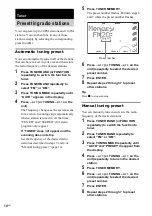
Page 14: ...ning preset page 14 5 Press TUNER MEMORY The preset number flashes Perform steps 6 and 7 while the preset number flashes 6 Press or or TUNING or on the unit repeatedly to select the desired preset number 7 Press ENTER 8 Repeat steps 2 through 7 to preset other stations Tip Press x to stop scanning Manual tuning preset You can manually tune in and store the radio frequency of the desired stations 1...

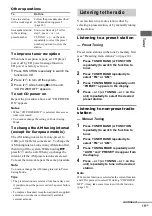
Page 15: ...ternal antenna You can listen to a radio station either by selecting a preset station or by manually tuning in the station Listening to a preset station Preset Tuning Preset radio stations in the tuner s memory first see Presetting radio stations on page 14 1 Press TUNER BAND or FUNCTION repeatedly to switch the function to tuner 2 Press TUNER BAND repeatedly to select FM or AM 3 Press TUNING MODE...

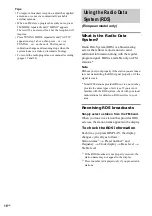
Page 16: ...available only on FM stations Note RDS may not work properly if the station you are tuned in is not transmitting the RDS signal properly or if the signal is weak Not all FM stations provide RDS service nor do they provide the same types of services If you are not familiar with the RDS system check with your local radio stations for details on RDS services in your area Receiving RDS broadcasts Simp...

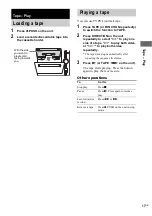
Page 17: ...h sides or j to play both sides repeatedly The tape deck stops automatically after repeating the sequence five times 3 Press N or TAPE nN on the unit The tape starts playing Press the button again to play the reverse side Other operations Tape Play Loading a tape With the side you want to play record facing towards you Playing a tape To Do this Stop play Press x Pause Press X Press again to resume...

Page 18: ... sides 5 Press TAPE nN repeatedly to select recording side If you select both sides recording or front side recording press TAPE nN to light up the N indicator If you record on the reverse side press TAPE nN again to light up the n indicator 6 Press z REC PAUSE START Recording starts When the recording is completed the CD player and the tape deck stop automatically To stop recording Press x To rec...

Page 19: ...to record on both sides 5 Press TAPE nN repeatedly to select recording side If you select both sides recording or front side recording press TAPE nN to light up the N indicator If you record on the reverse side press TAPE nN again to light up the n indicator 6 Press z REC PAUSE START then start playing the desired source to record Recording starts To stop recording Press x Notes You cannot listen ...

Page 20: ...he unit Each time you press the button the display changes cyclically as follows i Bass 1 t i Bass 2 t i Bass OFF The i Bass indicator changes You can set the system to turn off after a certain time so that you can fall asleep to music Press SLEEP Each time you press the button the minute display the turn off time changes cyclically as follows AUTO t 90min t 80min t t 10min t OFF The system automa...

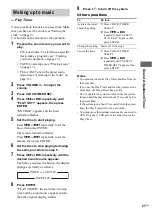
Page 21: ...e appears Each time you press the button the display changes cyclically as follows 8 Press ENTER PLAY TIMER the start time the stop time and the sound source appear in turn then the original display returns 9 Press 1 to turn off the system Other operations Notes You cannot activate the Play Timer and Rec Timer at the same time If you use the Play Timer and the Sleep Timer at the same time the Slee...

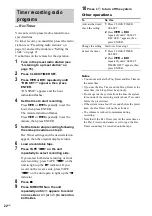
Page 22: ...cator If you record on the reverse side press TAPE nN on the unit again to light up the n indicator 8 Press x 9 Press DIRECTION on the unit repeatedly until g appears to record on one side or h or j to record on both sides 10Press 1 to turn off the system Other operations Notes You cannot activate the Play Timer and Rec Timer at the same time If you use the Rec Timer and the Sleep Timer at the sam...

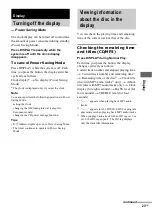
Page 23: ...de You can check the playing time and remaining time of the current track or that of the disc Checking the remaining time and titles CD MP3 Press DISPLAY during Normal Play Each time you press the button the display changes cyclically as follows Current track number and elapsed playing time t Current track number and remaining time1 t Remaining time of the disc2 t Track title disc with MP3 audio t...

Page 24: ...tal playing time t Total track number of the program for eight seconds t Volume label t Clock display for eight seconds t BASS level for four seconds t TREBLE level for four seconds For discs with MP3 audio tracks Checking the station name TUNER Press DISPLAY while listening to the radio Each time you press the button the display changes cyclically as follows Station name1 t Preset number2 and fre...

Page 25: ...ms Windows XP versions other than Home Edition or Professional Windows 98 versions other than Second Edition Windows NT Windows 95 Mac OS versions other than 9 0 4 9 2 or X 10 0 to 10 3 An environment upgraded to the other operating systems Multi boot environment Multi monitor environment Notes Operations are not guaranteed for all the recommended computer environments mentioned above You cannot p...

Page 26: ...er 2 Press 1 to turn on the system 3 Press FUNCTION repeatedly to switch the function to PC 4 Connect the system to the computer with the USB cable see page 25 The computer automatically detects the system and begins the device OS standard driver installation 5 Follow the instructions appearing on the monitor The illustrations above show examples of Windows Millennium Edition screens Notes The OS ...

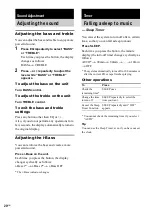
Page 27: ...t If the devices are not recognized disconnect and reconnect the USB cable and try to automatically install the drive drivers again If the devices still are not recognized reboot the computer For Windows 2000 Professional or Windows XP Professional Home Edition To install the USB driver 1 Start up the computer 2 Press 1 to turn on the system 3 Press FUNCTION repeatedly to switch the function to PC...

Page 28: ...lly install the drive drivers again If the devices still are not recognized reboot the computer For Mac OS 9 0 4 9 2 or X 10 0 To install the USB driver 1 Start up the computer 2 Press 1 to turn on the system 3 Press FUNCTION repeatedly to switch the function to PC 4 Connect the system to the computer with the USB cable see page 25 For Mac OS X 10 1 to 10 3 To install the USB driver 1 Start up the...

Page 29: ...ff the system or the computer or disconnecting the USB cable be sure to first quit the software being used to play back music on the computer When turning off the power turning off the system first and then turning off the computer is recommended After turning off the power disconnect the USB cable When setting the computer to hibernation mode or sleep mode turning off the system first is recommen...

Page 30: ...lied to connect an optional sub woofer to this jack You can then output audio to the component from this system Note The effects may be limited or noise may occur depending on the connected sub woofer or the type of music being played For details consult your nearest Aiwa dealer Optional Components Hooking up optional components Optional analog component From the audio output jacks of an optional ...

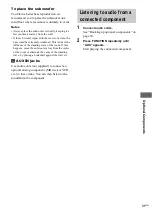
Page 31: ... to the influence of the standing wave of the room If this happens move the subwoofer away from the center of the room or eliminate the cause of the standing wave by placing a bookshelf against the wall etc C AUX IN jacks Use audio cords not supplied to connect an optional analog component MD deck or VCR etc to these jacks You can then listen to the sound from the component 1 Connect audio cords S...

Page 32: ... The timer does not function Press CLOCK TIMER SELECT to set the timer and light up cPLAY or cREC in the display pages 21 and 22 Check the timer setting and set the correct time pages 21 and 22 Cancel the Sleep Timer Function page 20 Make sure the clock is correctly set The remote does not function Remove the obstacle Move the remote closer to the system Point the remote at the system s sensor Rep...

Page 33: ...ot be played back Recording was not performed according to the ISO9660 level 1 level 2 format Joliet or Romeo in the expansion format The MP3 audio track does not have the extension MP3 The file is not stored in MP3 format Discs containing files other than MPEG 1 Audio Layer 3 files cannot be played MP3 audio tracks take longer to begin play back than others After the system reads all tracks on th...

Page 34: ...ssette Cover the broken tab with adhesive tape page 37 The tape has wound to the end Optional components There is no sound Refer to General item There is no sound page 32 and check the condition of the system Connect the component properly page 30 while checking if the cords are connected properly if the cord plugs are firmly inserted all the way Turn on the connected component Refer to the operat...

Page 35: ...pressed PLAY MODE during playback Step Full You tried to program 25 or more tracks steps TUNER Complete The preset operation ended normally TAPE No Tab You cannot record the tape because the tab has been removed from the cassette No Tape There is no tape in the tape deck Timer TIME NG The Play Timer or Rec Timer start and end times are set to the same time SET CLOCK The clock has not been set ther...

Page 36: ... near a TV set However color irregularity may still be observed on the TV screen depending on the type of your TV set On operation If the system is brought directly from a cold to a warm location or is placed in a very damp room moisture may condense on the lens inside the CD player Should this occur the system will not operate properly Remove the disc and leave the system turned on for about an h...

Page 37: ...eaning cassette Demagnetizing the tape heads Demagnetize the tape heads and the metal parts that have contact with the tape after every 20 to 30 hours of use with a separately sold demagnetizing cassette For details refer to the instructions of the demagnetizing cassette Main Unit CX LZX7 Amplifier section For the U S model AUDIO POWER SPECIFICATIONS POWER OUTPUT AND TOTAL HARMONIC DISTORTION With...

Page 38: ...er FM tuner section Tuning range North American model 87 5 108 0 MHz 100 kHz step Other models 87 5 108 0 MHz 50 kHz step Antenna FM lead antenna Antenna terminals 75 ohms unbalanced Intermediate frequency 10 7 MHz AM tuner section Tuning range Pan American model 530 1 710 kHz with the tuning interval set at 10 kHz 531 1 710 kHz with the tuning interval set at 9 kHz European model 531 1 602 kHz wi...

Page 39: ...E control qg 29 1 power 1 8 15 26 34 TAPE nN play 2 17 18 22 CD NX play pause 3 11 z REC PAUSE START 9 18 Z CD eject 0 9 10 Z PUSH qd 17 go back go forward qj 11 m M rewind fast forward qj 9 11 15 17 x stop qk 11 15 17 18 List of button locations and reference pages How to use this page Use this page to find the location of buttons and other parts of the system that are mentioned in the text Illus...

Page 40: ...MODE 4 16 FUNCTION 6 10 13 14 15 17 19 26 29 31 PLAY MODE w 11 13 REPEAT 4 12 SLEEP ws 20 TAPE qj 17 19 TUNER BAND 5 14 15 19 TUNER MEMORY ql 14 TUNING MODE w 14 15 VOLUME qs 21 29 1 power 1 8 15 21 26 m M rewind fast forward 7 11 15 17 X pause 8 11 17 x stop 8 11 17 18 22 N play 8 11 17 tuning qh 14 20 go back go forward qh 9 11 21 ALPHABETICAL ORDER A E F Z BUTTON DESCRIPTIONS 4 5 6 7 8 9 q ws 1...

Reviews: