Company Internal
Rev
20
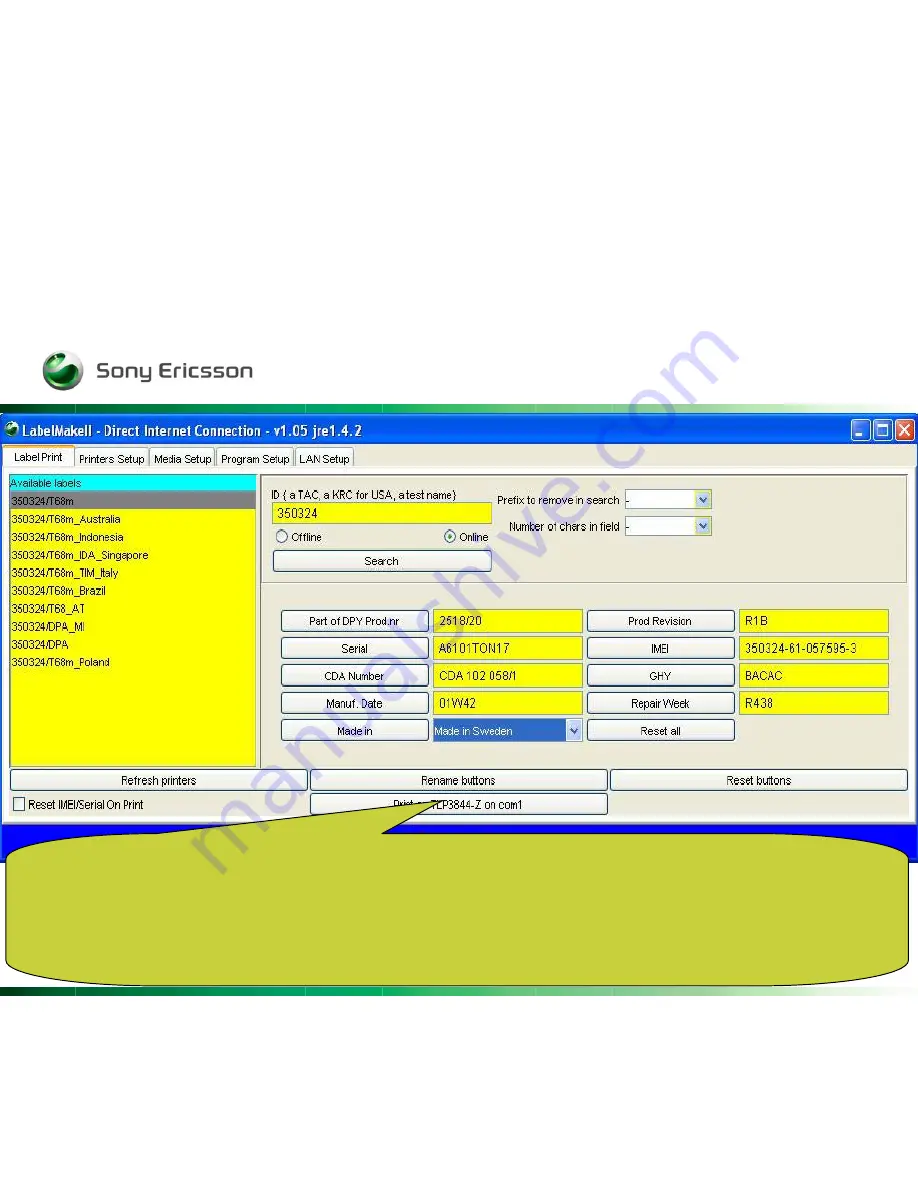
Label Fields
: The label fields that appear for the selected label must all be populated with the correct information from
the product label. Position the curser over the field to see a help note appear on the screen. The help notes describe
the type of information that goes in the fields. Click on the button beside each field to reset the field, or click on the
"Reset all" button to reset all of the fields. The "Repair Week" field is automatically populated and cannot be edited.
Print on ... on comX
: After entering data in all of the label fields, click this button to print the label. The "Alt + F1"
keyboard shortcut can be used instead of clicking this button.
Summary of Contents for Label Make II
Page 1: ...Company Internal Rev 1 Label Make II Install guideline Client handbook...
Page 3: ...Company Internal Rev 3...
Page 4: ...Company Internal Rev 4 Click Install...
Page 5: ...Company Internal Rev 5 Click on download...
Page 6: ...Company Internal Rev 6 Choose Open...
Page 7: ...Company Internal Rev 7 Accept the terms and click Next...
Page 8: ...Company Internal Rev 8 Choose Typical and click Next...
Page 9: ...Company Internal Rev 9 This part may take several minutes So please be patient...
Page 10: ...Company Internal Rev 10 Click Finish To exit the wizard Click Home...
Page 12: ...Company Internal Rev 12 Click Start to continue...
Page 13: ...Company Internal Rev 13...
Page 19: ...Company Internal Rev 19 Choose your label and some fields will appear...
Page 26: ...Company Internal Rev 26...
Page 27: ...Company Internal Rev 27 You could rename the print buttons by using the Rename buttons...
Page 28: ...Company Internal Rev 28 And you could of course set it to default again by using Reset buttons...
Page 35: ...Company Internal Rev 35...


