3
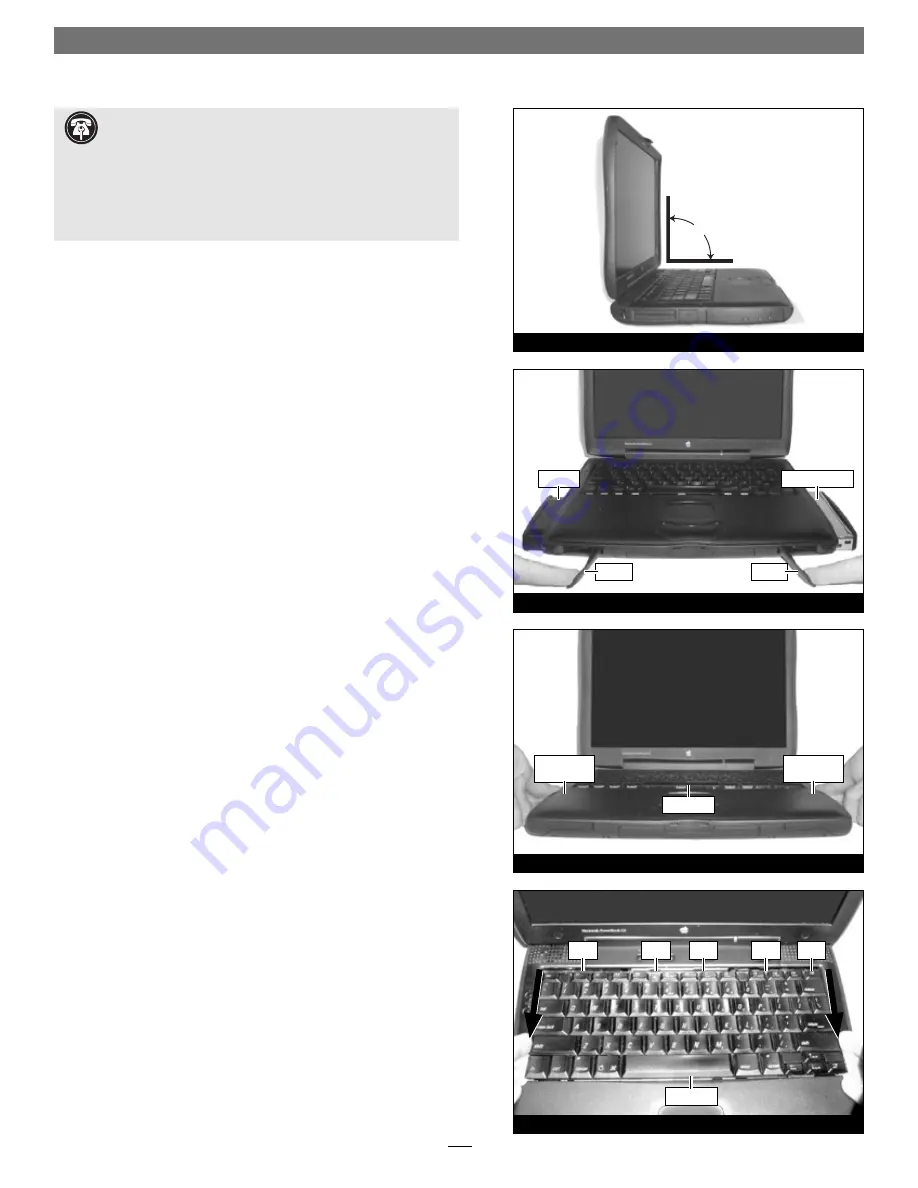
Figure 2
Figure 1
Figure 3
Figure 4
Shut Down and Open Computer
1.
If you have not already done so, shut down your PowerBook. If
the computer has been on for any length of time, wait a couple
of minutes for it to cool before beginning the installation.
2.
Disconnect all cables from your PowerBook, including the
power cable. If necessary, move your PowerBook to an area with a
fl at, level surface where you can freely work.
3.
Open the display on your PowerBook to a 90˚ angle;
you must
do this to prevent it from tipping over during the installation process
(Figure 1)
.
4.
Locate the expansion bay release levers on the front edge of the
computer
(Figure 2)
, then pull them out to eject and remove bat-
teries and modules installed in both expansion bays.
5.
Reach inside the expansion bays to locate the two small, ridged
plastic tabs; these are the keyboard release levers. Slide the levers
toward you until the lower edge of the keyboard rises
(Figure 3)
.
6.
Lift up the lower edge of the keyboard slightly, and pull it
toward you until the tabs on the upper edge of the keyboard are
visible
(Figure 4)
.
Hardware Installation
Support Note:
When handling computer products, you must
take care to prevent components from being damaged by
static electricity. Before opening your computer or removing parts
from their packages, always ground yourself first by touching a metal
part of the computer, such as a port access cover, and work in an area
free of static electricity; avoid carpeted areas. Handle all electronic
components only by their edges, and avoid touching connector traces
and component pins.
90˚
battery
CD-ROM drive
lever
lever
release lever
(inside)
release lever
(inside)
keyboard
keyboard
tab
tab
tab
tab
tab


