background image

Page 22

  Registering as an Associated Component  

Registering as an Associated Component

When you have a distributed SonicWALL GMS deployment 
involving more than one appliance or software instance of 
SonicWALL GMS, you can associate these components on 
MySonicWALL. 

Note:

The default 10-node management license is not 

automatically increased when additional components 
are associated with an existing SonicWALL GMS 
deployment. Contact SonicWALL Technical Support to 
add the node licenses to the deployment.

To register a SonicWALL UMA EM5000 as an associated 
component of an existing SonicWALL GMS deployment, 
perform the following steps:

1.

In a browser, log in to the appliance management interface 
and click the 

Register

 button. 

2.

Enter your MySonicWALL user name and password in the 
appropriate fields and then click 

Submit

.

3.

Type a descriptive name for the appliance into the 

Friendly Name

 field and then click 

Submit

.

The 

Serial Number

 field is automatically populated. 

4.

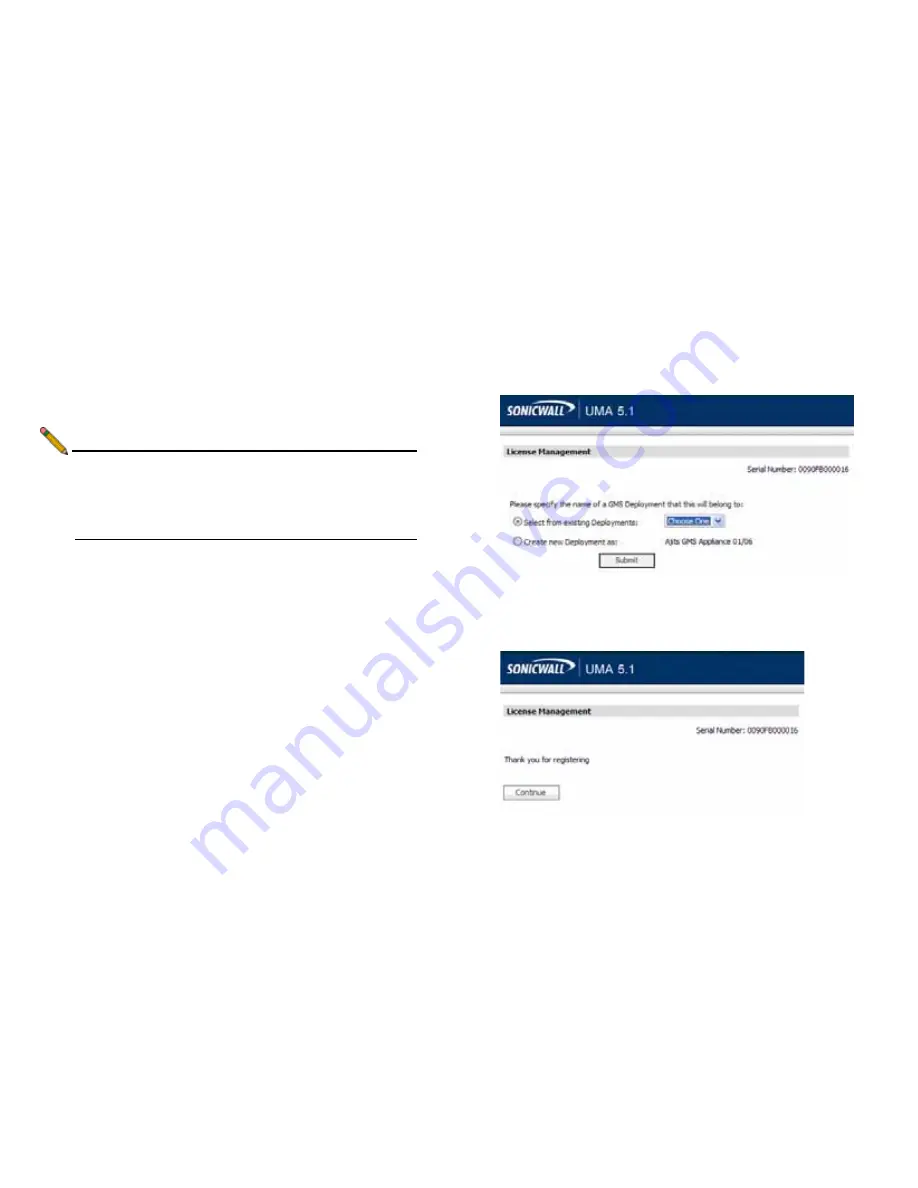
The next registration page prompts you to associate this 
SonicWALL GMS component with an existing deployment, 
or create a new GMS deployment instance. Select the 

Select from existing Deployments

 radio button. 

5.

Select the desired deployment for the association from the 
drop-down list and then click 

Submit

.

6.

Click 

Continue

.

Summary of Contents for UMA EM5000

Page 1: ...PROTECTION AT THE SPEED OF BUSINESS UMA EM5000 Getting Started Guide ...

Page 2: ... Internet security appliances and non SonicWALL appliances from a central location The SonicWALL UMA EM5000 provides these benefits Centralized security and network management Sophisticated VPN deployment and configuration Active device monitoring and alerts Intelligent reporting and activity visualization Centralized logging and offline management Note For complete documentation refer to the Soni...

Page 3: ...Registering Your Appliance page 19 Configuring the Role of Your Appliance page 23 Using the SonicWALL GMS Management Interface page 41 Managing SonicWALL Appliances page 49 Reporting page 57 Monitoring page 63 Front Panel LCD Controls page 73 Support and Training Options page 77 Product Safety and Regulatory Information page 85 1 6 2 7 3 9 4 5 6 6 7 7 9 8 9 10 11 ...

Page 4: ...his section provides pre configuration information before setting up your SonicWALL UMA EM5000 Checking Package Contents page 2 Overview of the SonicWALL UMA EM5000 page 3 System Requirements page 5 Recording Configuration Information page 8 1 ...

Page 5: ...ck Mounting Kit not pictured 5 6 7 Any Items Missing If any items are missing from your package please contact SonicWALL support A listing of the most current support documents are available online at http www sonicwall com us Support html The included power cord is intended for use in North America only For European Union EU customers a power cord is not included Getting Started Guide SonicWALL N...

Page 6: ...ance to be powered on or off D Pad Controls Provides up left right and down buttons to navigate the LCD menu Up Down Navigate lists Left Cancel changes return to previous Right Accept changes Provides the following system status indications ALARM Thermal or other alert condition ETH0 ETH1 Ethernet link solid activity blinking HDD Hard disk activity blinking PWR The appliance is powered off on For ...

Page 7: ... 0 Management LAN Provides configurable Gigabit capable Ethernet connection to your local network Provides access to a command line interface CLI for SonicWALL technical support use Serial Port Not authorized for use unless explicitly instructed by a SonicWALL technical support representative VGA Port For future use eSATA Port 1 Ethernet Port 1 Not authorized for use ...

Page 8: ...For Microsoft SQL Server installations SonicWALL UMS uses Tomcat 5 5 26 Browser Requirements The following browser requirements apply to client machines when accessing the SonicWALL UMA EM5000 or the SonicWALL GMS application Microsoft Internet Explorer 6 0 or higher Mozilla Firefox 2 0 or higher Pop up blocker disabled The SonicWALL UMA EM5000 supports SSL 3 0 TLS 1 0 for HTTPS management of Soni...

Page 9: ...Internet A static IP address Network connection must be able to accommodate 1 KB s for each device under management For example if the SonicWALL UMA EM5000 is monitoring 100 SonicWALL appliances the connection must support at least 100 KB s Depending on the configuration of SonicWALL log settings and the amount of traffic handled by each device the network traffic can vary dramatically The 1KB s f...

Page 10: ...u select Management VPN tunnel you must have a GMS gateway between the SonicWALL UMA EM5000 agent appliance and the managed SonicWALL appliance s to allow each SonicWALL UMA EM5000 agent to securely communicate with its managed appliance s The following list provides more detail on SonicWALL appliance management methods and gateway requirements Management VPN tunnel A GMS gateway is required Each ...

Page 11: ...ress from which the email notifications will be sent by the SonicWALL UMA EM5000 GMS Gateway IP The IP address of the GMS gateway between the SonicWALL UMA EM5000 agent and the network This optional field is only applicable if you have a GMS gateway GMS Gateway Password The password for the GMS gateway This optional field is only applicable if you have a GMS gateway between the SonicWALL UMA EM500...

Page 12: ...rface running the Host Configuration Tool and then connecting the appliance to your local network Powering On Your Appliance page 10 Restarting Your Appliance page 10 Powering Off Your Appliance page 10 Logging into the Appliance Management Interface page 10 Using the Host Configuration Tool page 12 Connecting the SonicWALL UMA EM5000 to Your Network page 15 Configuring a Static IP Address on Your...

Page 13: ...ee Using the Restart Option page 76 Powering Off Your Appliance To power off your SonicWALL UMA EM5000 appliance press and then quickly release the power button on the upper right corner of the appliance front bezel Tip Do not hold down the power button to shutdown To power off your appliance by using the D Pad controls on the front panel see Using the Shutdown Option page 76 Logging into the Appl...

Page 14: ... log in to the SonicWALL UMA EM5000 5 Log in to the appliance management interface using the default credentials User name admin Password password 6 The first time you log in to the appliance you must change the password The login page re displays with the default login credentials prepopulated Enter a new password for the administrator account in the New Password field and enter it again in the C...

Page 15: ...ppliance and prevents the wizard from automatically starting again Note If you log out of the appliance management interface without actually cancelling the wizard it will start automatically on your next login You can manually start the wizard at any time by clicking the Wizards button at the top right corner of the page To use the Host Configuration Tool perform the following steps 1 If the Host...

Page 16: ...The IP address of the network gateway this is the default gateway and is required for networking purposes This is not the GMS Gateway explained earlier in this guide DNS Server 1 The IP address of the primary DNS server DNS Server 2 Optional The IP address of the secondary DNS server 4 In the Time Settings screen select values for the following system settings on the appliance and click Next Time ...

Page 17: ... modified the DNS settings the services on the appliance will restart when the changes are applied causing a momentary connectivity loss to the Web server Your browser will be redirected to the appliance management interface login page 7 If you have modified the appliance IP address you will lose contact with the appliance when the changes are applied To connect the appliance to your network and a...

Page 18: ...WALL UMA EM5000 2 Plug one end of the provided Ethernet cable not the crossover cable into the eth0 port on the back of your SonicWALL UMA EM5000 3 Plug the other end of the Ethernet cable into an open port on your local network hub or switch 4 Adjust your management computer to its previous settings prior to assigning it a static IP address on the default appliance subnet 5 Connect your managemen...

Page 19: ...g network diagram illustrates how the SonicWALL UMA EM5000 connects to an example network San Jose USA Management Console UMA Appliance Database X0 X1 X2 X3 X4 X5 X6 link spd X0 X1 X2 X3 X4 X5 X6 activity TZ 210 X0 X1 X2 X3 X4 X5 X6 Universal Management Appliance UMA EM5000 ...

Page 20: ...u highlight Connect To and then select Show All Connections 2 Open the Local Area Connection Properties window 3 Highlight Internet Protocol TCP IP and then click Properties 4 Select Use the following IP address and type 192 168 168 50 in the IP address field 5 Type 255 255 255 0 in the Subnet Mask field 6 Click OK for the settings to take effect Windows 2000 1 On the Windows Start menu select Set...

Page 21: ...Page 18 ...

Page 22: ...Registering Your Appliance In this Section This section provides instructions for registering your SonicWALL UMA EM5000 appliance Creating a MySonicWALL Account page 20 Registering Your Appliance page 20 Registering as an Associated Component page 22 3 ...

Page 23: ...ot sold or shared with any other company Registering Your Appliance You must register your SonicWALL UMA EM5000 on MySonicWALL before you can run SonicWALL GMS on it Registration is performed using the appliance management interface When registration is completed SonicWALL GMS will be licensed on your appliance When you log in to the SonicWALL UMA EM5000 after running the Host Configuration Tool t...

Page 24: ...u have registered the Friendly Name for this appliance will also be used as the name for the distributed deployment As you register more UMA EM5000 appliances or instances of SonicWALL GMS on Windows Server systems you will have the option of adding them to this deployment 4 Select the Create New Deployment as radio button and then click Submit 5 Click Continue 6 On the License Summary page verify...

Page 25: ...ssociated component of an existing SonicWALL GMS deployment perform the following steps 1 In a browser log in to the appliance management interface and click the Register button 2 Enter your MySonicWALL user name and password in the appropriate fields and then click Submit 3 Type a descriptive name for the appliance into the Friendly Name field and then click Submit The Serial Number field is auto...

Page 26: ...n about configuring the role for your SonicWALL UMA EM5000 as well as information about deployment settings and services Overview of SonicWALL UMA EM5000 Roles page 24 Using the Role Configuration Tool page 25 Manually Configuring the System Role page 31 Configuring Deployment Settings page 38 Starting and Stopping Host Services page 39 4 ...

Page 27: ...d deployment You can also use Windows Server machines running SonicWALL GMS in any of the roles You can include the MySQL database installation with any role The All In One or Database Only roles automatically include the MySQL database You can scale your deployment to handle more units and more reporting by adding more systems in the Agent role Agents provide built in redundancy capability meanin...

Page 28: ...gh the process of defining the deployment role for your SonicWALL UMA EM5000 appliance Your system must be registered and licensed for SonicWALL GMS to run the Role Configuration Tool There are two ways to access the Role Configuration Tool After the appliance is registered and licensed for SonicWALL GMS the System Status page of the appliance management interface provides a link to the wizard ...

Page 29: ... access to the Role Configuration Tool To use the Role Configuration Tool perform the following steps 1 Log in to the appliance management interface and navigate to the System Status page 2 Click the Click here link at the top of the page 3 In the Introduction page of the Role Configuration Tool click Next ...

Page 30: ...e page select Yes if this system will be the only SonicWALL GMS server in the deployment or select No if there will be multiple GMS servers Click Next 6 In the Role Configuration page select the desired role for this system and select the Include Database MYSQL checkbox if you want to configure a SonicWALL GMS database on this system Click Next The list of roles on this page will vary depending on...

Page 31: ...figuring the database administrator credentials The Administrator Credentials fields are only displayed and editable in the following circumstances The Database Type is MySQL The Include Database MYSQL checkbox is selected either manually or automatically for the chosen role The Database Host field is set to localhost and is not editable When these conditions are met the administrator password is ...

Page 32: ...ress and connection password if you are using a GMS gateway Leave these fields empty if you are using HTTP HTTPS to connect to the managed appliances 10 In the Syslog Server Port field type in the port used for receiving syslog messages or accept the default of 514 11 For access to email on this system including the ability to send email alerts type the mail server IP address into the SMTP Server ...

Page 33: ... the settings to be applied The screen displays a progress bar until it finishes and then displays the status This phase can take up to 10 minutes especially if the database was included in the deployment 15 Click Close to exit the Role Configuration Tool ...

Page 34: ...ring the Monitor Role page 35 Configuring the Syslog Collector Role page 35 Configuring Database Settings page 36 Configuring Deployment Settings page 38 Configuring the All In One Role All In One deployments are ideal for managing a small number of SonicWALL appliances or for test environments However SonicWALL recommends that you use a multi system distributed deployment in production environmen...

Page 35: ...tings as described in the Configuring Web Port Settings section on page 38 7 To apply your changes click Update To change the settings on this page back to the defaults click Reset Configuring the Database Only Role The Database Only role is used in a multi server SonicWALL GMS deployment In this role the server is configured to run only the database service SonicWALL recommends that one of the se...

Page 36: ...ion select the Console radio button 2 If this SonicWALL UMA EM5000 will connect to managed appliances through a GMS gateway type the gateway IP address into the GMS Gateway IP field To determine if a GMS gateway is required see the GMS Gateway Recommendations section on page 7 3 If a GMS gateway will be used type the password into both the GMS Gateway Password and Confirm GMS Gateway Password fiel...

Page 37: ...ton 2 If this SonicWALL UMA EM5000 will connect to managed appliances through a GMS gateway type the gateway IP address into the GMS Gateway IP field To determine if a GMS gateway is required see the GMS Gateway Recommendations section on page 7 3 If a GMS gateway will be used type the password into both the GMS Gateway Password and Confirm GMS Gateway Password fields 4 If this SonicWALL UMA EM500...

Page 38: ...ings as described in the Configuring Database Settings section on page 36 4 Configure the Web port settings as described in the Configuring Web Port Settings section on page 38 5 To apply your changes click Update To change the settings on this page back to the defaults click Reset Configuring the Syslog Collector Role The Syslog Collector role can be assigned to a SonicWALL UMA EM5000 in a multi ...

Page 39: ...ase Settings Database settings configuration is largely the same for any role when you choose to include the database on that appliance For roles that automatically include the default MySQL database such as All In One or Database Only the Database Type Database Host and Database Port fields are not editable This is also the case for any role when the Include Database MYSQL checkbox is selected Th...

Page 40: ...nicWALL UMA EM5000 includes the database This field is not editable if you previously selected Include Database MYSQL or if the selected role is All In One or Database Only 5 To use a different user name when SonicWALL GMS accesses the database type the user name into the Database User field The default user name is sa 6 Type the password that SonicWALL GMS will use to access the database into bot...

Page 41: ...will cause the appliance to restart 4 After the appliance restarts use the new port to access the appliance management interface For example If you changed the HTTP port to 8080 use the URL http IP Address 8080 appliance If you changed the HTTPS port to 4430 use the URL http IP Address 4430 appliance Configuring SMTP Settings The SMTP settings are used for sending email alerts to the SonicWALL UMA...

Page 42: ... change the current state of a service perform the following steps 1 On the Deployment Services page select the checkbox next to the service whose state you want to change and then do one of the following To stop the service click the Disable Stop button To start a stopped service click the Enable Start button To restart the service click the Restart button This option stops and then starts the se...

Page 43: ...Page 40 Starting and Stopping Host Services ...

Page 44: ...terface The SonicWALL GMS application runs on the SonicWALL UMA EM5000 Accessing the Correct Management Interface page 42 SonicWALL GMS Management Interface Introduction page 43 SonicWALL GMS Login Screen page 44 SonicWALL GMS Navigation Tabs page 44 Left Pane Overview page 45 Center Pane Overview page 45 Right Pane Overview page 46 Description of Managed Appliance States page 46 5 ...

Page 45: ...t interface with the URL http IP address port appliance If you are using the standard HTTP port 80 it is not necessary to append the port number to the IP address SonicWALL GMS Management Interface Used to access the SonicWALL GMS application that runs on the SonicWALL UMA EM5000 This interface is used to configure GMS management of SonicWALL appliances including creating policies viewing reports ...

Page 46: ...ntroduction SonicWALL GMS is a Web based application that runs on the SonicWALL UMA EM5000 SonicWALL GMS is used for configuring managing monitoring and gathering reports from thousands of SonicWALL Internet security appliances and non SonicWALL appliances as well as for configuring SonicWALL GMS administrative settings This section provides an introduction to the main elements of the SonicWALL GM...

Page 47: ...s the SonicWALL GMS management interface using a Web browser on your management computer SonicWALL GMS Navigation Tabs The SonicWALL GMS management interface navigation tabs are located at the top of the management interface The six navigation tabs are SonicToday Firewall SSL VPN CDP Monitor and Console The Monitor tab provides real time monitoring at the global group or appliance level The Consol...

Page 48: ...ft Pane then the Left Pane will automatically collapse to present a larger screen for the rest of the management interface Center Pane Overview The center pane displays for the three appliance tabs Firewalls SSL VPNs and CDPs A navigational tree control that provides access to the configuration options available based on navigational tab and left pane selections At the top of the Center pane there...

Page 49: ...ent interface Appliance Status Description One blue box indicates that the appliance is operating normally The appliance is accessible from SonicWALL GMS and no tasks are pending or scheduled Two blue boxes indicate that appliances in a group are operating normally All appliances in the group are accessible from SonicWALL GMS and no tasks are pending or scheduled Three blue boxes indicate that all...

Page 50: ...yellow box with a lightning flash indicates that one or more tasks are pending on the provisioned appliance Two yellow boxes with a lightning flash indicates that tasks are pending on one or more provisioned appliances within the group One red box indicates that the appliance is no longer sending heartbeats to SonicWALL GMS Two red boxes indicate that one or more appliance in the group is no longe...

Page 51: ...Page 48 Description of Managed Appliance States ...

Page 52: ...are to be managed using SonicWALL GMS For information about configuring other SonicWALL appliances for management see the SonicWALL GMS Administrator s Guide This section provides instructions for the following example configurations Configuring a SonicWALL NSA 2400 for Management page 50 Configuring a SonicWALL SSL VPN 2000 for Management page 54 6 ...

Page 53: ...he following steps Configuring a SonicWALL NSA 2400 page 50 Adding a SonicWALL NSA 2400 to SonicWALL GMS page 53 Configuring a SonicWALL NSA 2400 To configure a SonicWALL NSA 2400 for SonicWALL GMS management perform the following steps 1 Log in to your SonicWALL NSA 2400 Navigate to System Administration and scroll down to the Advanced Management section 2 Select the Enable management using GMS c...

Page 54: ...etailed information on configuring your SonicWALL UMA EM5000 behind a NAT device Tip If your gateway controller is running in transparent mode the WAN IP is the same as the LAN IP 7 From the Management Mode drop down box select one of the following methods of management IPSEC Management Tunnel Existing Tunnel or HTTPS For information on selecting a management method refer to GMS Gateway Recommenda...

Page 55: ...ng service do not select the Send Syslog Messages to a Distributed GMS Reporting Server checkbox If you have a distributed SonicWALL GMS deployment with a different Reporting server select the Send Syslog Messages to a Distributed GMS Reporting Server checkbox and type the IP address and port of the Reporting server into the respective fields Note If HTTPS management mode is specified ensure that ...

Page 56: ...assword in the Password field 8 Select the radio button next to the management mode that is the same as the mode you selected in the SonicWALL NSA 2400 management interface in Configuring a SonicWALL NSA 2400 page 50 Select Using Existing Tunnel or LAN Using Management VPN Tunnel or Using HTTPS If you choose Using Existing Tunnel or LAN the HTTP port will be populated with the default value 80 If ...

Page 57: ... site to site VPN tunnel to access the managed appliance and acquire it for management For SonicWALL GMS appliance acquisition troubleshooting refer to the SonicWALL GMS Administrator s Guide When the appliance has been acquired the configuration settings will be displayed at the unit level and the settings will be saved to the database Your SonicWALL NSA 2400 is now ready for management using Son...

Page 58: ...ALL SSL VPN appliance serial number in the Serial Number field The serial number can be found in the SonicWALL SSL VPN management interface under System Status 6 To specify the IP address of the SonicWALL SSL VPN appliance select the Specify manually radio button for Managed Address and type the IP address into the field 7 Enter the SonicWALL SSL VPN appliance administrator login name in the Login...

Page 59: ...ss in the System Status screen of the managed appliance available in the center pane of the SonicWALL GMS management interface You will need to refresh the screen by clicking the Status link in the center pane For detailed appliance icon descriptions refer to the table in the Description of Managed Appliance States section on page 46 It may take up to five minutes for SonicWALL GMS to establish an...

Page 60: ... Started Guide Page 57 Reporting In This Section This section contains information about SonicWALL Universal Management reporting Overview of SonicWALL GMS Reporting page 58 Using the SonicWALL GMS Summarize Now Feature page 61 7 ...

Page 61: ... security offerings by providing detailed and comprehensive reports of network activity SonicWALL GMS reporting allows you to review network access enhance security and anticipate future bandwidth needs SonicWALL GMS reporting is available for appliances on the Firewall and SSL VPN tabs using the Reports tab in the center pane of the SonicWALL GMS management interface ...

Page 62: ...from raw syslog data using your customized filtering Can provide date and time down to the second of all Internet activity passing through a monitored SonicWALL security appliance Status The number of hours that managed SonicWALL appliances were online and functional during the time period Bandwidth The amount of data transferred through selected managed appliances including the cost of consumed n...

Page 63: ...mputers on the LAN or DMZ Virus Attacks The number of virus attacks that were directed at or through the selected appliances The selected appliances must be licensed for SonicWALL Gateway Anti Virus Anti Spyware The number of spyware attacks that were directed at or through the selected appliances The selected appliances must be licensed for SonicWALL Anti Spyware Intrusion Prevention The number o...

Page 64: ...eates summary reports by default every 8 hours Summary reports can be configured by the administrator to occur every 1 to every 24 hours For more information about the Summarizer feature of SonicWALL GMS refer to the SonicWALL GMS Administrator s Guide To use the Summarize Now feature perform the following steps 1 Click the Console tab at the top of the screen 2 In the left pane navigate to Report...

Page 65: ...ppliance 6 Click the Reports tab in the center pane Alert You may see incomplete data if you view the Summary section of a selected report before the Summarize Now process is complete Wait for the Report Data Summarized message to be displayed in Log View Logs 7 In the center pane click a report to expand it then click the Summary option underneath it For example click Bandwidth then click Summary...

Page 66: ... Monitoring In this Section This section contains information about SonicWALL Universal Management monitoring Overview of SonicWALL GMS Monitoring page 64 Monitoring a SonicWALL NSA 2400 Using SNMP page 65 Monitoring an FTP Server Using Ping page 71 8 ...

Page 67: ...tivity such as security threats inappropriate Web use and bandwidth levels is an essential component of network security SonicWALL GMS can monitor WAN traffic using physical and logical monitoring enabling it to detect physical issues for example if a link is unplugged or disconnected and higher level traffic for example upstream connectivity interruptions The SonicWALL GMS monitoring feature is a...

Page 68: ... 3 Perform the steps described in Enabling SNMP Monitoring in SonicWALL GMS page 67 Note SNMP must be able to reach the target appliance For detailed information about monitoring appliances with SNMP refer to the SonicWALL GMS Administrator s Guide GMS Navigation Provides a detailed graphical map of the SonicWALL GMS security management deployment including the GMS database GMS console GMS agents ...

Page 69: ...utton next to Enable SNMP Custom settings are optional To use the default settings do not click Configure 4 Type the host name of the SonicWALL security appliance in the System Name field 5 Type the network administrator s name in the System Contact field 6 Type an email address telephone number or pager number in the System Location field 7 Type a name for a group or community of administrators w...

Page 70: ...rnatively if an appliance is already added to SonicWALL GMS you can right click the appliance and select Add to Net Monitor To add an appliance that will use SNMP monitoring in SonicWALL GMS perform the following steps 1 Log in to the SonicWALL GMS management interface 2 Click the Monitor tab at the top of the page and navigate to Tools Net Monitor 3 Click the Add button and select Add GMS Device ...

Page 71: ... 2400 Using SNMP 4 In the All Devices by Views column select the Sonicwall appliance and click the right arrow to add the device to the Selected GMS Devices column 5 Click Next The Add GMS Device Wizard Monitor Information page displays ...

Page 72: ...e SonicWALL appliance s from the Category Priority list box either High Medium or Low 8 From the Monitoring Type drop down select SNMP Enter a Monitor Port The default monitor port is 161 9 Click the Advanced button to configure the following SNMP fields Community Enter the community name Retry Enter the time to retry in seconds Timeout Enter the timeout length in seconds ...

Page 73: ...p down menu 15 Do not check the Disable checkbox unless you want to disable monitoring for this appliance 16 To optionally change the icon image that will represent the appliance click the button next to Click to specify an image icon and choose an image Click OK 17 Click Finish 18 When your appliance has been added a confirmation pop up will display Click OK 19 Click the button of the category yo...

Page 74: ...e top of the screen 2 In the center pane navigate to Tools Net Monitor 3 Click the Add button and select Add Non GMS Device The Add Non GMS Device Wizard displays 4 Select the radio button next to Add Specific to add by the FTP server using its name and host 5 Type the FTP server name in the Name field and the FTP server IP address or host name in the Host field Click Add 6 Highlight the device in...

Page 75: ...e between 1 and 1 5 times the ideal response time will be labeled slow and appliances that take between 1 5 and 2 times the ideal response time will be labeled very slow 13 Specify the number of missed probes allowed in the Missed Probes Threshold field The default number of missed probes allowed is 1 14 Select the agent that will perform the monitoring from the Assign to Monitor drop down menu 15...

Page 76: ...ection provides information about using the LCD controls on the front panel of the SonicWALL UMA EM5000 Front Panel Control Features page 74 Using the Main Menu page 74 About the Status Menu page 75 Using the Configure Menu page 75 Using the Restart Option page 76 Using the Shutdown Option page 76 9 ...

Page 77: ...ain Menu Upon booting the LCD display will initially show the Main Menu The menu is made up of four options The Status and Configure options are menus that contain multiple selections The Restart and Shutdown options provide confirmation screens when selected Use the Up and Down buttons to navigate to the option or menu that you wish to enter Click the Right button to select the option or enter th...

Page 78: ...ad To enter the PIN use the buttons as follows 1 Select the desired number using the Up and Down buttons Digits increase incrementally from 0 to 9 2 To move to the next digit field press the Right button 3 To move back to a previous digit field press the Left button 4 When you are finished entering the PIN press the Right button to confirm your PIN and enter the Configure Menu The appliance allows...

Page 79: ...e Main Menu you are asked to confirm the appliance restart Press the Right button for yes or the Left button for no Using the Shutdown Option When you select Shutdown from the Main Menu you are asked to confirm the appliance shutdown Press the Right button for yes or the Left button for no ...

Page 80: ...This section provides SonicWALL support and training information Customer Support page 78 Knowledge Portal page 78 SonicWALL Live Product Demos page 79 User Forums page 80 Training page 81 Related Technical Documentation page 82 SonicWALL Secure Wireless Network Integrated Solutions Guide page 83 10 ...

Page 81: ...lting services to meet your needs from our innovative implementation services to traditional statement of work based services For further information visit http www sonicwall com us support contact html Knowledge Portal The Knowledge Portal allows users to search for SonicWALL documents based on the following types of search tools Browse Search for keywords Full text search For further information...

Page 82: ...cWALL security products and services through interactive live product installations SonicWALL GMS and ViewPoint Unified Threat Management Platform Secure Cellular Wireless Continuous Data Protection SSL VPN Secure Remote Access Content Filtering Secure Wireless Solutions Email Security For further information visit http livedemo sonicwall com ...

Page 83: ...for users Content Security Manager topics Continuous Data Protection topics Email Security topics Firewall topics Network Anti Virus topics Security Services and Content Filtering topics SonicWALL GMS and Viewpoint topics SonicPoint and Wireless topics SSL VPN topics SonicWALL TZ 210 Wireless WAN 3G Capability topics VPN Client topics VPN site to site and interoperability topics For further inform...

Page 84: ...icWALL Medallion Partners who need to enhance their knowledge and maximize their investment in SonicWALL Products and Security Applications SonicWALL Training provides the following resources for its customers E Training Instructor Led Training Custom Training Technical Certification Authorized Training Partners For further information visit http www sonicwall com us training html ...

Page 85: ...UMA EM5000 Getting Started Guide SonicWALL GMS Release Notes SonicWALL GMS Administrator s Guide Stand alone SonicWALL GMS feature module guides SonicToday Custom Reports Enhanced User Management Third Party Authentication Installing MySQL Granular Event Management SonicOS SSL VPN Reporting Enhancements SonicWALL CDP Appliance Management SonicWALL SMB SSL VPN Appliance Management SonicWALL Aventai...

Page 86: ... Network Integrated Solutions Guide The Official Guide to SonicWALL s market leading wireless networking and security devices This 512 page book is available in hardcopy Order the book directly from Elsevier Publishing at http www sonicwall com us products resources 11427 html ...

Page 87: ...Page 84 SonicWALL Secure Wireless Network Integrated Solutions Guide ...

Page 88: ...k and copyright information Mounting the SonicWALL UMA EM5000 page 86 Montage Anweisungen auf Deutsch page 86 Replacing a Single Hard Drive page 87 Safety and Regulatory Information page 89 FCC Part 15 Class A Notice page 90 Lithium Battery Warning page 92 Gesetzlich und Sicherheits Anweisungen auf Deutsch page 92 Copyright Notice page 93 Trademarks page 93 11 ...

Page 89: ...ct connections to the branch circuits such as power strips The power cord must be removed to disconnect power Montage Anweisungen auf Deutsch Weitere Hinweise zur Montage der Modell Vergewissern Sie sich dass das Rack für dieses Gerät geeignet ist und verwenden Sie das vom Rack Hersteller empfohlene Montagezubehör Verwenden Sie für eine sichere Montage vier passende Befestigungsschrauben und ziehe...

Page 90: ...o the System RAID page The defective drive is indicated by a drive status box displaying a status such as UNKNOWN NOT SUPPORTED NOT PRESENT You might see a different status than those listed depending on the condition of the drive as interpreted by the RAID controller 3 On the appliance press the square button on the right side of the defective drive to pop out the drive handle Warning Be careful ...

Page 91: ...the handle sticking out 6 Press the drive firmly into place to seat the connectors and then close the handle 7 Click Refresh on the System RAID page You will see the drive slot status change to DEGRADED and the Array Status change to REBUILD PAUSED The DEGRADED drive status indicates that the RAID controller senses that data is missing from the drive The Array Status will change to REBUILDING with...

Page 92: ...ory Information Unauthorized Ports Do not plug devices into any ports other than those indicated unless explicitly instructed to do so by a SonicWALL technical support representative Doing so may void your warranty Regulatory Model Type Product Name 1RK19 066 UMA EM5000 ...

Page 93: ... device may cause harmful interference to radio communications Operation of this equipment in a residential area is likely to cause harmful interference in which case the user is required to correct the interference at his own expense Notice About Modifying Equipment Caution Modifying this equipment or using this equipment for purposes not shown in this manual without the written consent of SonicW...

Page 94: ... All products with country code blank and A are made in the USA All products with country code B are made in China All products with country code C or D are made in Taiwan R O C Declaration of Conformity Application of council Directive 2004 108 EC EMC and 2006 95 EC LVD Standards to which conformity is declared EN 55022 2006 Class A EN 55024 1998 A2 EN 61000 3 2 2006 EN 61000 3 3 1995 A2 EN 60950...

Page 95: ...xits the building where the SonicWALL is located Gesetzlich und Sicherheits Anweisungen auf Deutsch Hinweis zur Lithiumbatterie Die in der Internet Security appliance von SonicWALL verwendete Lithiumbatterie darf nicht vom Benutzer ausgetauscht werden Zum Austauschen der Batterie muss die SonicWALL in ein von SonicWALL autorisiertes Service Center gebracht werden Dort wird die Batterie durch dense...

Page 96: ...ers whether or not sold but all of the material purchased with all backup copies can be sold given or loaned to another person Under the law copying includes translating into another language or format Specifications and descriptions subject to change without notice Trademarks SonicWALL is a registered trademark of SonicWALL Inc Microsoft Windows Vista Windows XP Windows Server 2000 Windows Server...

Page 97: ...Page 94 Trademarks ...

Page 98: ...300 2009 SonicWALL Inc is a registered trademark of SonicWALL Inc Other product names mentioned herein may be trademarks and or registered trademarks of their respective companies Specifications and descriptions subject to change without notice PROTECTION AT THE SPEED OF BUSINESS PN 232 001638 50 Rev A 2 09 ...

Reviews: