background image

66

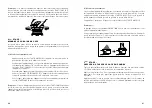
b)  Manual grinding function

In the manual grinding function, you have perfect control over how much coffee 

powder has already been dispensed into the portafilter at all times. For manual 

operation, keep the START/CANCEL button (F) pressed until the desired amount of 

coffee powder is in the filter insert.

The grinding process stops only after you release the START/CANCEL button (F).

Notes:

The setting of the GRIND TIME dial does not play a part in the manual grinding 

function.

It is normal that the coffee powder in the portafilter appears to be too much after 

grinding – unpressed, the volume of the coffee powder is three times larger than 

pressed.

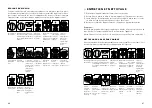
5.  STEP:
TAMPING RESP. PRESSING THE COFFEE POWDER

Firmly press the fresh coffee powder into the filter insert with a pressure of approx. 

15–20 kg, using the tamper of your espresso machine.

Tamp multiple times. Using extreme amounts of pressure is not most important, 

more important is making sure that the pressure is constant for each press.

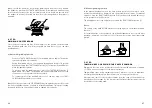
After pressing, remove coffee powder remains from the edge of the portafilter as 

described on the next page. Do this to make sure that the portafilter can be correctly 

inserted into the brewing head.

Note: 

Should the grind size controller be jammed and difficult to turn, activate 

the grinder by pressing the START/CANCEL button (F) inwards and simultaneously 

spin the bean container. Like this, potentially stuck coffee beans are unstuck from 

the grinder. In general, the grind size should only be changed while the grinder is 

activated.

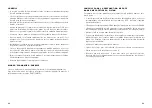
4.  STEP:
GRINDING COFFEE BEANS

Once the bean container has been locked in place on the grinder, the beans have 

been filled and grind time as well as the grind size have been set, you can start 

grinding beans.

a)  Automatic grinding function


– Press the START/CANCEL button (F), the grinding process begins. The button 

surround still lights up constantly.


– During the grinding process, you can pause the appliance for up to 10 seconds 

by briefly pressing the START/CANCEL button (F). The button surround flashes 

while the appliance pauses.


– To continue with the grinding process, press the START/CANCEL button (F) 

again within 10 seconds. The grinding function automatically stops once the 

set amount of coffee powder has been reached.


– To completely cancel the grinding process, you can also keep the START/

CANCEL button pressed for one second.

Note:

 Should you not press the START/CANCEL button again during the 10 seconds 

in which the appliance pauses, you have to restart the appliance. Time stops counting 

down and the button surround goes back to lighting up constantly.

67

Summary of Contents for CAFFISSIMA BCG600SILANZ

Page 1: ...CAFFISSIMA Typ Type1611 S I N C E 1 9 0 8 Bedienungsanleitung Mode d emploi User Manual ...

Page 2: ...sem Gebrauch besteht Verletzungsgefahr Für evtl auftretende Schäden oder Verletzungen kann keine Haftung übernommen werden WICHTIGE SICHERHEITSHINWEISE Bitte lesen Sie vor Gebrauch Ihres Solis Caffissima Kaffeemahl werks diese Bedienungsanleitung aufmerksam durch damit Sie Ihr Gerät kennenlernen und sicher bedienen können Wir empfehlen diese Anleitung sorgfältig aufzubewahren und gegebenenfalls be...

Page 3: ...Kaffeemahlwerk während das Gerät in Betrieb ist 30 Das Gerät und das Zubehör immer sauber halten Beachten Sie dazu die Angaben in die Anleitung 13 Greifen Sie niemals nach einem Gerät das ins Wasser oder in eine andere Flüssigkeit gefallen ist Ziehen Sie immer erst den Netzstecker bevor Sie es herausnehmen Nehmen Sie es nicht wieder in Betrieb bevor Sie es bei Solis oder einer von Solis autorisier...

Page 4: ...elzahl an Mahlgraden auswählen zu können und so Ihre ganz persönlichen Vorlieben umzusetzen Durch Drehen des Bohnenbehälters stehen Ihnen insgesamt 60 unterschiedliche Mahlgrade zur Auswahl 31 Das Kaffeemahlwerk nur einschalten wenn der Bohnenbehälter korrekt auf dem Gerät ange bracht und mit dem Mahlwerk fest arretiert wurde wenn der Deckel fest und luftdicht auf dem Bohnenbehälter aufliegt Achtu...

Page 5: ...e Zum Starten Pausieren und Stoppen der Mahlfunktion G Kaffeepulver Auswurf H Gerätegehäuse aus Kunststoff I Rutschsichere Gummifüsse J Kaffeepulver Auffangschale Fängt das Kaffeepulver auf das evtl nicht im Siebträger oder im Kaffee filter landet zur leichten Reinigung abnehmbar Dosierinstrument inlie gend Deckel abnehmbar 50 mm Klinge inliegend ZUBEHÖR K Zusätzliche 50mm Klinge für das Dosierins...

Page 6: ...hnenbehälters mit den Kerben in der Behäl terhalterung bzw dem Mahlgrad Wahlregler aus und drücken Sie den Bohnen behälter bis zum Anschlag auf das Gerät Drehen Sie den Verriegelungsknopf im Uhrzeigersinn um 90 in Richtung des Pfeils um den Behälter auf dem Mahlwerk zu arretieren Sie hören ein Klick Geräusch wenn der Bohnenbehälter mit dem Mahlwerk verriegelt ist Wenn der Bohnenbehälter arretiert ...

Page 7: ...eachten Sie dazu die Kaffee Tabelle auf Seite19 dieser Anleitung Tipp Um den Mahlgrad und die Kaffeepulver Menge auszuprobieren sollten Sie jeweils mit der getätigten Einstellung einen Espresso zubereiten Ein einfacher Espresso ist definiert mit ca 30 ml Espresso in 30 Sekunden Brühzeit Ein doppelter Espresso ist definiert mit ca 60 ml Espresso in 30 Sekunden Brühzeit INBETRIEBNAHME KAFFEEPULVER A...

Page 8: ...eis Sollte sich der Mahlgrad Wahlregler verklemmt haben und schwer zu drehen sein schalten Sie das Mahlwerk ein indem Sie die START CANCEL Taste F nach innen drücken und drehen Sie gleichzeitig den Bohnenbehälter So werden evtl eingeklemmte Kaffeebohnen aus dem Mahlwerk befreit Generell sollte der Mahlgrad nur bei laufendem Mahlwerk verstellt werden 4 SCHRITT KAFFEEBOHNEN MAHLEN Wenn der Bohnenbeh...

Page 9: ...n Stelle die 50 mm Klinge in das Instrument Drehen Sie das Rad wieder nach rechts bis die neue Klinge in der Markierung auf 4 steht Zu Anfang müssen Sie eventuell leicht auf die Klinge gegen die Gehäusemitte drücken damit die innenliegenden Zahnräder greifen Drücken Sie dann gleichzeitig und gegeneinander oben und unten auf die 50 mm und 58 mm Klinge in Richtung Instrument Mitte bis Sie ein Klick ...

Page 10: ...n Je nach Kaffeebohne Röstdatum und Röstgrad können Abweichungen nötig werden Benutzung des Dosierinstruments ohne Solis Espressomaschine Sollten Sie keine Solis Espressomaschine benutzen müssen Sie bei der Benutzung des Dosierinstruments mit Ihrem Siebträger folgendes berücksichtigen Probieren Sie die Handhabung des Dosierinstruments mit Ihrem Siebträger so lange bis Sie einen ca 1 mm grossen Abs...

Page 11: ...s Mahlwerk setzen Bohnen behälter wieder verriegeln und Netzstecker einstecken 21 20 EINSTELLEN DES MAHLWERKS Einige Kaffeesorten benötigen eine noch feinere Abstimmung um optimal gebrüht zu werden Ihre Solis Caffissima gibt Ihnen die Möglichkeit den oberen Mahlkegel zusätzlich einzustellen Wir empfehlen immer nur eine Einstellung von einer Stufe vorzunehmen und diese erst auszuprobieren bevor Sie...

Page 12: ...behälter und das Mahlwerk regelmässig ENERGIESPAR MODUS Sollten Sie das Kaffeemahlwerk 5 Minuten nicht bedienen schaltet es sich automa tisch aus Um das Gerät wieder aus dem Energiespar Modus zu holen und es wieder in Betrieb zu nehmen können Sie die START CANCEL Taste drücken TIPPS FÜR DIE KAFFEEZUBEREITUNG IN EINER FRENCH PRESS KAFFEEPRESSE Mit diesen simplen Tricks können Sie leckeren Kaffee in...

Page 13: ...zstecker steckt nicht in Steckdose Mahlwerk ist überhitzt Der Bohnenbehälter ist nicht korrekt positio niert Der GRIND TIME Wahlregler steht bei 0 Sekunden Stecken Sie den Netzstecker in eine passende Steckdose Ziehen Sie den Netzstecker und lassen Sie das Gerät 20 Minuten abkühlen bevor Sie es erneut benutzen Verriegeln Sie den Bohnenbehäl ter mit Hilfe des Verriegelungs knopfes Drehen Sie den GR...

Page 14: ... eine Panne mit dem richtigen Tipp oder Kniff unkompliziert und einfach wieder beheben ohne dass Sie das Gerät gleich zur Reparatur einschicken müssen Wir stehen Ihnen gerne mit Rat und Tat zur Seite Bewahren Sie die Originalverpackung dieses Artikels gut auf damit Sie sie für einen eventuell nötigen Transport oder Versand des Produktes verwenden können Solis of Switzerland AG Solis Haus CH 8152 G...

Page 15: ...de Ne placez jamais l appareil à proximité d une source d humi dité de chaleur ou d une flamme nue Tenez à l écart d objets ou appareils mobiles 6 Ne tenez jamais l appareil par le cordon Ne tirez pas sur le cor don Ne posez pas d objets sur le cordon Ne tirez jamais sur le cordon mais seulement sur la fiche pour débrancher l appareil 7 Nous vous conseillons de ne pas utiliser de rallonge électriq...

Page 16: ...café en poudre dans le bac Le moulin à café n est pas approprié pour moudre des céréales des fruits des pépins ou noyaux du pavot des fruits à coque etc 14 Ne placez jamais l appareil où il risque de tomber dans de l eau ou puisse entrer en contact avec de l eau ou autre liquide p ex dans ou à côté d un évier 15 Ne plongez jamais l appareil y compris le cordon ou la fiche dans de l eau Evitez tout...

Page 17: ...e cafetière à piston ou avec une machine à café classique Le degré de la mouture est défini individuellement selon le type de café car chaque type de café a besoin d une certaine mouture pour une extraction optimale du café Votre Solis Caffis sima vous met également dans la situation avantageuse de pouvoir choisir au sein d un type de café parmi une large sélection de degré de la mouture afin de r...

Page 18: ...tre en marche interrompre momentanément ou définitivement le moulin G Sortie du café en poudre H Châssis de l appareil en plastique I Pieds en caoutchouc antidérapants J Bac de récupération du café en poudre Récupère le café en poudre qui éventuellement tombe à côté du porte filtre ou du filtre à café amo vible pour pouvoir être nettoyé plus facilement doseur joint couvercle amovible lame de 50 mm...

Page 19: ...r votre propre sécurité Si vous voulez retirer le bac à grains de l appareil tournez le bouton de verrouil lage dans le sens inverse des aiguilles d une montre et soulevez le bac Conseil Le système de verrouillage vous permet de retirer le bac à grains de l appareil sans avoir à le vider tout d abord des grains de café AVANT LA PREMIERE MISE EN SERVICE Retirez l appareil de son emballage avec préc...

Page 20: ...pareil moud longtemps et plus la quantité de café en poudre est importante Plus la durée sélec tionnée est faible moins l appareil moud longtemps et plus la quantité de café en poudre est faible Tournez l encoche située sur le bouton régulateur sur le nombre de secondes correspondant La programmation recommandée de la durée dépend de la grandeur du porte filtre et de la variété du café Référez vou...

Page 21: ...ré de la mouture est bloqué et difficile à tourner mettez le moulin en marche en appuyant sur la touche START CANCEL F tout en tournant le bac à grains Vous pourrez ainsi dégager des grains de café qui se seraient éventuellement coincés dans le moulin D une manière générale il est re commandé de modifier le degré de la mouture seulement lorsque le moteur tourne 4ième ETAPE MOUDRE LES GRAINS DE CAF...

Page 22: ...e Remarque Si la lame n effleure pas le café en poudre vous n avez pas assez de café en poudre dans le filtre Dans ce cas augmentez la quantité de café en poudre en sélectionnant une durée plus longue avec le bouton régulateur GRIND TIME E 6ième ETAPE RACLER LE CAFE EN POUDRE EXCEDENTAIRE Le doseur Solis conçu tout spécialement vous aide à racler le café en poudre excéden taire en un tour de main ...

Page 23: ... degré de la mouture et la durée de broyage Selon les grains de café la date et le degré de torréfaction il peut être nécessaire d adapter les réglages Utilisation du doseur sans machine espresso Solis Si vous n utilisez pas de machine espresso Solis vous devez respecter la consigne suivante lors de l utilisation du doseur avec votre porte filtre Expérimentez le maniement du doseur avec votre port...

Page 24: ... clic Remettre le bac à grains en place sur le moulin Verrouiller à nouveau le bac à grains et brancher l appareil REGLAGE DU MOULIN Certaines variétés de café nécessitent un réglage encore plus précis pour être perco lées de manière optimale Votre Solis Caffissima vous permet de régler en plus le bro yeur conique supérieur Nous vous recommandons de toujours effectuer le réglage étape par étape et...

Page 25: ...moulus Selon vos goûts vous opterez pour différentes variétés et intensités de café Expé rimentez différents cafés en grains et variez également la quantité et la mouture du café pour découvrir votre favori N utilisez que des grains de café fraîchement torréfiés si possible pourvus de la date de torréfaction Utilisez de préférence les grains de café dans un laps de temps de 5 20 jours après leur t...

Page 26: ... coincés dans le moulin Le bac à grains n est pas fixé correctement Tourner le bac à grains de manière à ce que le bouton régulateur soit débloqué Mettre le moulin en marche avec la touche START CAN CEL tout en tournant le bac à grains Déverrouiller le bac à grains et le remettre en place comme décrit à la page 37 Impossible de verrouiller le bac à grains Des grains de café bloquent le mécanisme d...

Page 27: ... emballage d origine de cet article afin de pouvoir le transporter en cas de besoin Solis of Switzerland SA Solis Haus CH 8152 Glattbrugg Zurich Suisse Téléphone 41 44 874 64 54 Téléfax 41 44 874 64 99 info solis ch www solis ch www solis com CAFE ET BIENS DE CONSOMMATION Les accessoires cafés et biens de consommation suivants sont disponibles pour votre moulin à café Solis Caffissima no d article...

Page 28: ... surface Never place the appliance near moisture heat and naked flames Keep the appliance away from moving parts or appliances 55 6 Never carry the appliance by the power cord and do not place anything on the power cord Never pull on the power cord to disconnect the appliance from the power mains Only pull on the plug 7 We recommend that you do not use an extension cable with this appliance Do not...

Page 29: ...o not put pre ground coffee in bean container Do not use the grinder for grinding cereals grains fruits seeds poppy seeds or nuts etc 56 14 Never place the appliance in such a way that it might fall into water or come into contact with water or another liquid e g in or next to a sink 15 Never submerge the appliance power cable or plug in water or bring it into contact with water or other liquids 1...

Page 30: ...resso cooker resp your coffee in a French Press or a classic filter coffee machine The grind size is set differently for each brewing method as every brewing method requires an individual grind size for optimal coffee extraction With your Solis Caffissima you are in the comfortable situation of being able to select from a multitude of grind sizes even within a brewing method allowing you to realis...

Page 31: ... START CANCEL button For starting pausing and stopping the grinding function G Grind outlet H Plastic appliance chassis I Non slip feet J Coffee powder collection tray Collects coffee powder that does not end up in the portafilter or filter cone removable for easy cleaning measuring instrument inlying lid re movable 50 mm blade inlying ACCESSORIES K Extra 50 mm blade for the meas uring instrument ...

Page 32: ...s not light up and the appliance can not be operated for your own safety If you wish to remove the bean container from the appliance turn the locking but ton counter clock wisely and lift it up Tip The locking system allows you to take the bean container off the appliance without emptying out the beans beforehand BEFORE FIRST USE Carefully take the appliance out of its packaging and remove all sti...

Page 33: ...the larger the amount of coffee powder will be The shorter the time the shorter the appliance grinds and the lower the amount of coffee powder will be Turn the notch on the dial to the desired number of seconds The recommended time setting depends on the size of the portafilter and the type of coffee For further information please refer to the coffee chart on page 71 Sec 3 STEP SETTING THE GRIND S...

Page 34: ...Note Should the grind size controller be jammed and difficult to turn activate the grinder by pressing the START CANCEL button F inwards and simultaneously spin the bean container Like this potentially stuck coffee beans are unstuck from the grinder In general the grind size should only be changed while the grinder is activated 4 STEP GRINDING COFFEE BEANS Once the bean container has been locked i...

Page 35: ...de does not reach the coffee powder you have filled too little coffee powder into the filter insert In this case increase the amount of coffee powder by setting the GRIND TIME dial E to a higher time 6 STEP WIPING OFF EXCESS COFFEE POWDER The specially designed Solis measuring instrument helps you wipe off excess coffee powder at the flick of the wrist and clean the edge of the portafilter a Choos...

Page 36: ...ecessary depending on the kind of coffee bean the roasting date and the roasting level Using the measuring instrument without a Solis espresso machine Should you not use a Solis espresso machine you have to consider the following guidelines when using the measuring instrument with your portafilter Try using the measuring instrument with your portafilter until you reach a distance of approx 1 mm be...

Page 37: ...burr listen for click Place bean container back on grinder Lock bean container and connect power plug ADJUSTING THE CONICAL BURRS Some types of coffee require an even finer setting for optimal brewing Your Solis Caffissima allows you to additionally adjust the upper conical burr We recommend changing the setting only by one level and testing it before making the next setting 1 2 3 4 5 6 9 9 8 8 7 ...

Page 38: ...own again if you have pressed too firmly 75 74 HINTS Fresh grinds are the key to making coffee with more flavour and body Coffee flavour and strength is a personal preference Vary the type of coffee beans amount of coffee and fineness of grind to achieve the flavour you prefer Use freshly roasted coffee beans preferably with a roasted on date Best use the beans 5 20 days after the roasting date St...

Page 39: ...e beans are stuck in the grinder The bean container is not properly mounted Spin the bean container so that the controller can be moved again Start the coffee grinder with the START CANCEL button and simultaneously spin the bean container Unlock the bean container and re install it as described on page 63 Unable to lock bean container into position Coffee beans obstruct ing bean container locking ...

Page 40: ... tip or technique without having to straight away send off the device for repair We will give you all the advice and practical support you require 091 802 90 10 Keep the original packaging in a safe place so that you may use it in the event that transportation or shipping of the product becomes necessary Solis of Switzerland Ltd Solis House CH 8152 Glattbrugg Zurich Switzerland Phone 41 44 874 64 ...

Reviews: