


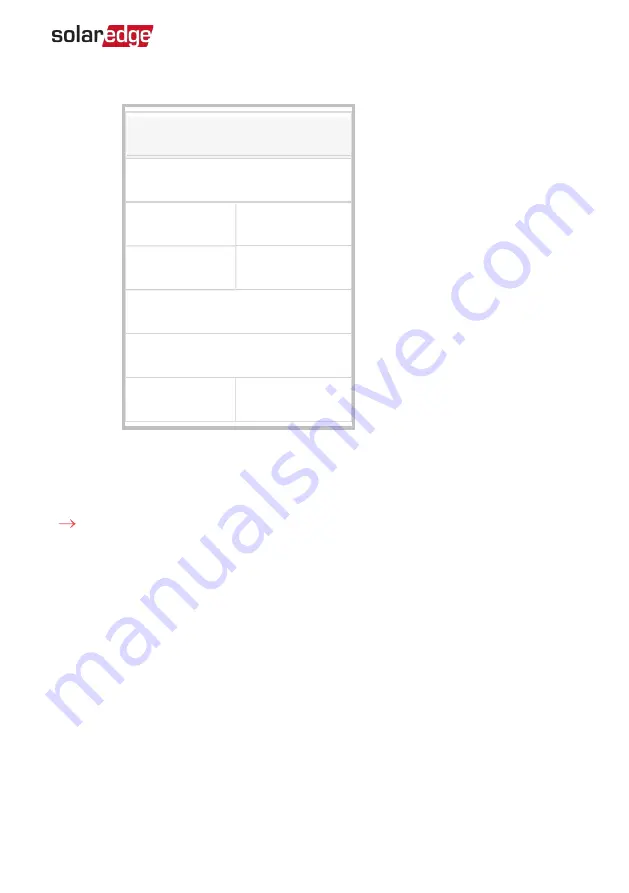
information is displayed:
Meters
Production Meter
SN: XXXXXXXX
RS485-2
Modbus ID #1
Status
OK
Power
7.60 kW
Energy
13.68MWh
Export Meter
SN: XXXXXXXX
GPIO S0 meter
1000 pulses per kWh
Power
7.60 kW
Energy
13.68MWh
4. From the SetApp main menu, select Status.
Verifying the Meter Connection using the Device Display
To verify the meter connection in devices with a display:
1. Short-press the LCD light button (on the inverter) or the
Enter
button (inside the
inverter) until the Communication status screen is displayed as shown below. This
screen shows the number of external devices that communicate on each port, the
device type, and the protocol to which each port was configured.
2. Short-press the
UP
or
Down
buttons until the Communication status screen is
displayed as shown below. This screen shows the number of external devices that
communicate on each port, the device type, and the protocol to which each port
was configured.
3. Verify that the setting of the relevant RS485 port is correct and that the port is
communicating with the meter.
For example, if the meter is connected to the RS485-1 port, the Communication
status screen should display the following:
Chapter 3: Configuration
27
Energy Meter with Modbus Connection MAN-01-00270-1.3


